How to Create iPhone Mockup in Canva
You will learn how to create an iPhone mockup in Canva. I use a screenshot from a website, and the frame is available in Canva. Canva stores plenty of iPhone frames you can use as a mockup.
If you want to show a screenshot, a photo, or any content inside an iPhone frame to look more professional, here is how. I will walk you through two options. The first option is the frames feature, and the second is a regular photo or graphic.
Create iPhone Mockup in Canva: Frames
Find frames
Open Elements.
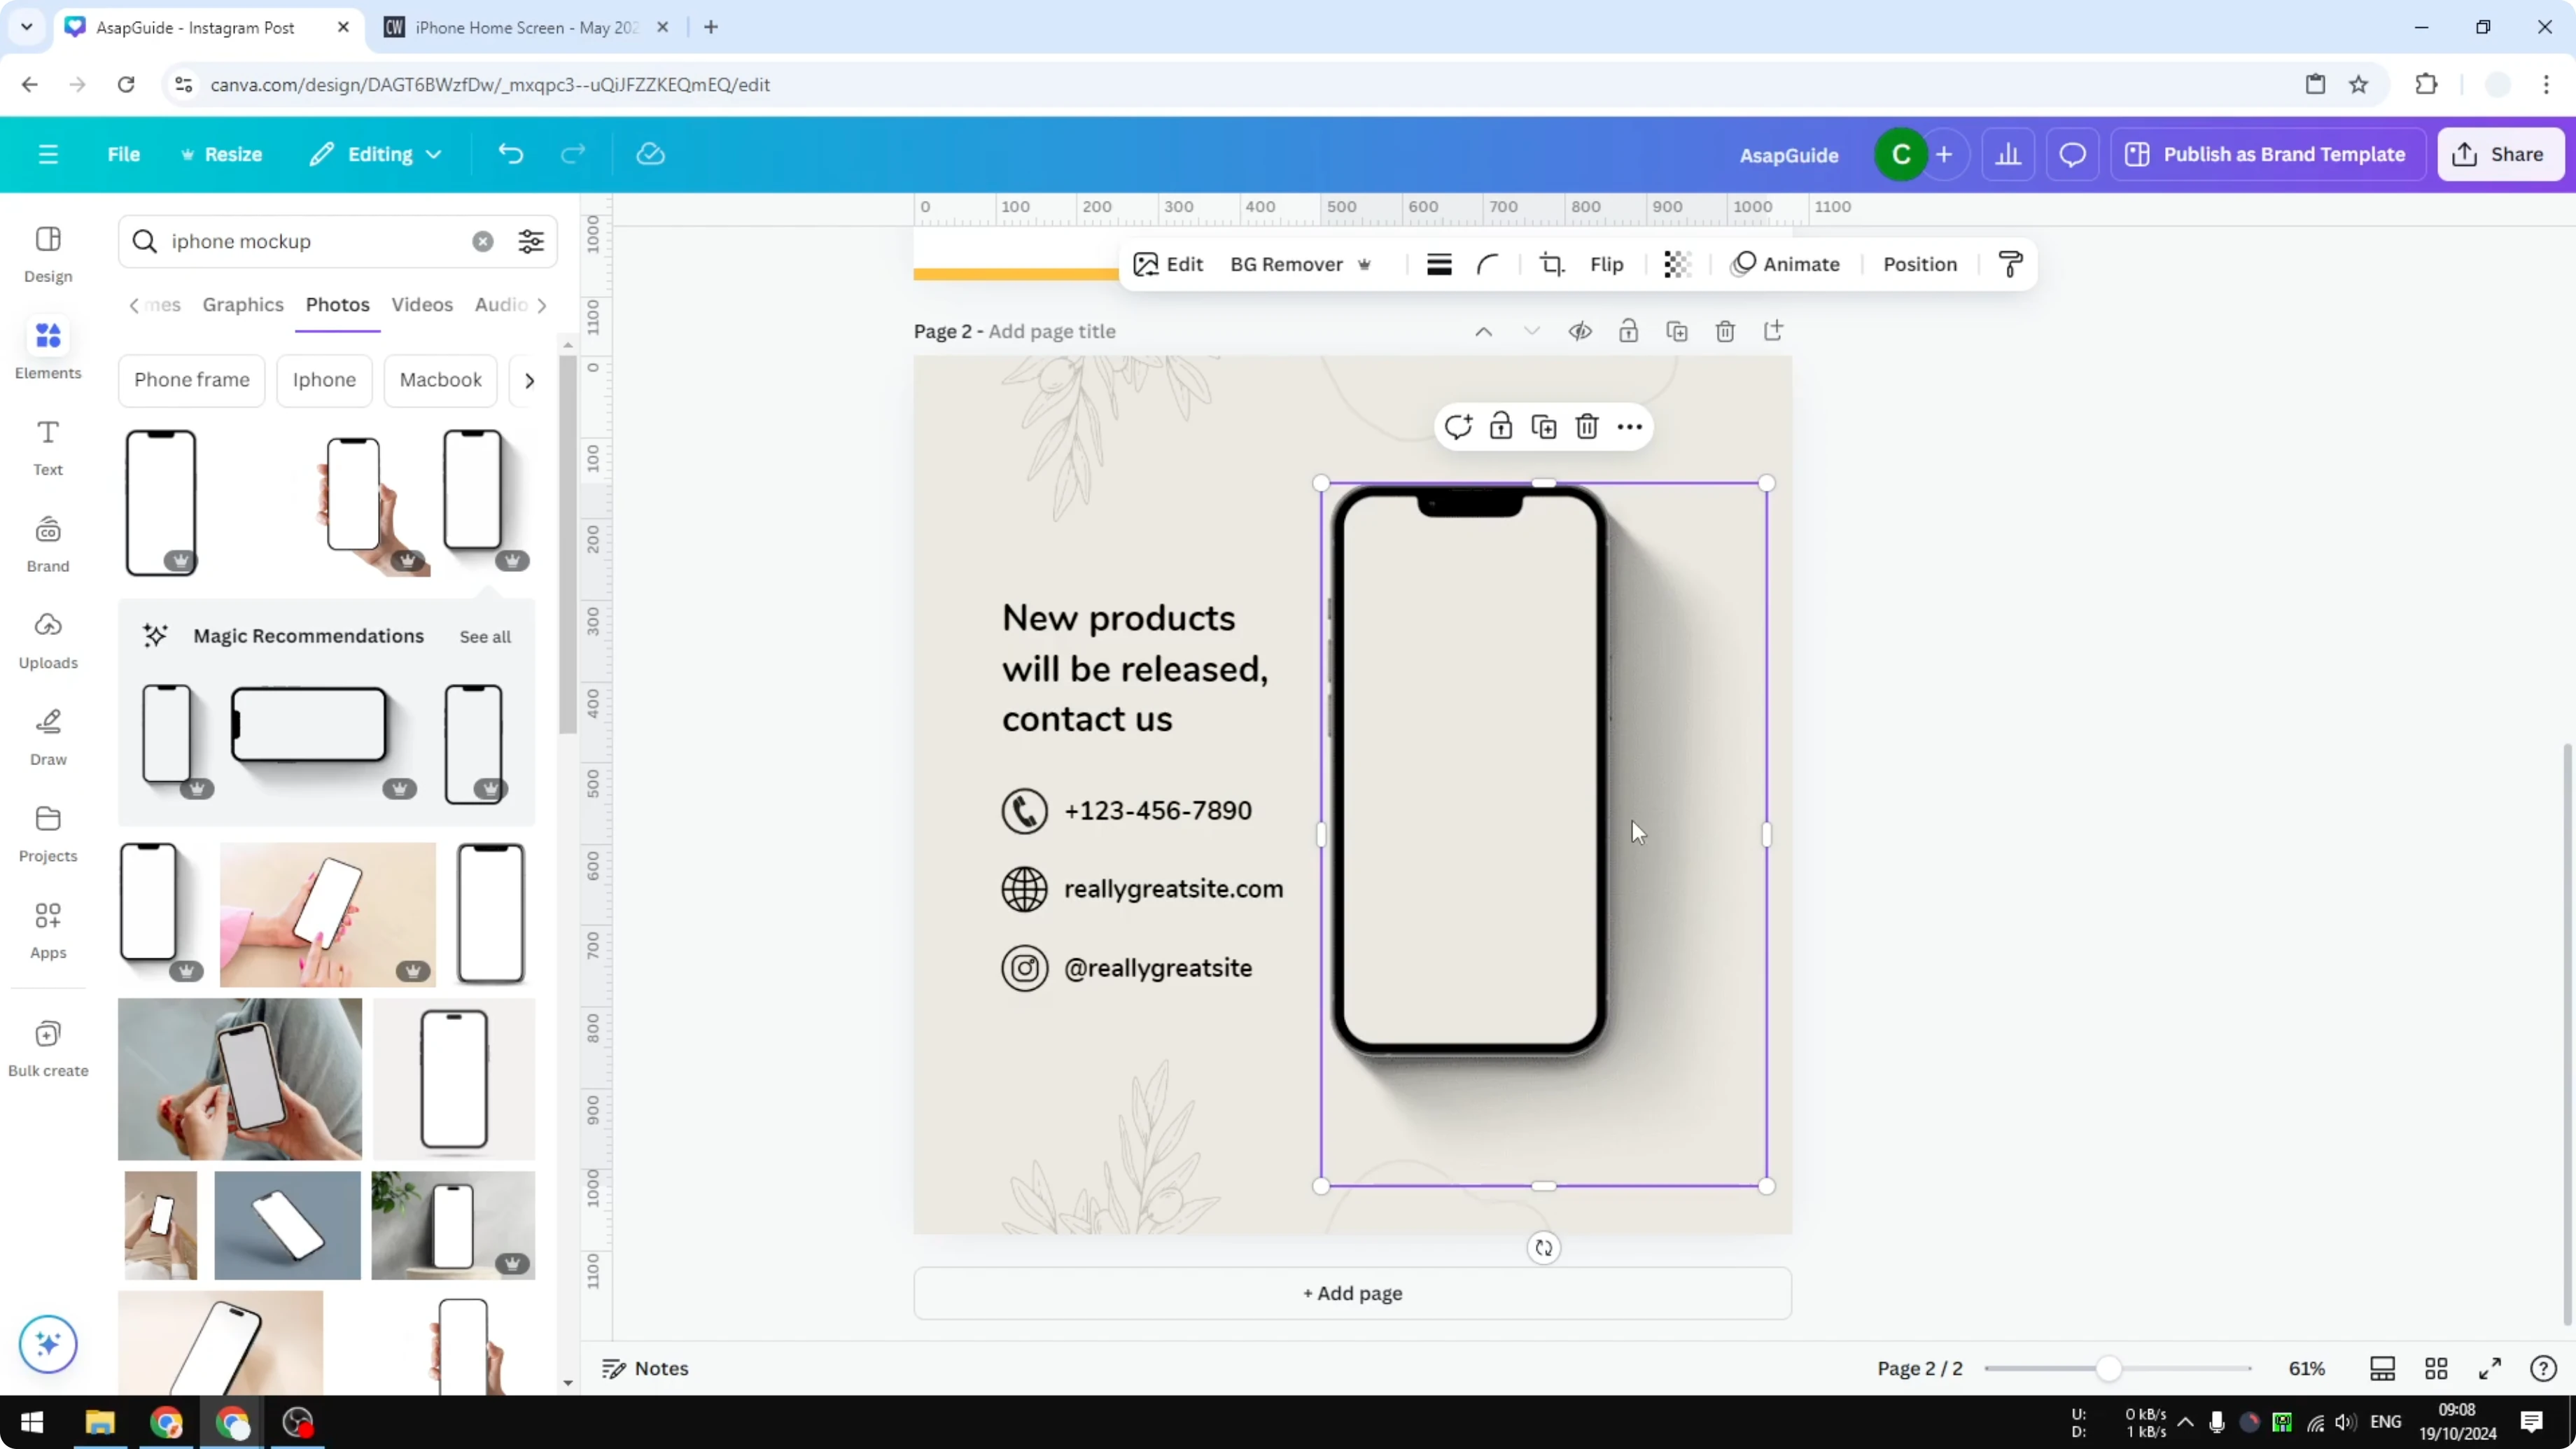
Search for iPhone mockup or iPhone frame.
Open Frames and you will see plenty of devices and different scenarios that are basically iPhone or Apple gadgets.
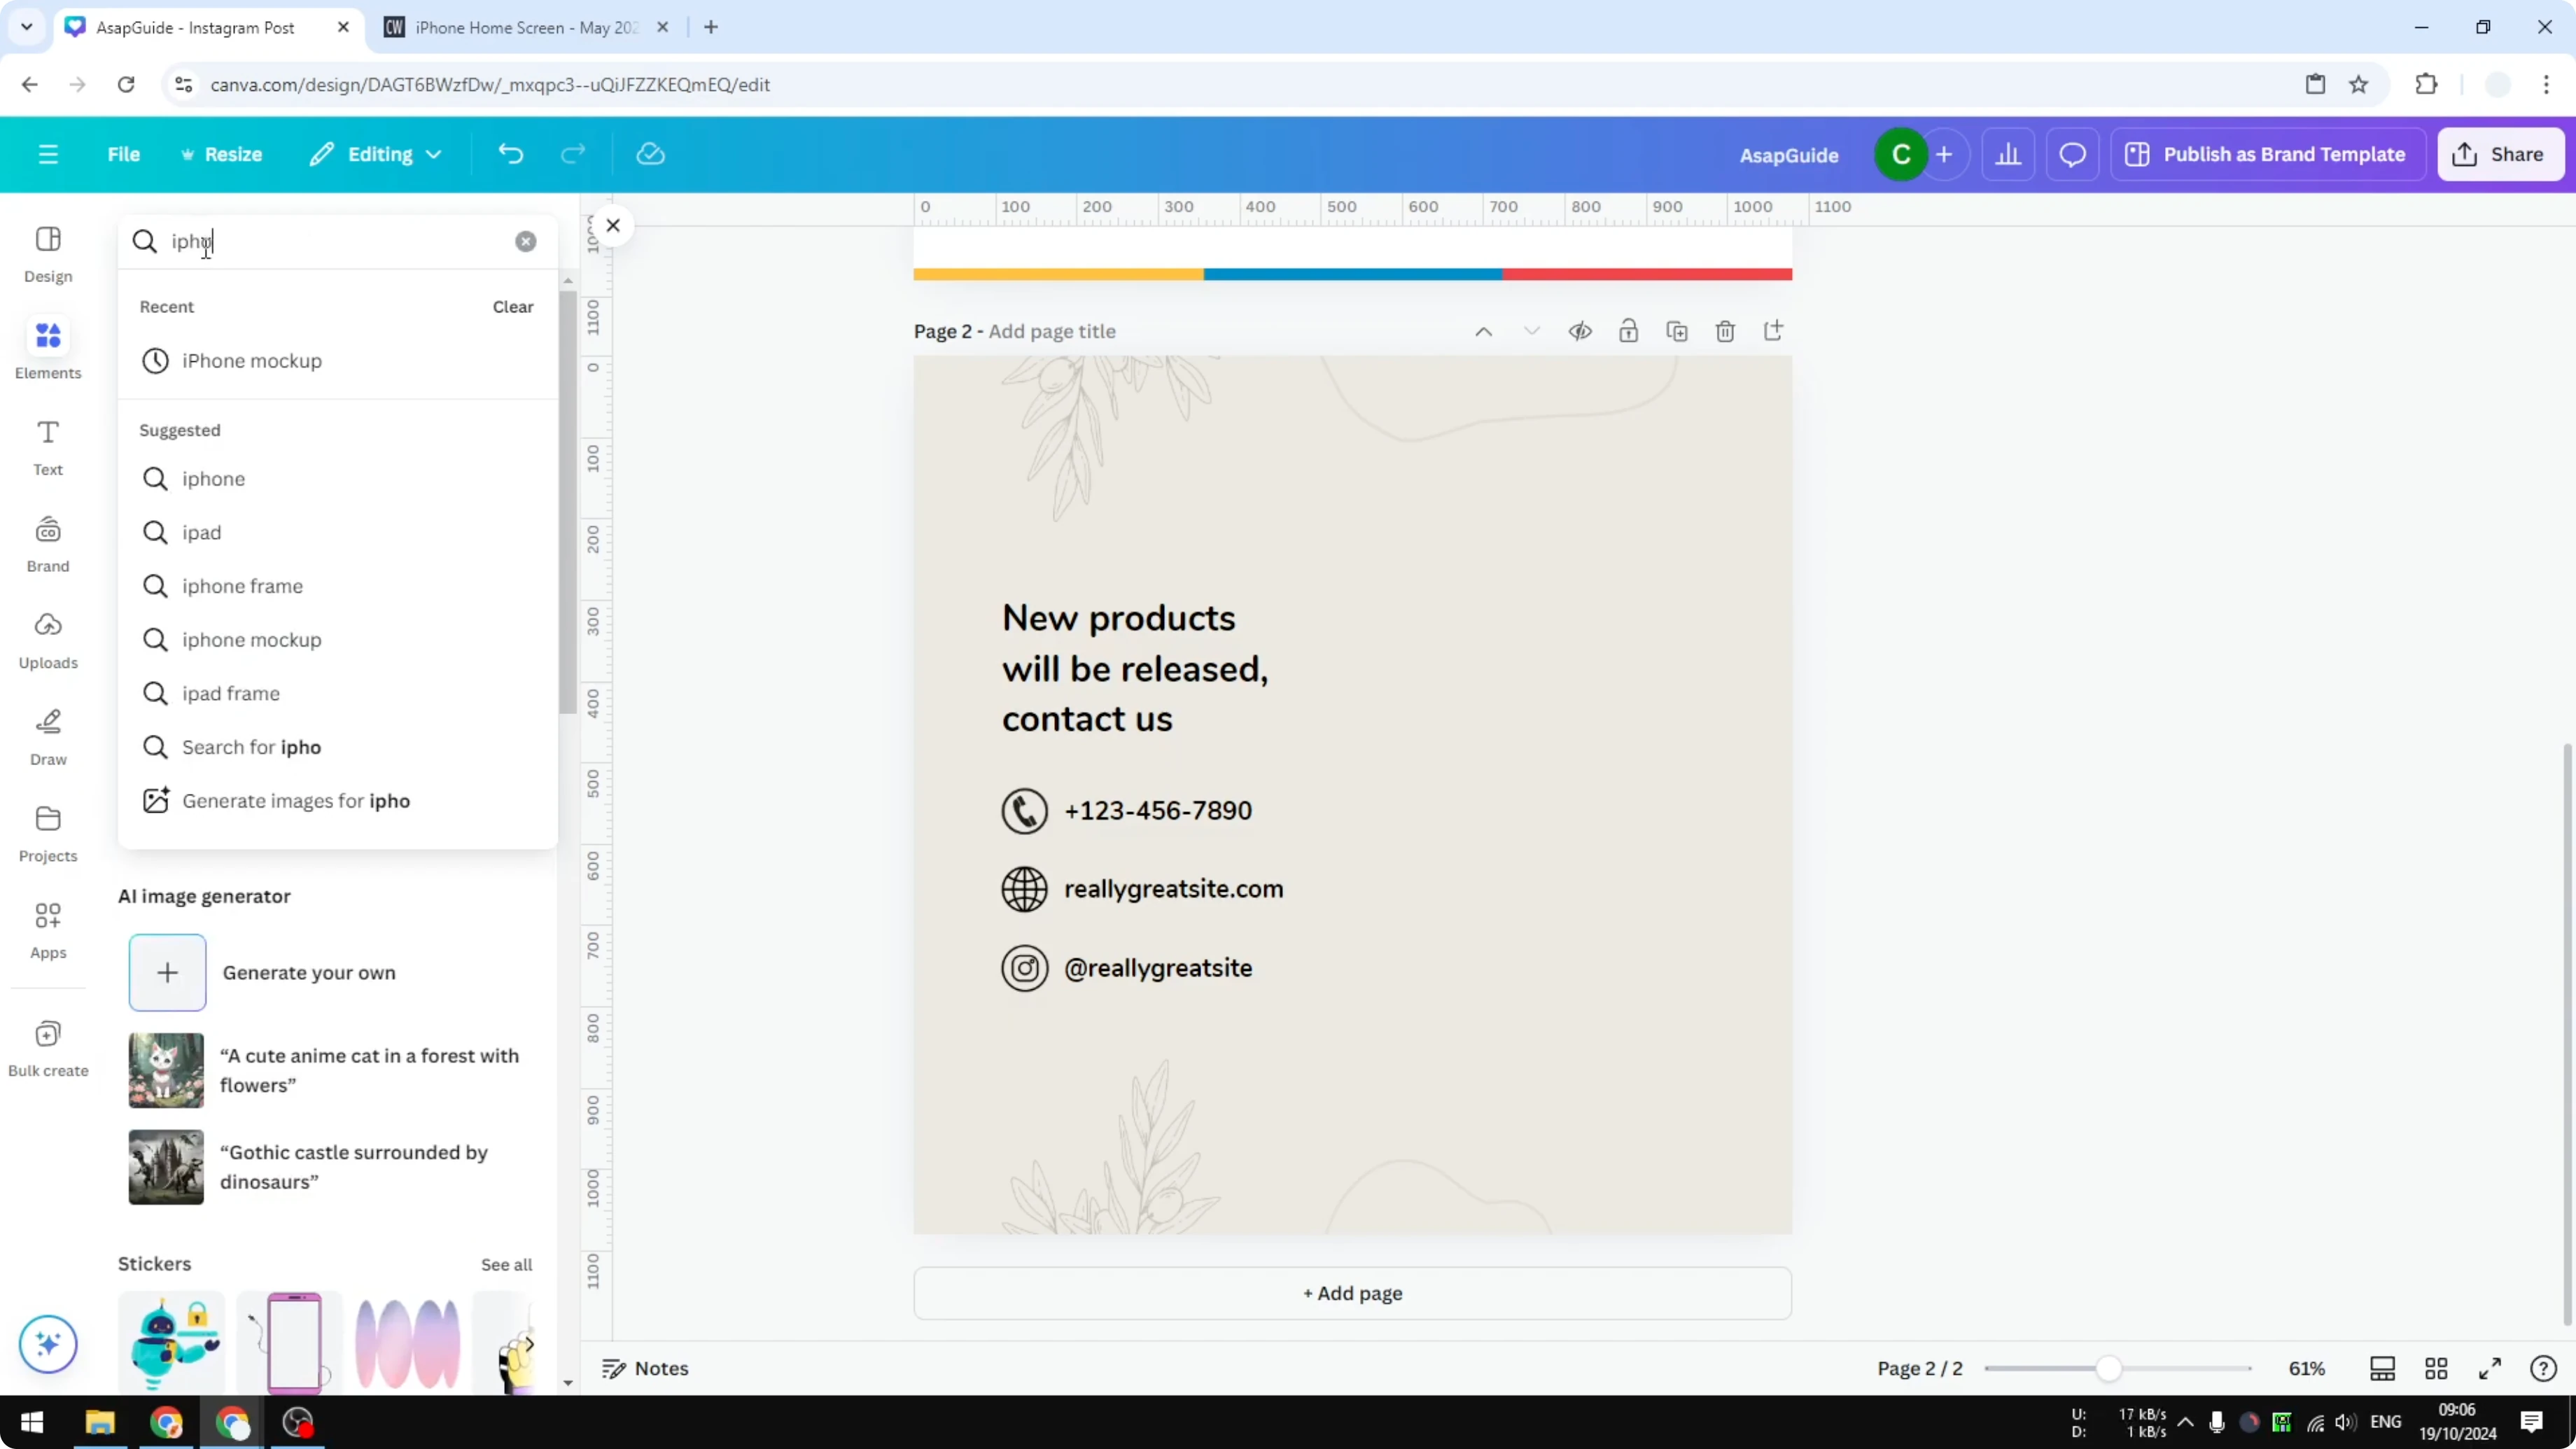
Insert the frame you like.
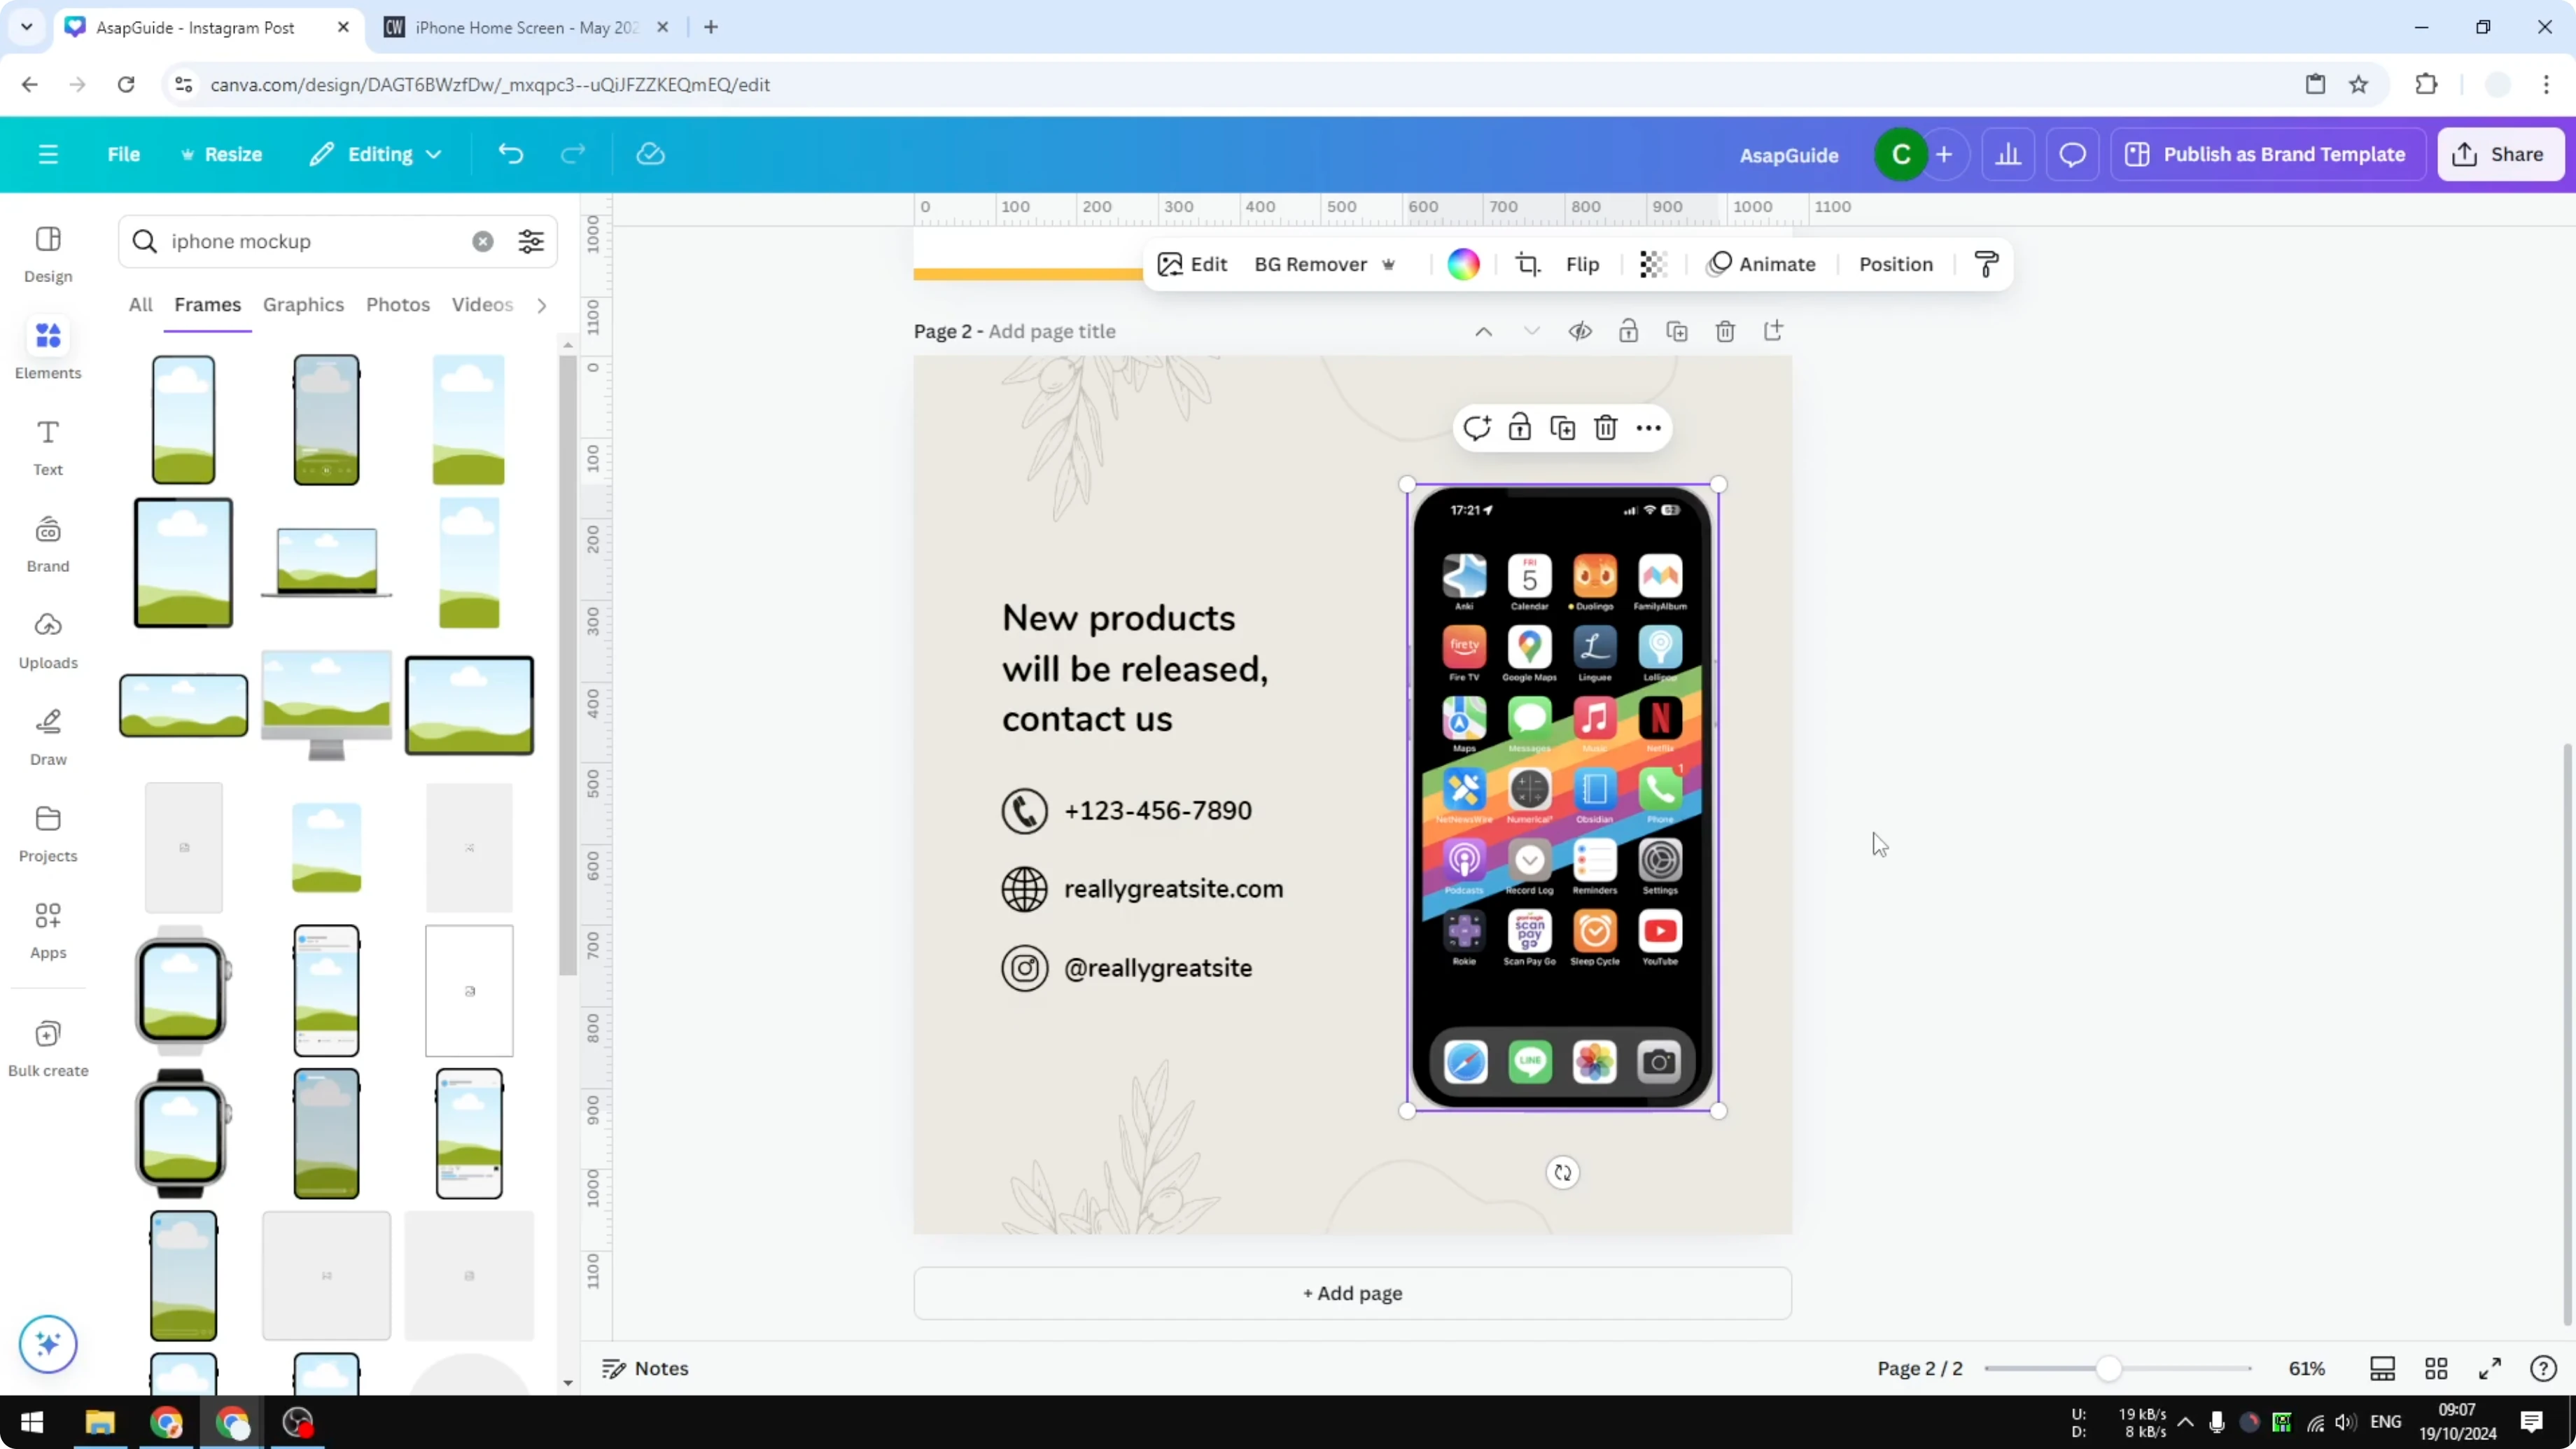
This is a frame with a placeholder.
It is ready to accept your content.
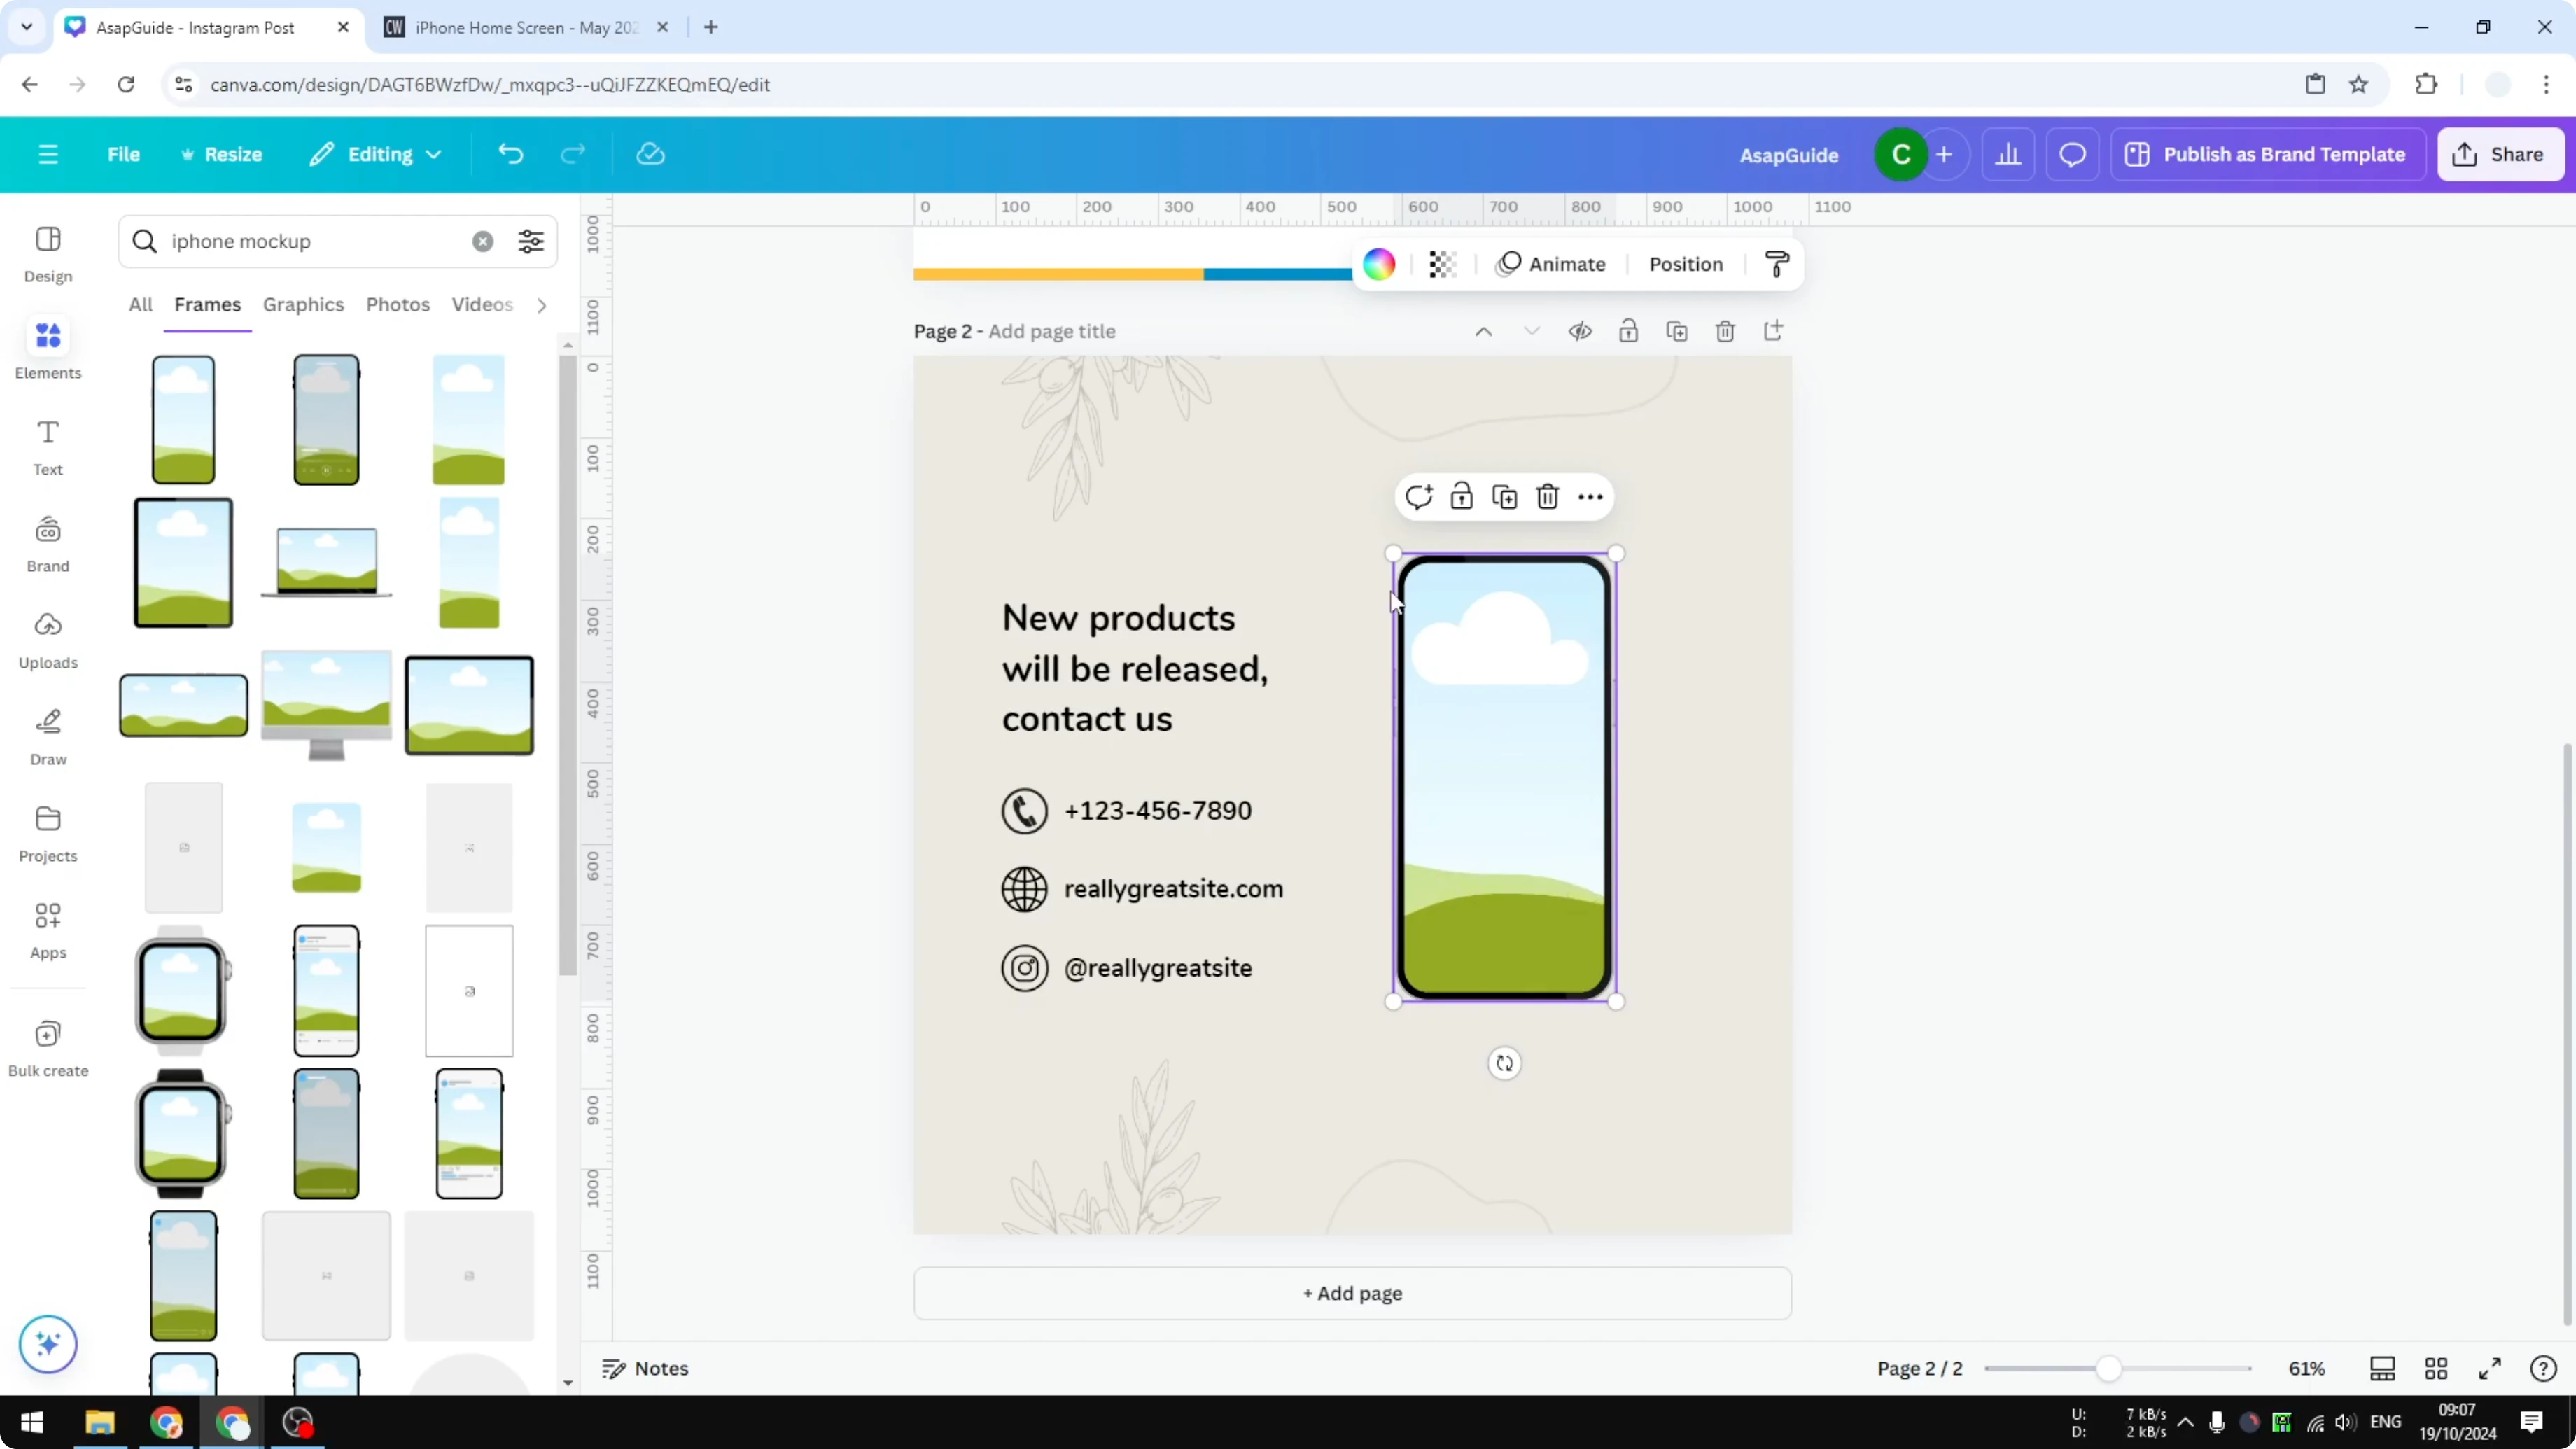
Place your screenshot
Copy your image or screenshot.
Drag it into the frame placeholder.
The frame recognizes the content and puts it into place.
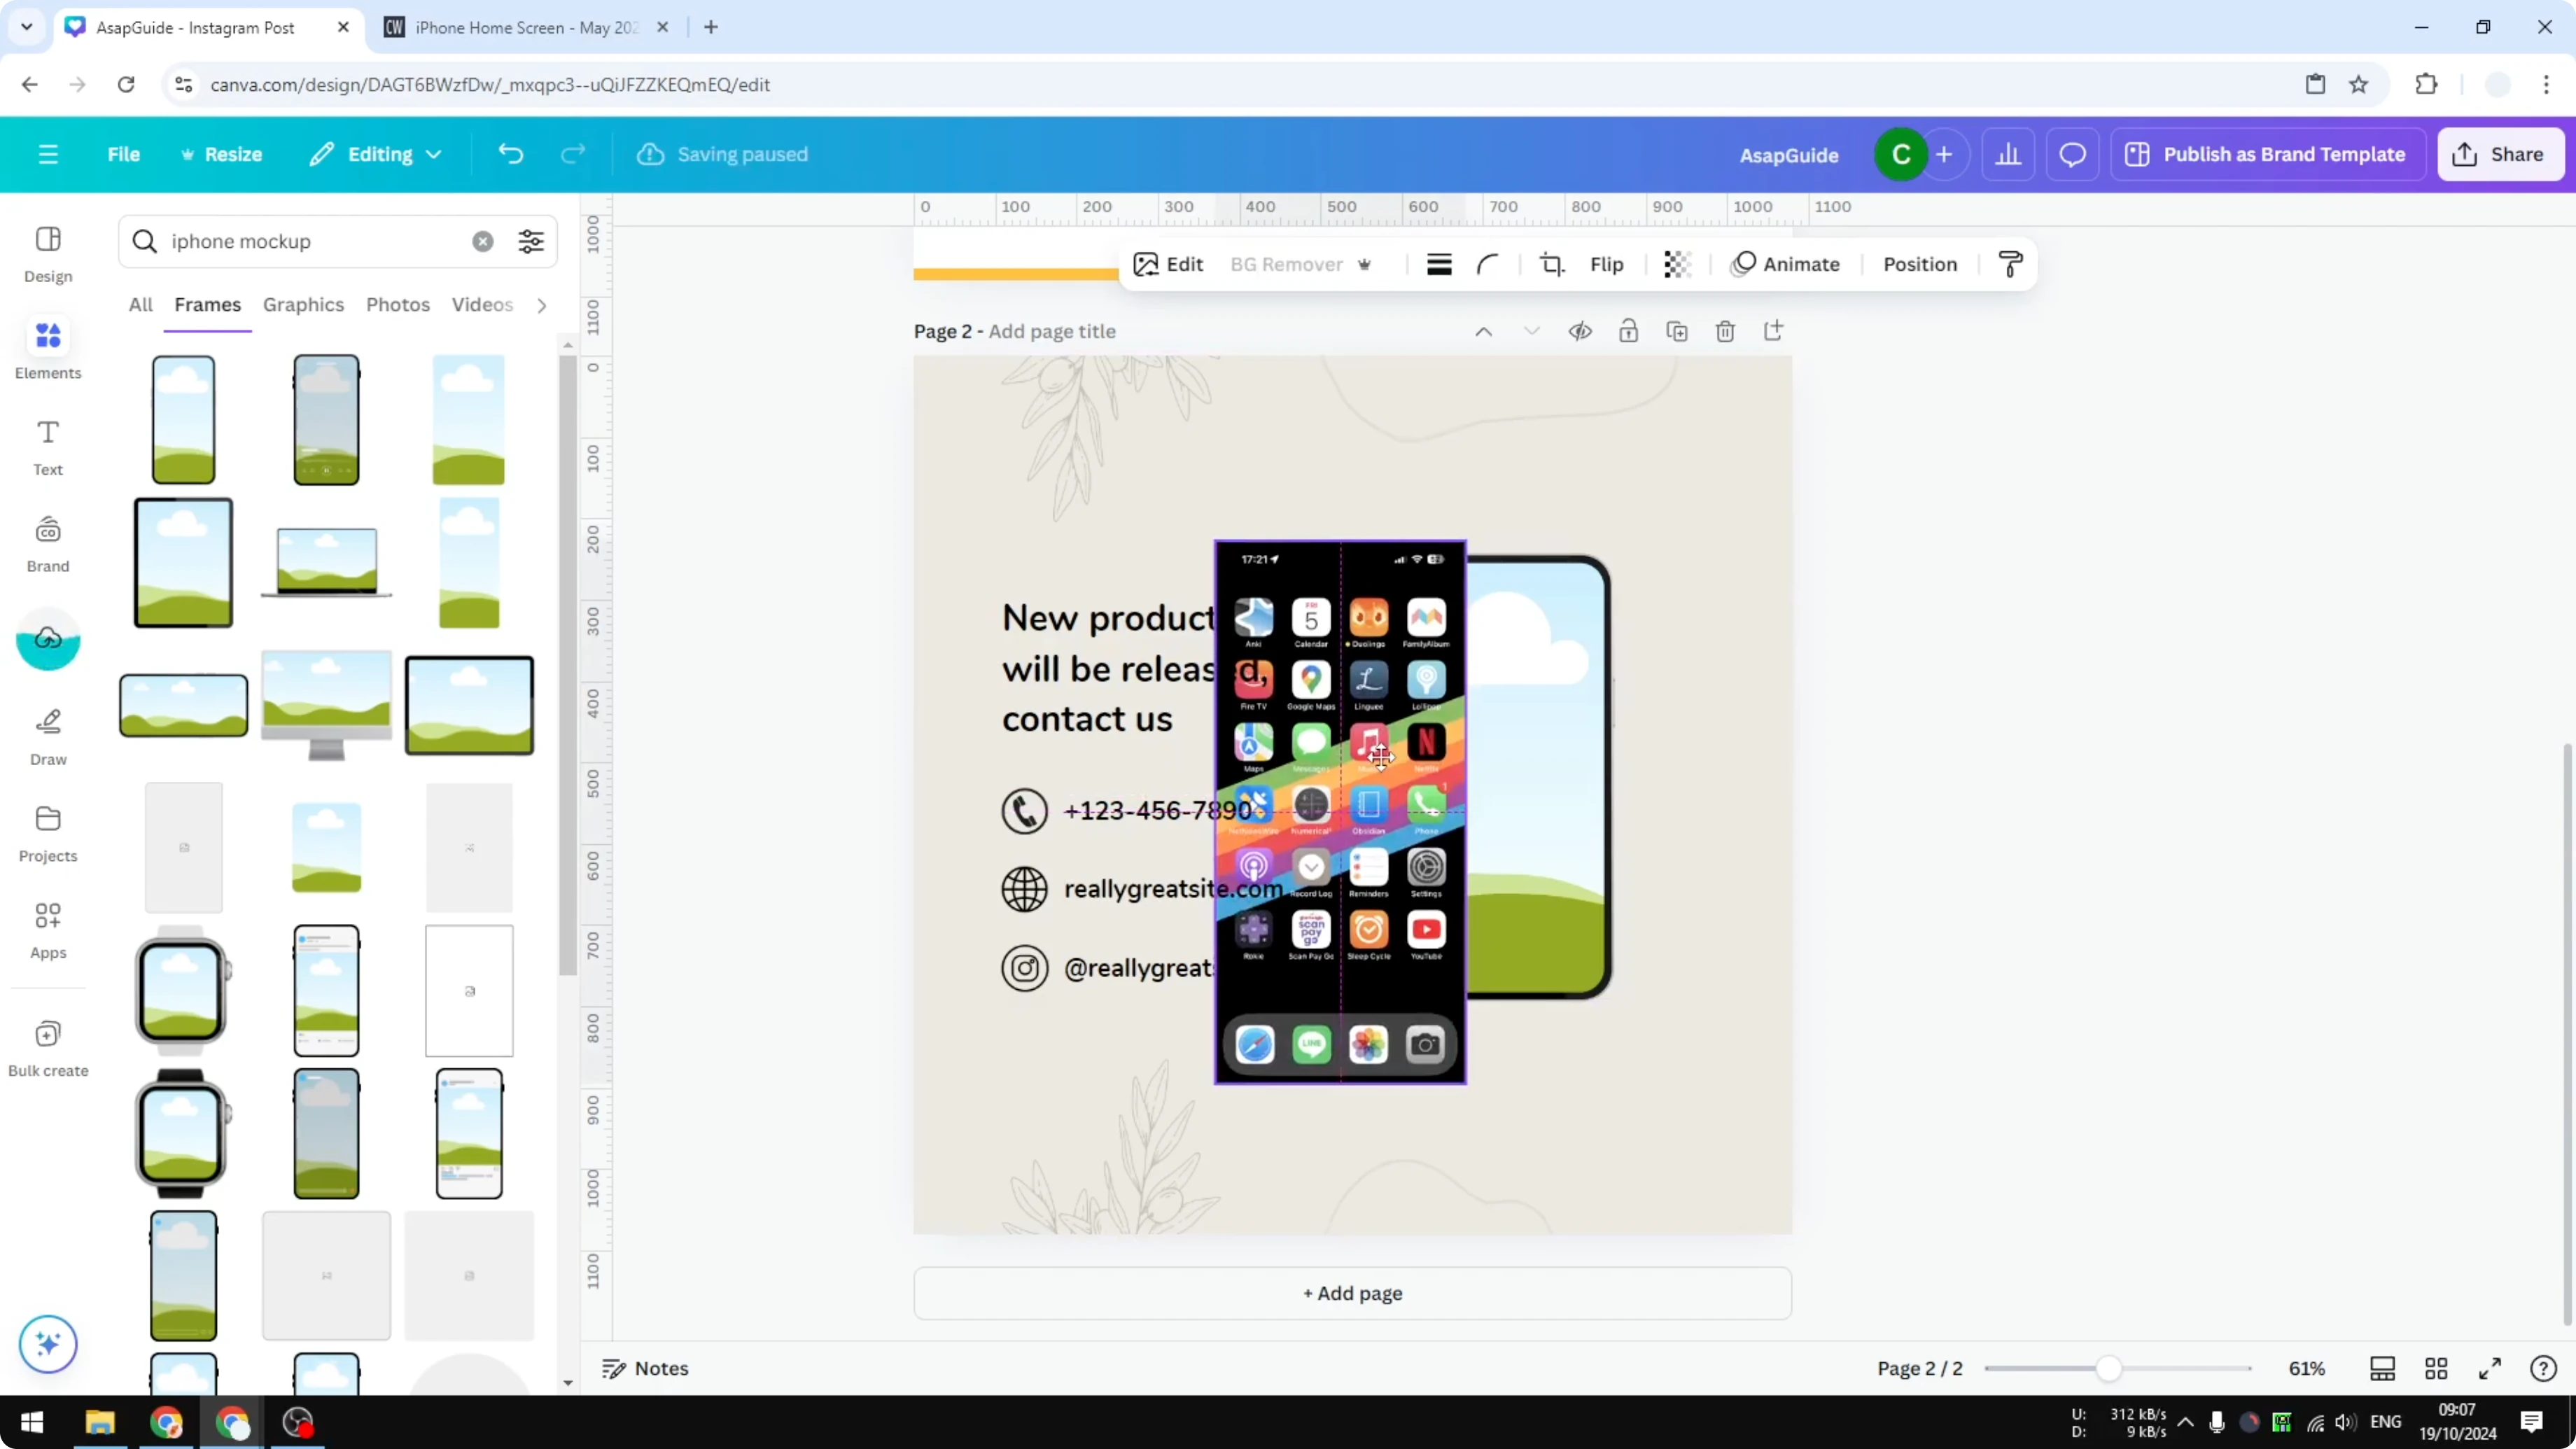
The result is instant.
You do not have to manually adjust the size or the position of the screenshot.
I think the results are quite good.
Read More: Create Bokeh Effect Canva
Create iPhone Mockup in Canva: Photos and Graphics
You can also use a regular photo or a regular graphic.
In the search results, Graphics and Photos are similar, and there are plenty of options.
I like a simple picture where there is a frame and also a shadow, so it looks more prominent.
Fit your screenshot
Copy your screenshot and paste it onto the canvas.
Manually adjust the position and size to make sure it looks really good and professional.
It will not be exactly within the frame at first, so make some adjustments.
This is the most difficult part, and that is why I keep it as the second option.
The first option should be the frame technique.
Once it looks right, you can move on to layer order.
Layer order
Right click on the phone image.
Go to Layer and choose Send backward or Send to back.
Pick the one that works best based on how much content surrounds the frame.
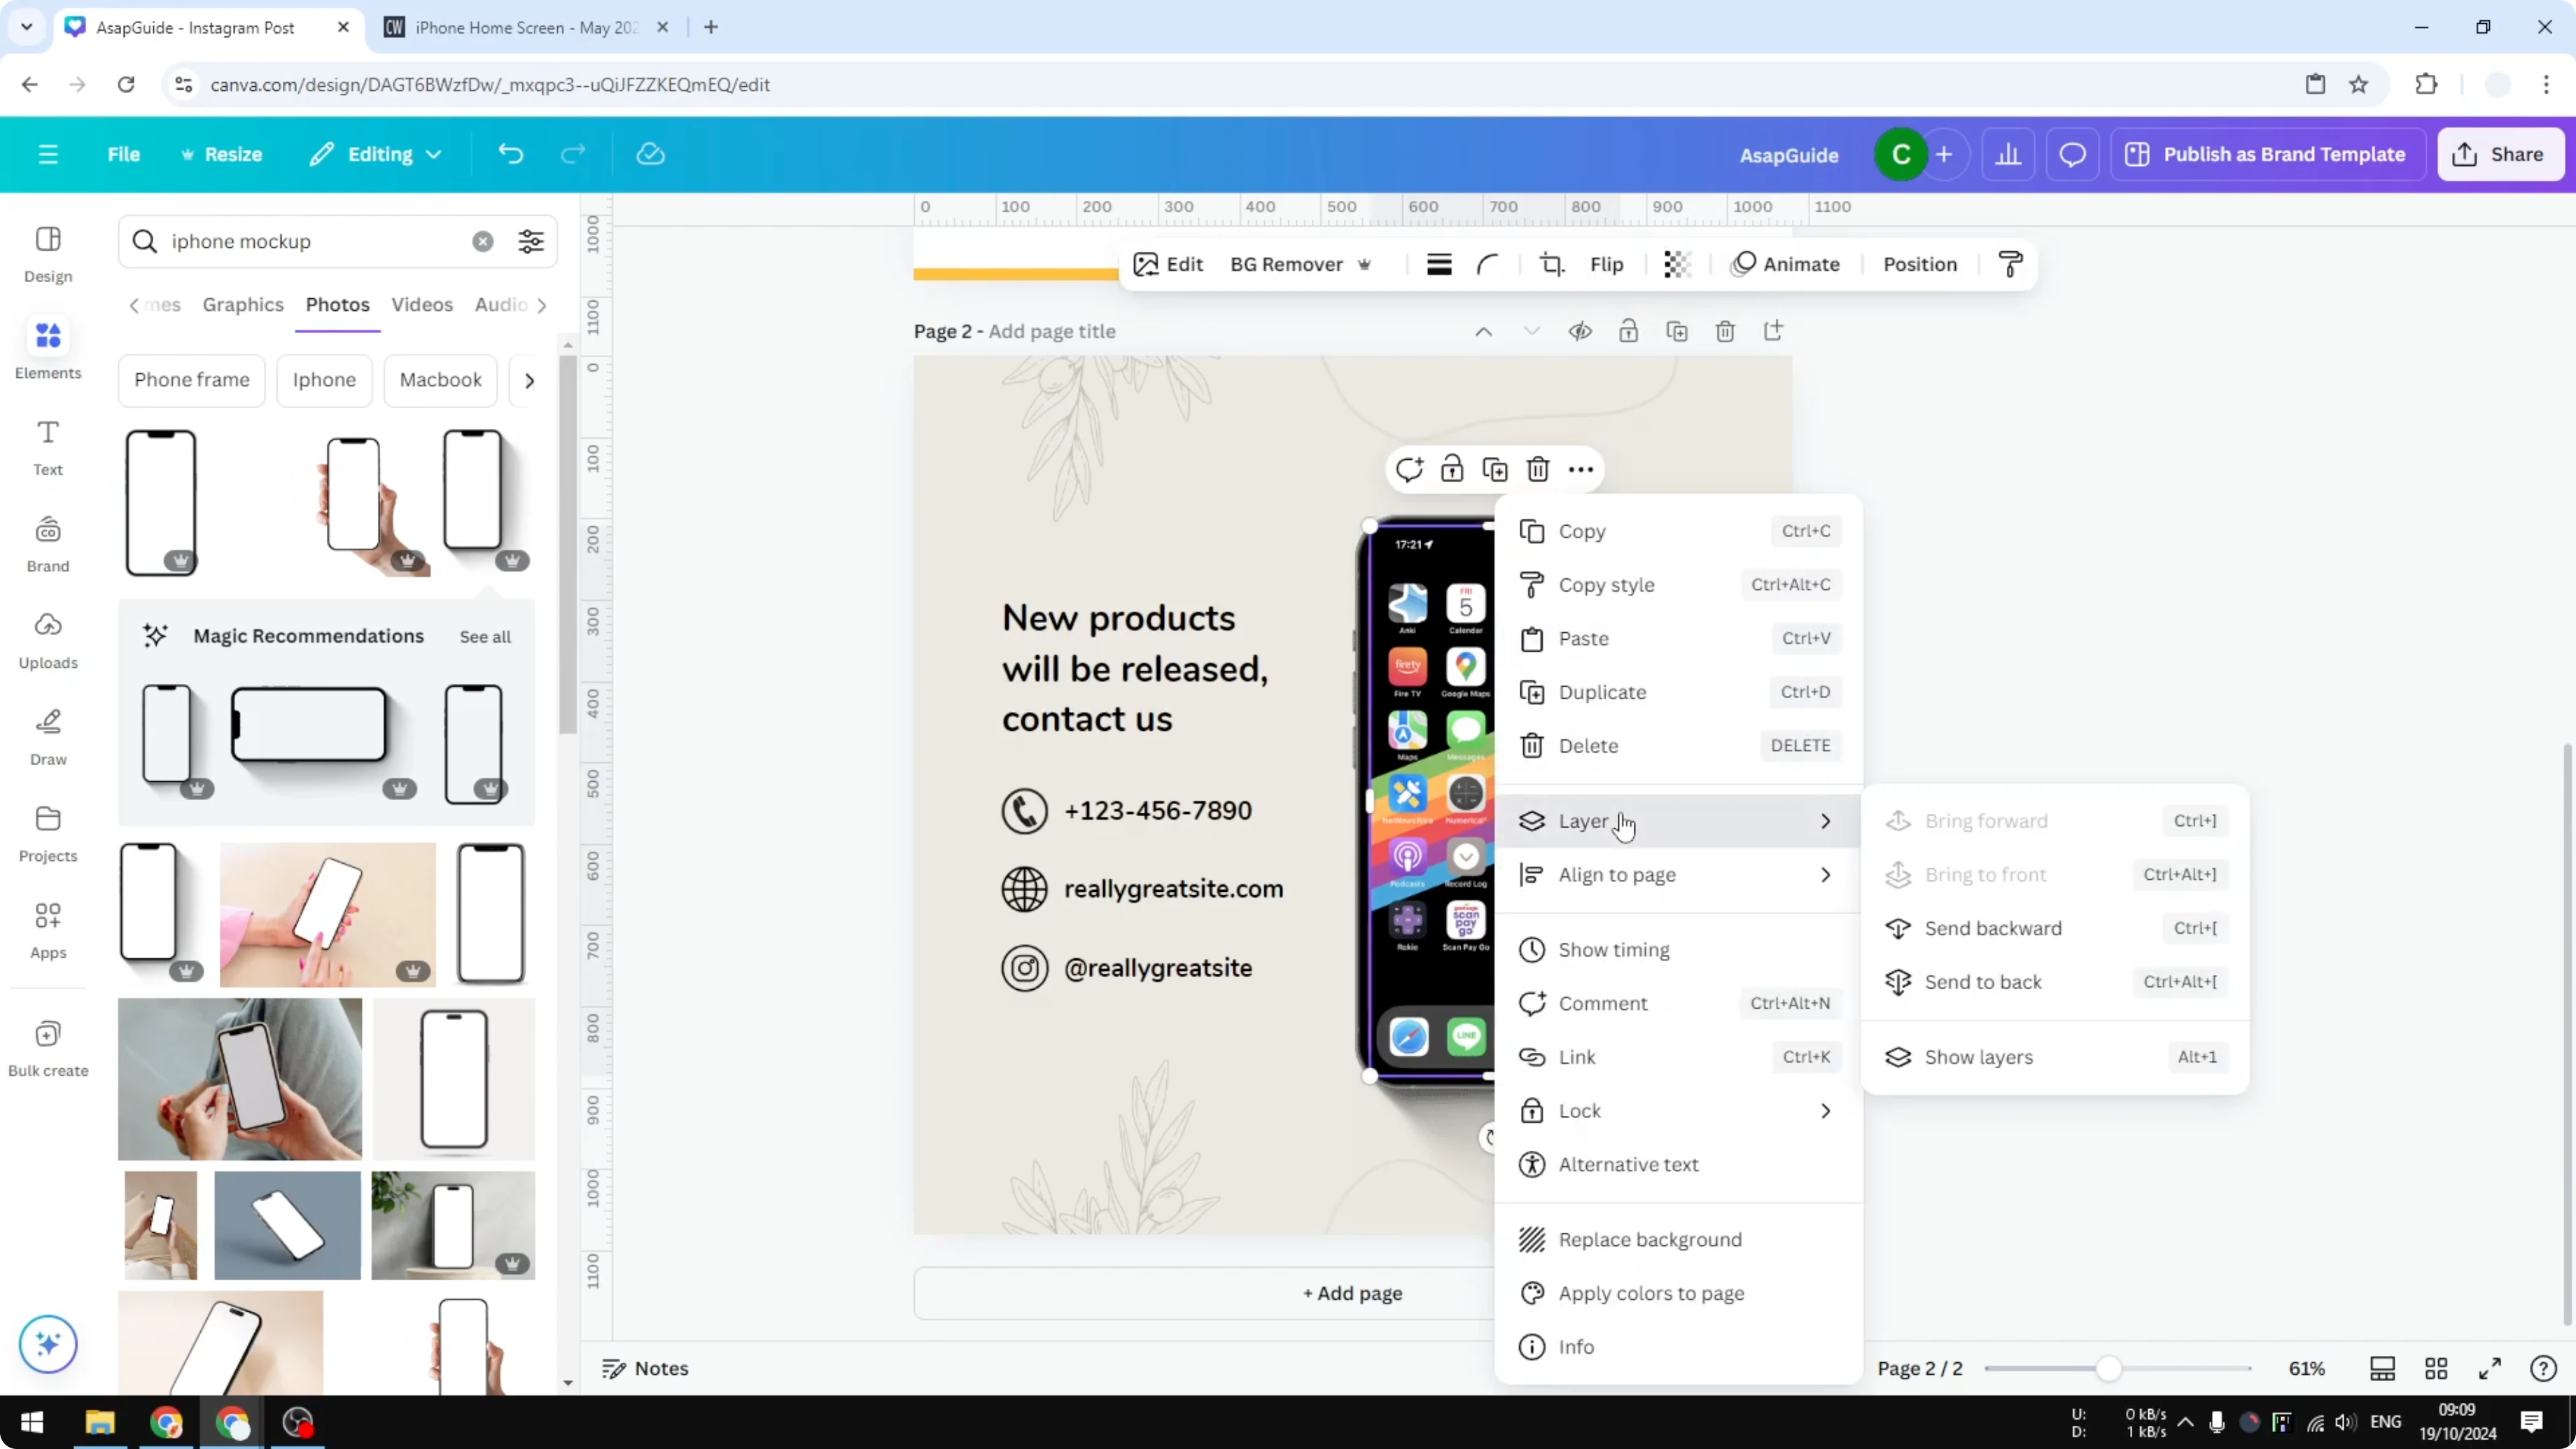
I usually send it to the very back.
Check the result and make small tweaks if needed.
Make sure the screenshot edges sit cleanly inside the phone area.
Read More: Create Balloon Text Effect Canva
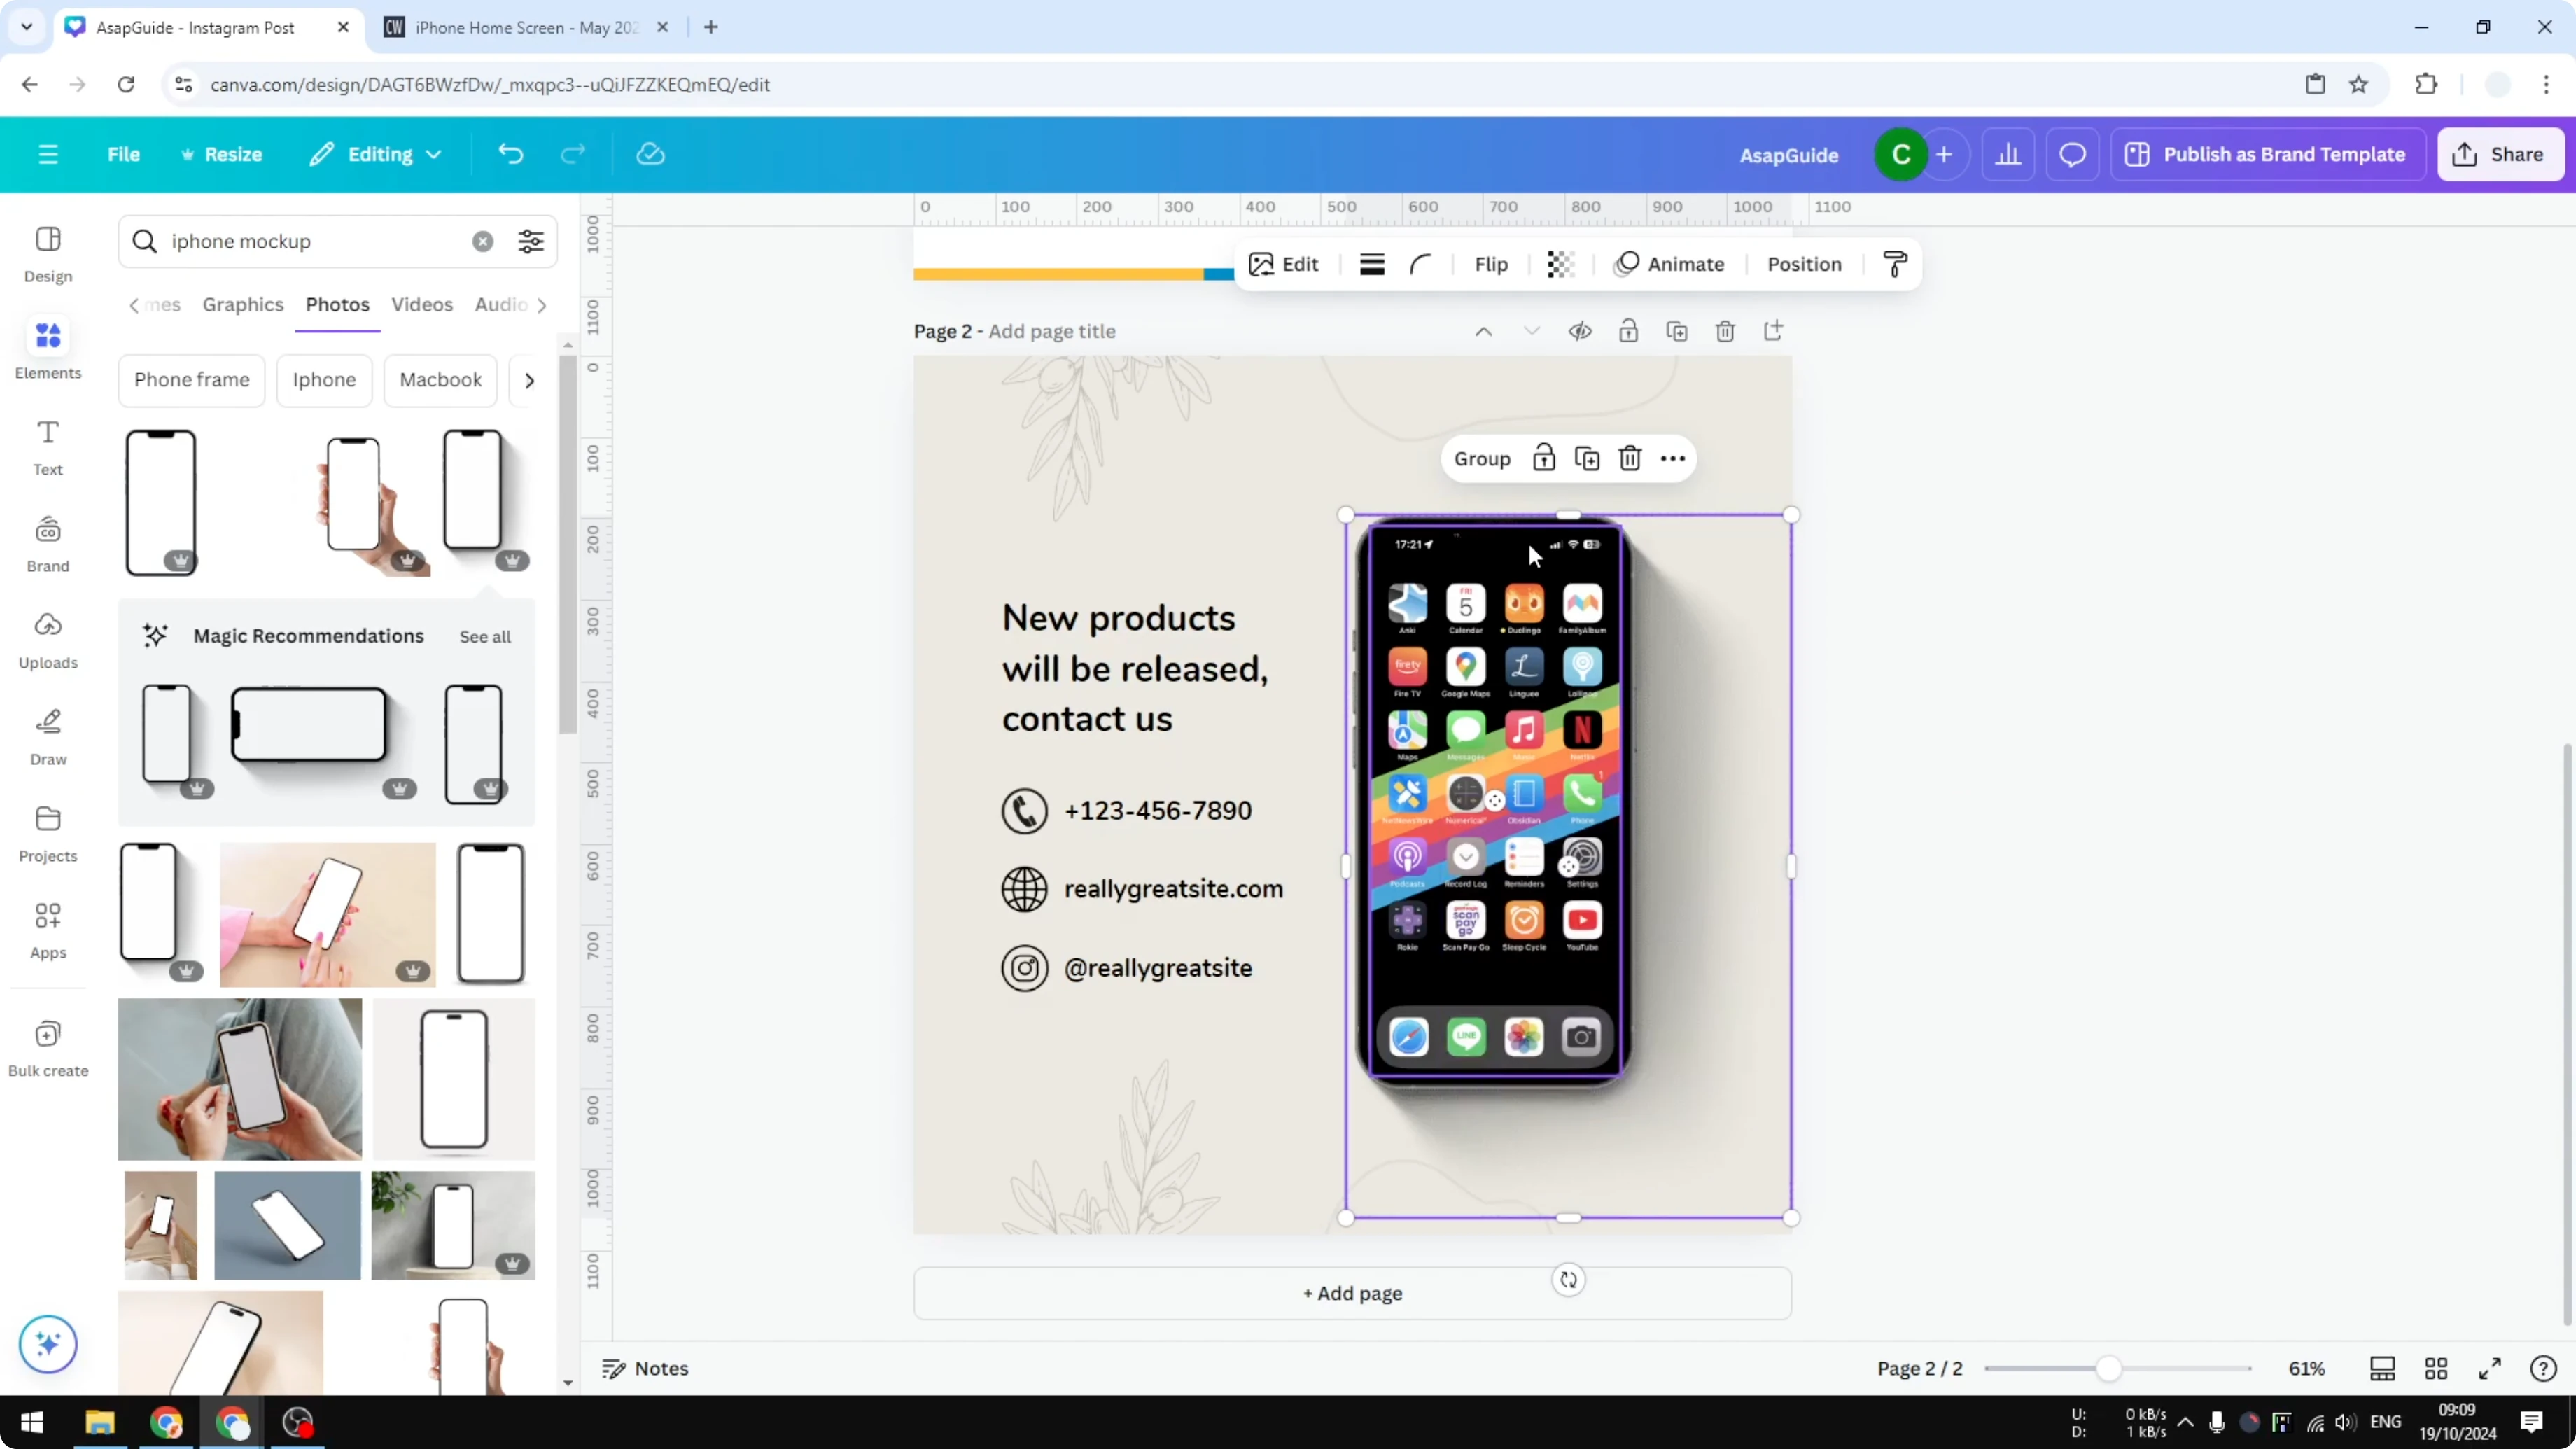
Group and resize
Select the screenshot and the phone image together.
Group them, so when you move one, the whole mockup moves together.
If you resize it, both the screenshot and the frame will resize accordingly.
Final thoughts
Those are the two ways to create an iPhone mockup in Canva.
Use Frames for a quick setup with automatic fitting.
Use Photos or Graphics when you want a specific look, then adjust and layer it, and group everything for easy resizing.
Read More: Create Bubble Map Canva
Recent Posts
How to Visualize Yourself as a Pixelized Character with AI?
How to Visualize Yourself as a Pixelized Character with AI?

How to Revive Faded Memories and Enhance Image Clarity with AI?
How to Revive Faded Memories and Enhance Image Clarity with AI?

How to Visualize Yourself as an Animal Crossing Character with AI?
How to Visualize Yourself as an Animal Crossing Character with AI?