How to Arrange Layers in Canva with Drag and Drop

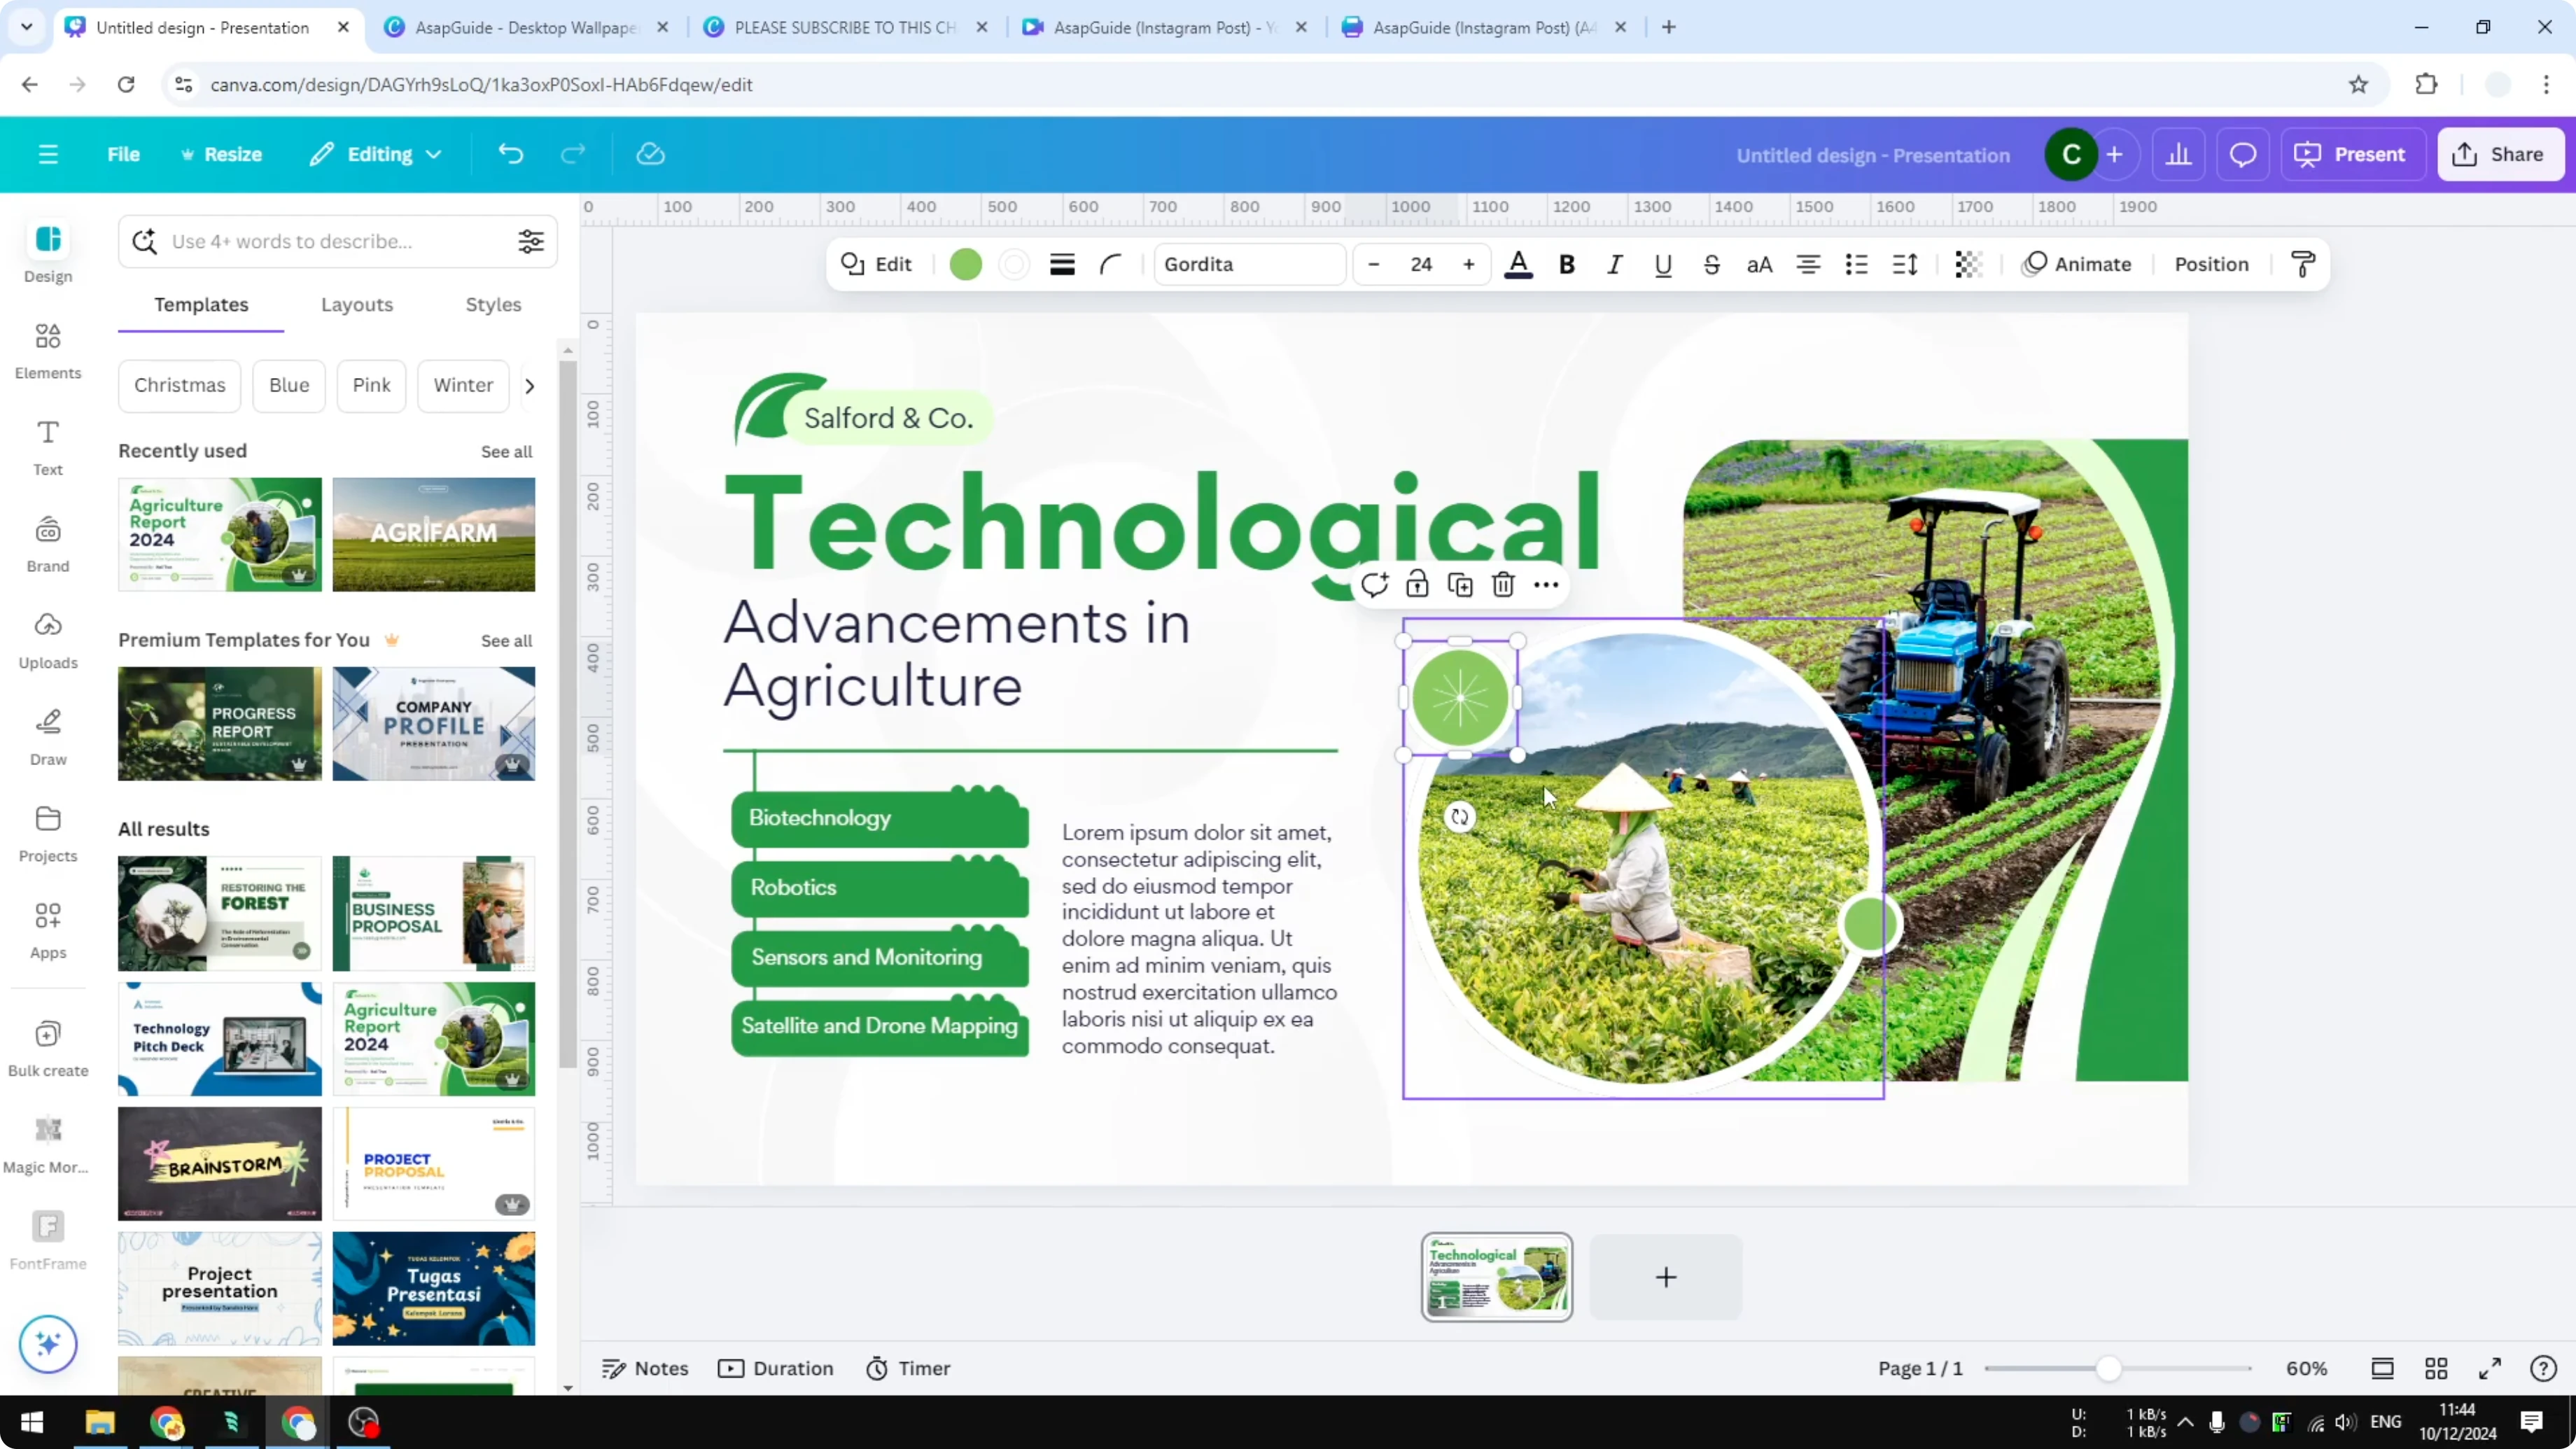
I am going to show you how you can arrange layers in Canva with drag and drop. In Canva you can have multiple elements, and sometimes elements are overlapping one another or you want a certain section of an element to be covered by another element. For example, a picture can have a circle decoration that covers a section of the image.
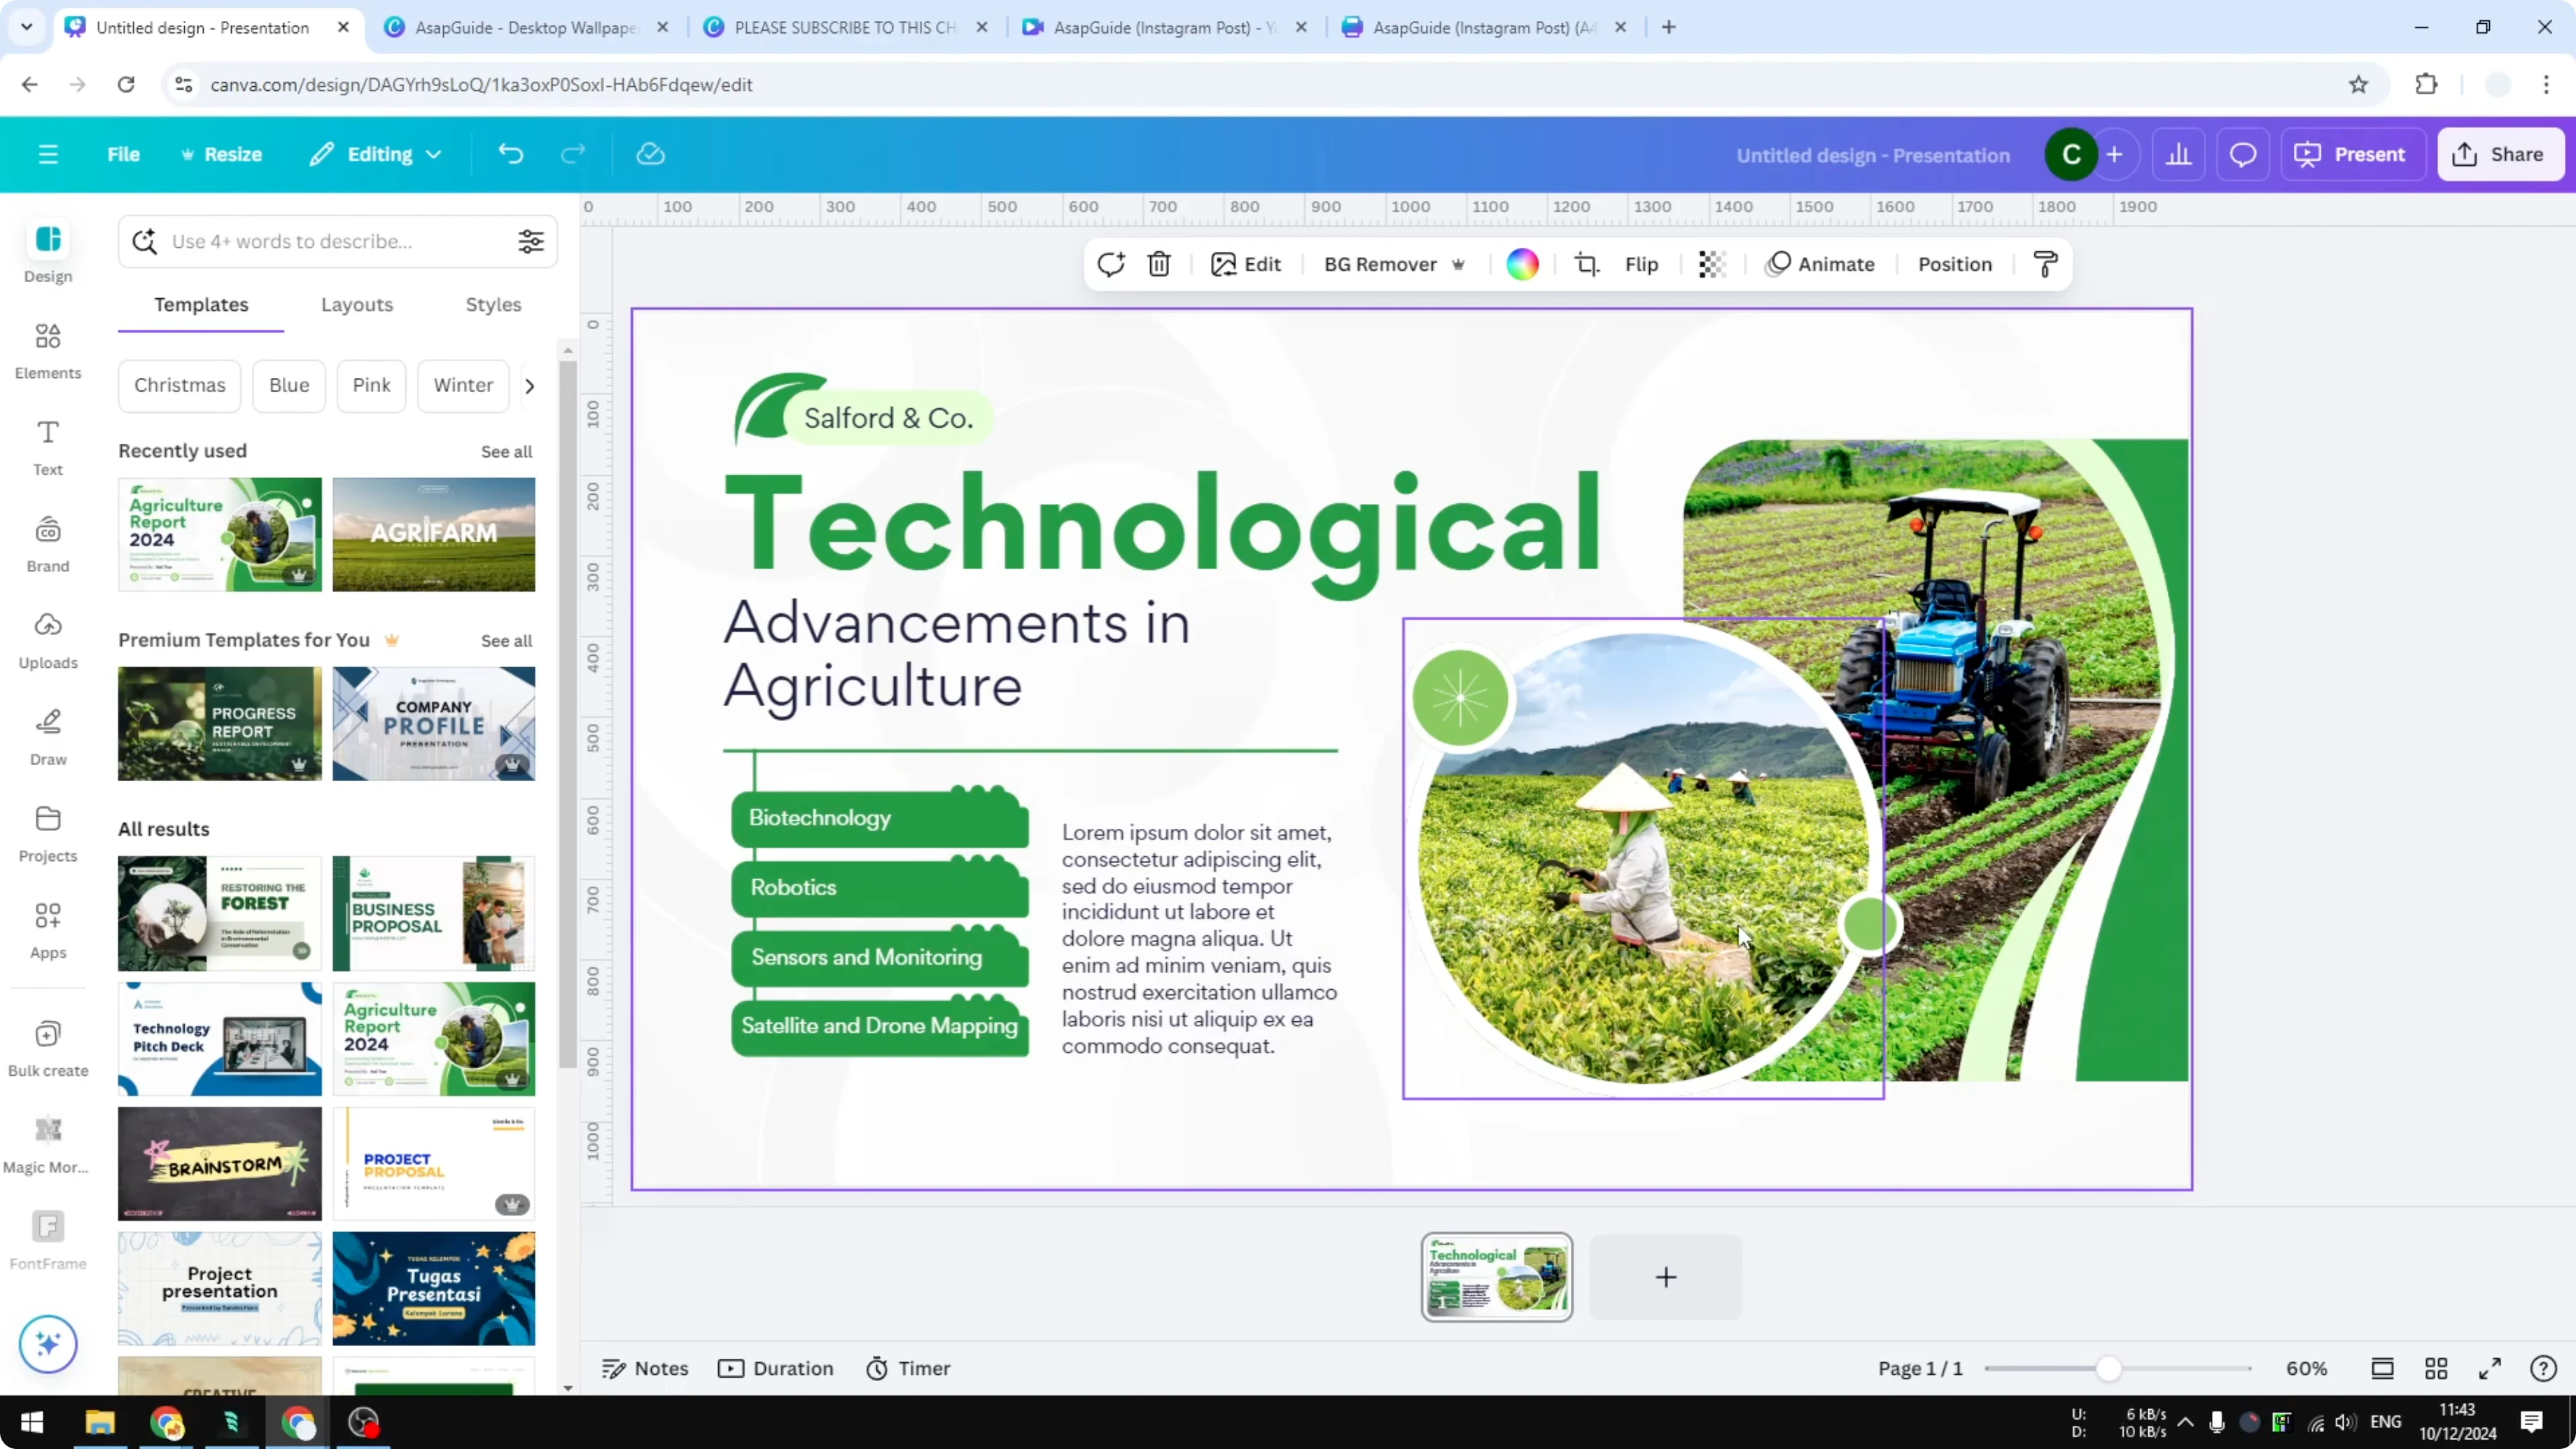
This is very important in Canva. You want to make sure you are putting the element the right way. You do not want to block items that are supposed to be seen.
Arrange Layers in Canva with Drag and Drop basics
The easiest way to play around with this is by using the Layers feature. The Layers menu lets you control what sits in front and what sits behind. It helps you keep elements visible and avoid having them blocked by other elements.
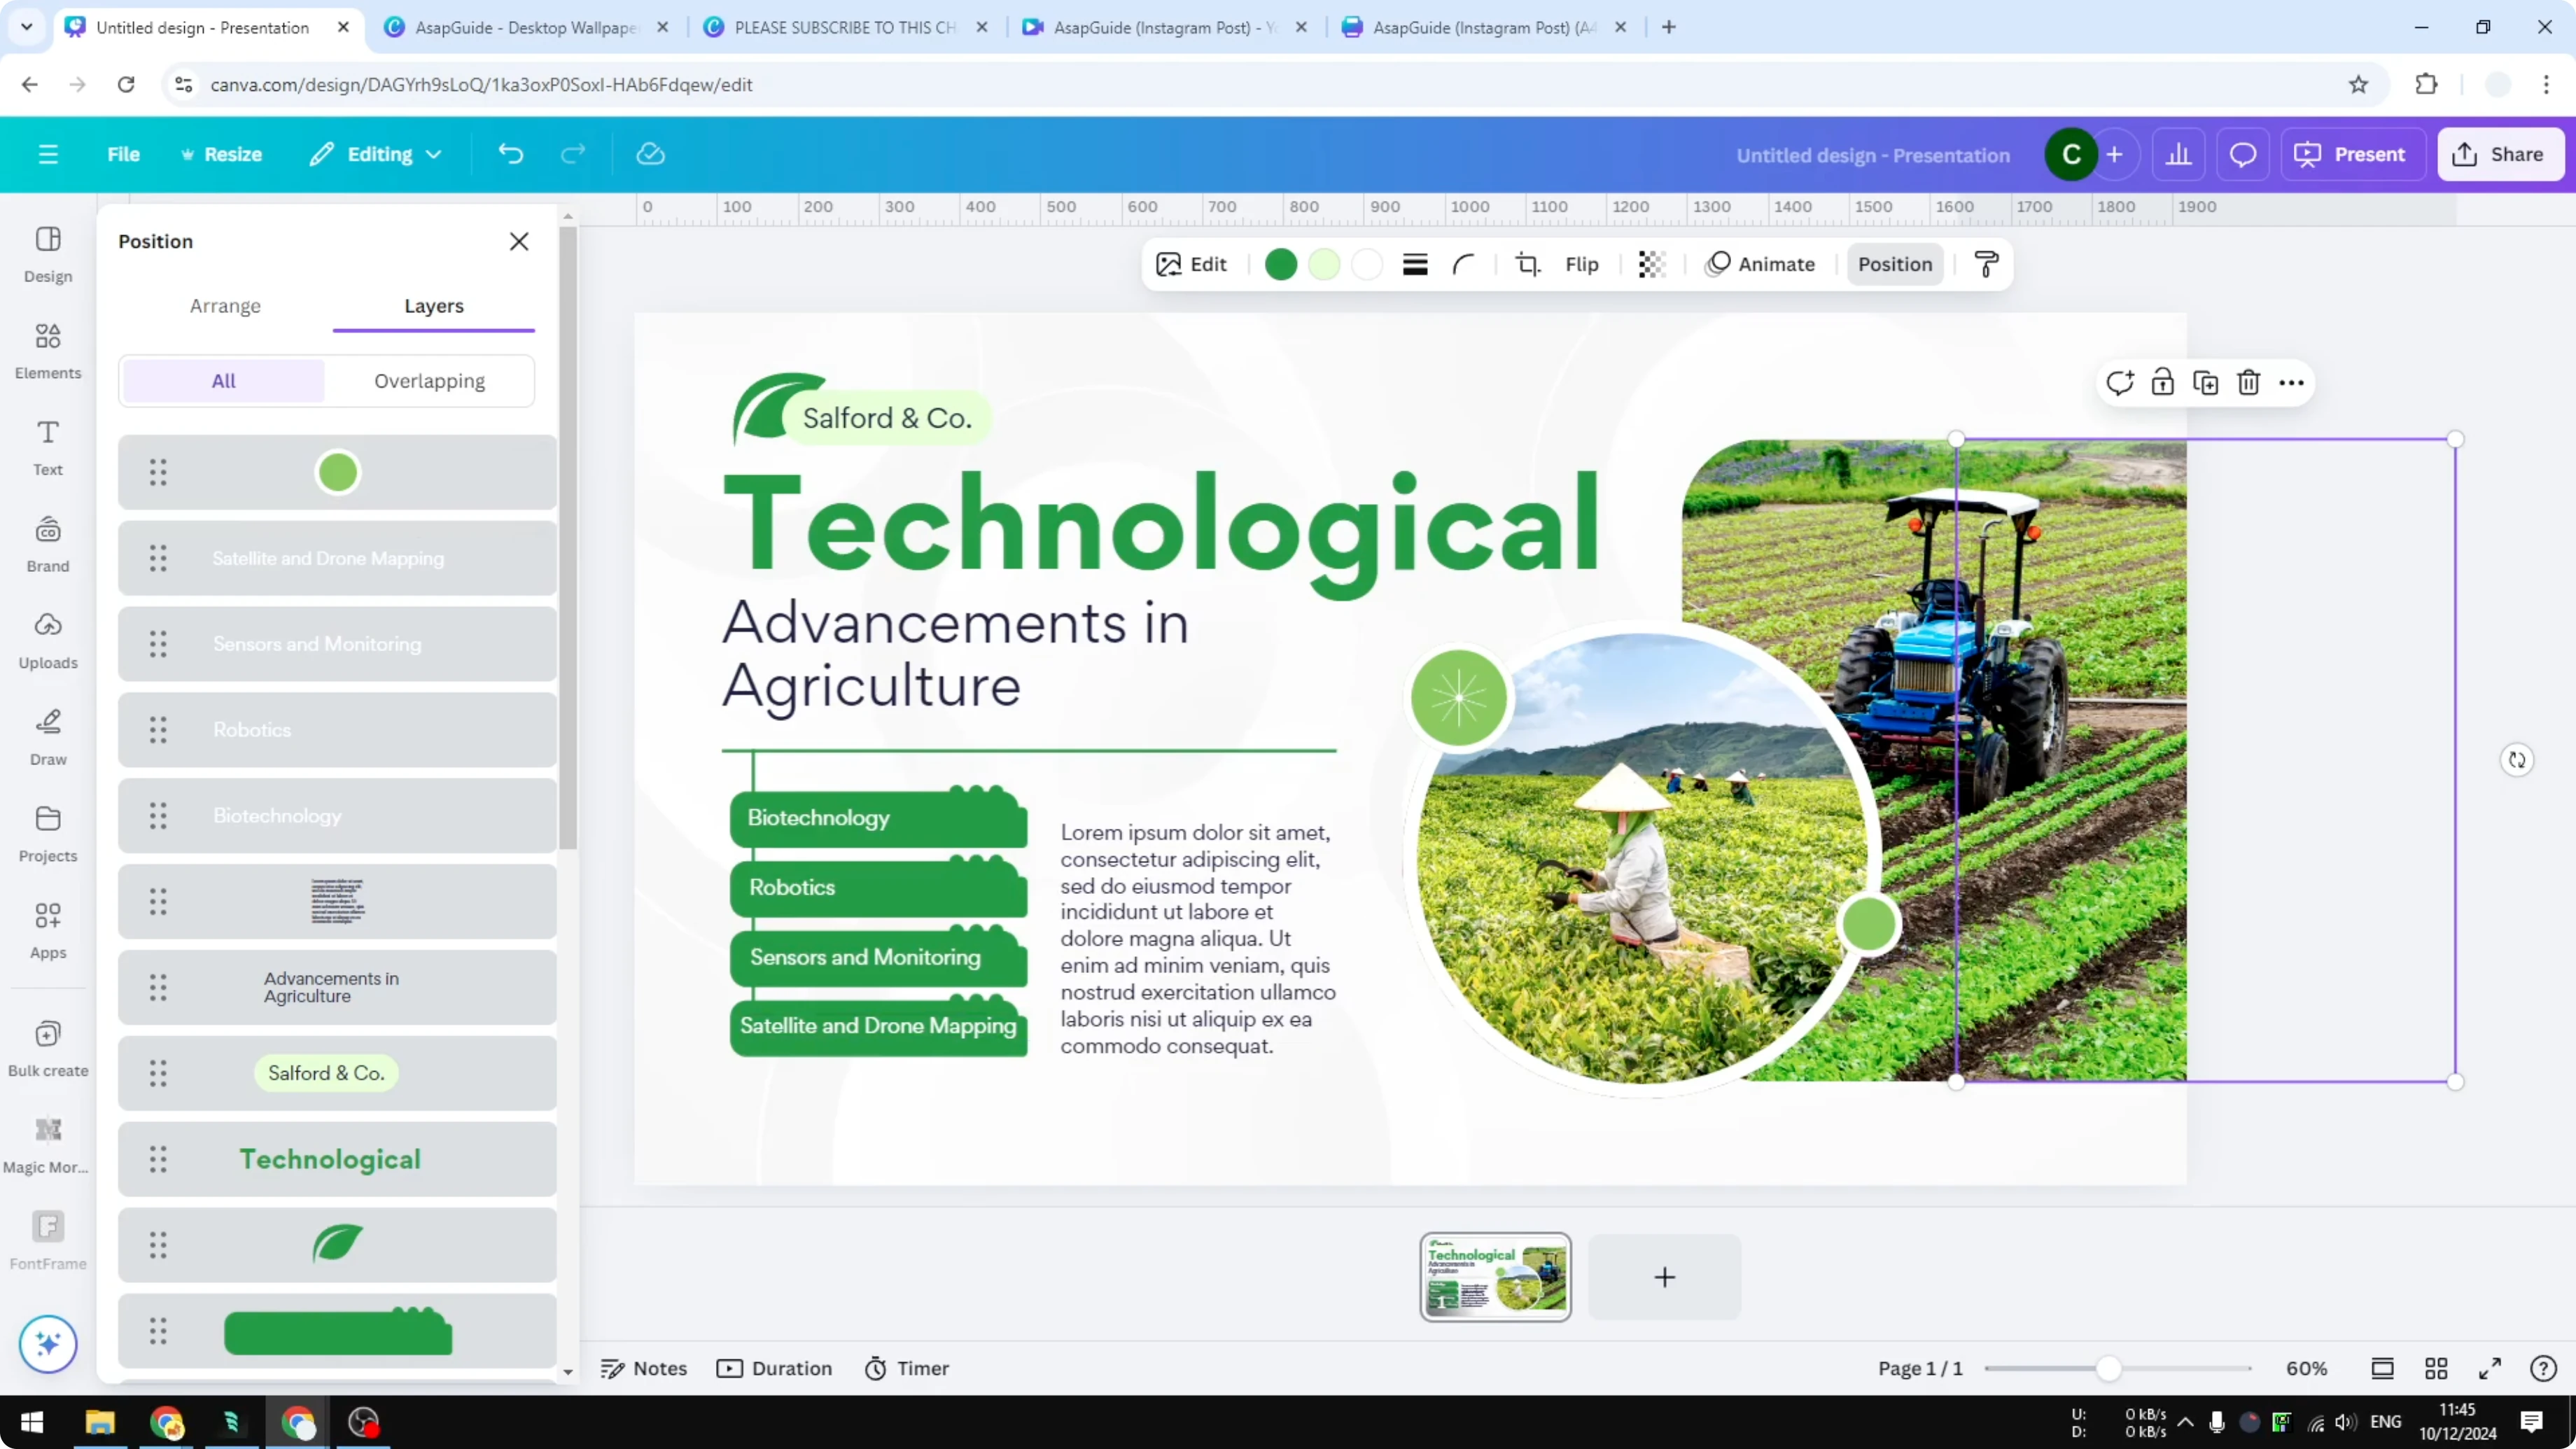
If you want to see the composition of your design in Canva, go to the Position menu and then navigate to Layers. You will see all the elements in your design listed there. You can drag and drop any element in that list to reorder it.
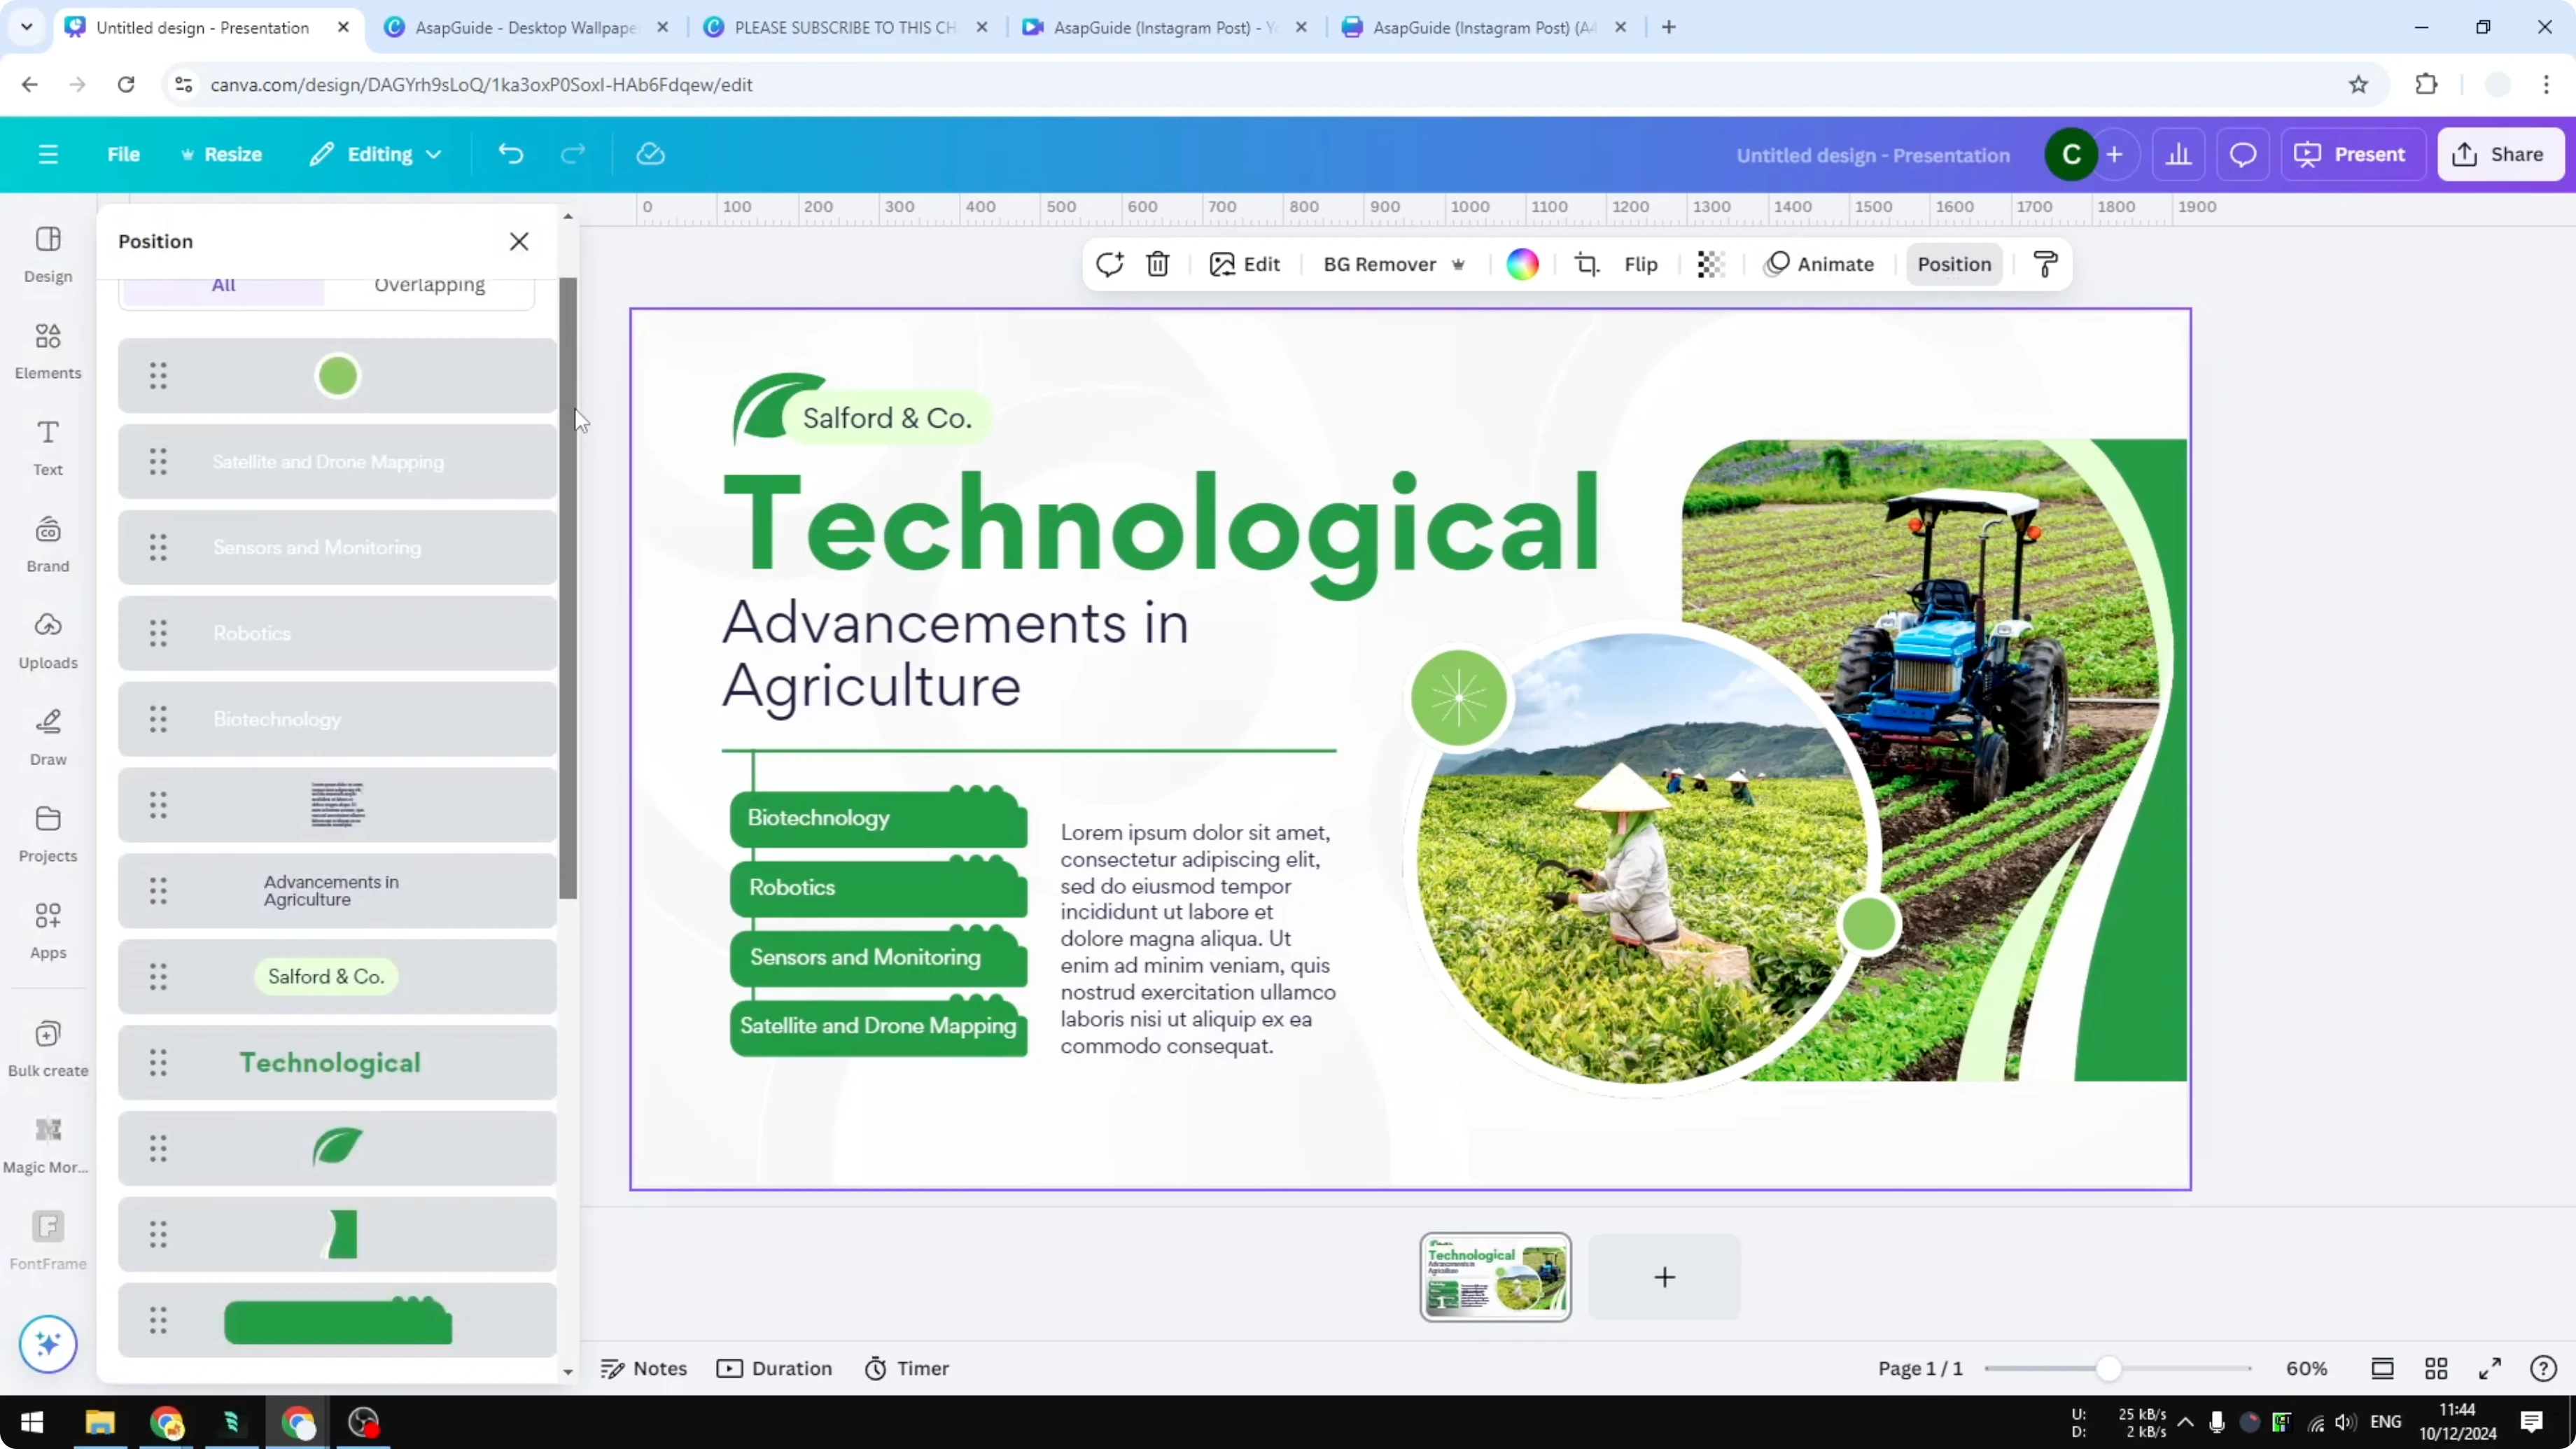
For more on opening the panel and reading the stack, see see layers in Canva.
Arrange Layers in Canva with Drag and Drop menu
Focus on the element you want to move in the stack. Identify what needs to be at the front and what needs to be at the back. Keep an eye on overlapping areas while you move items.
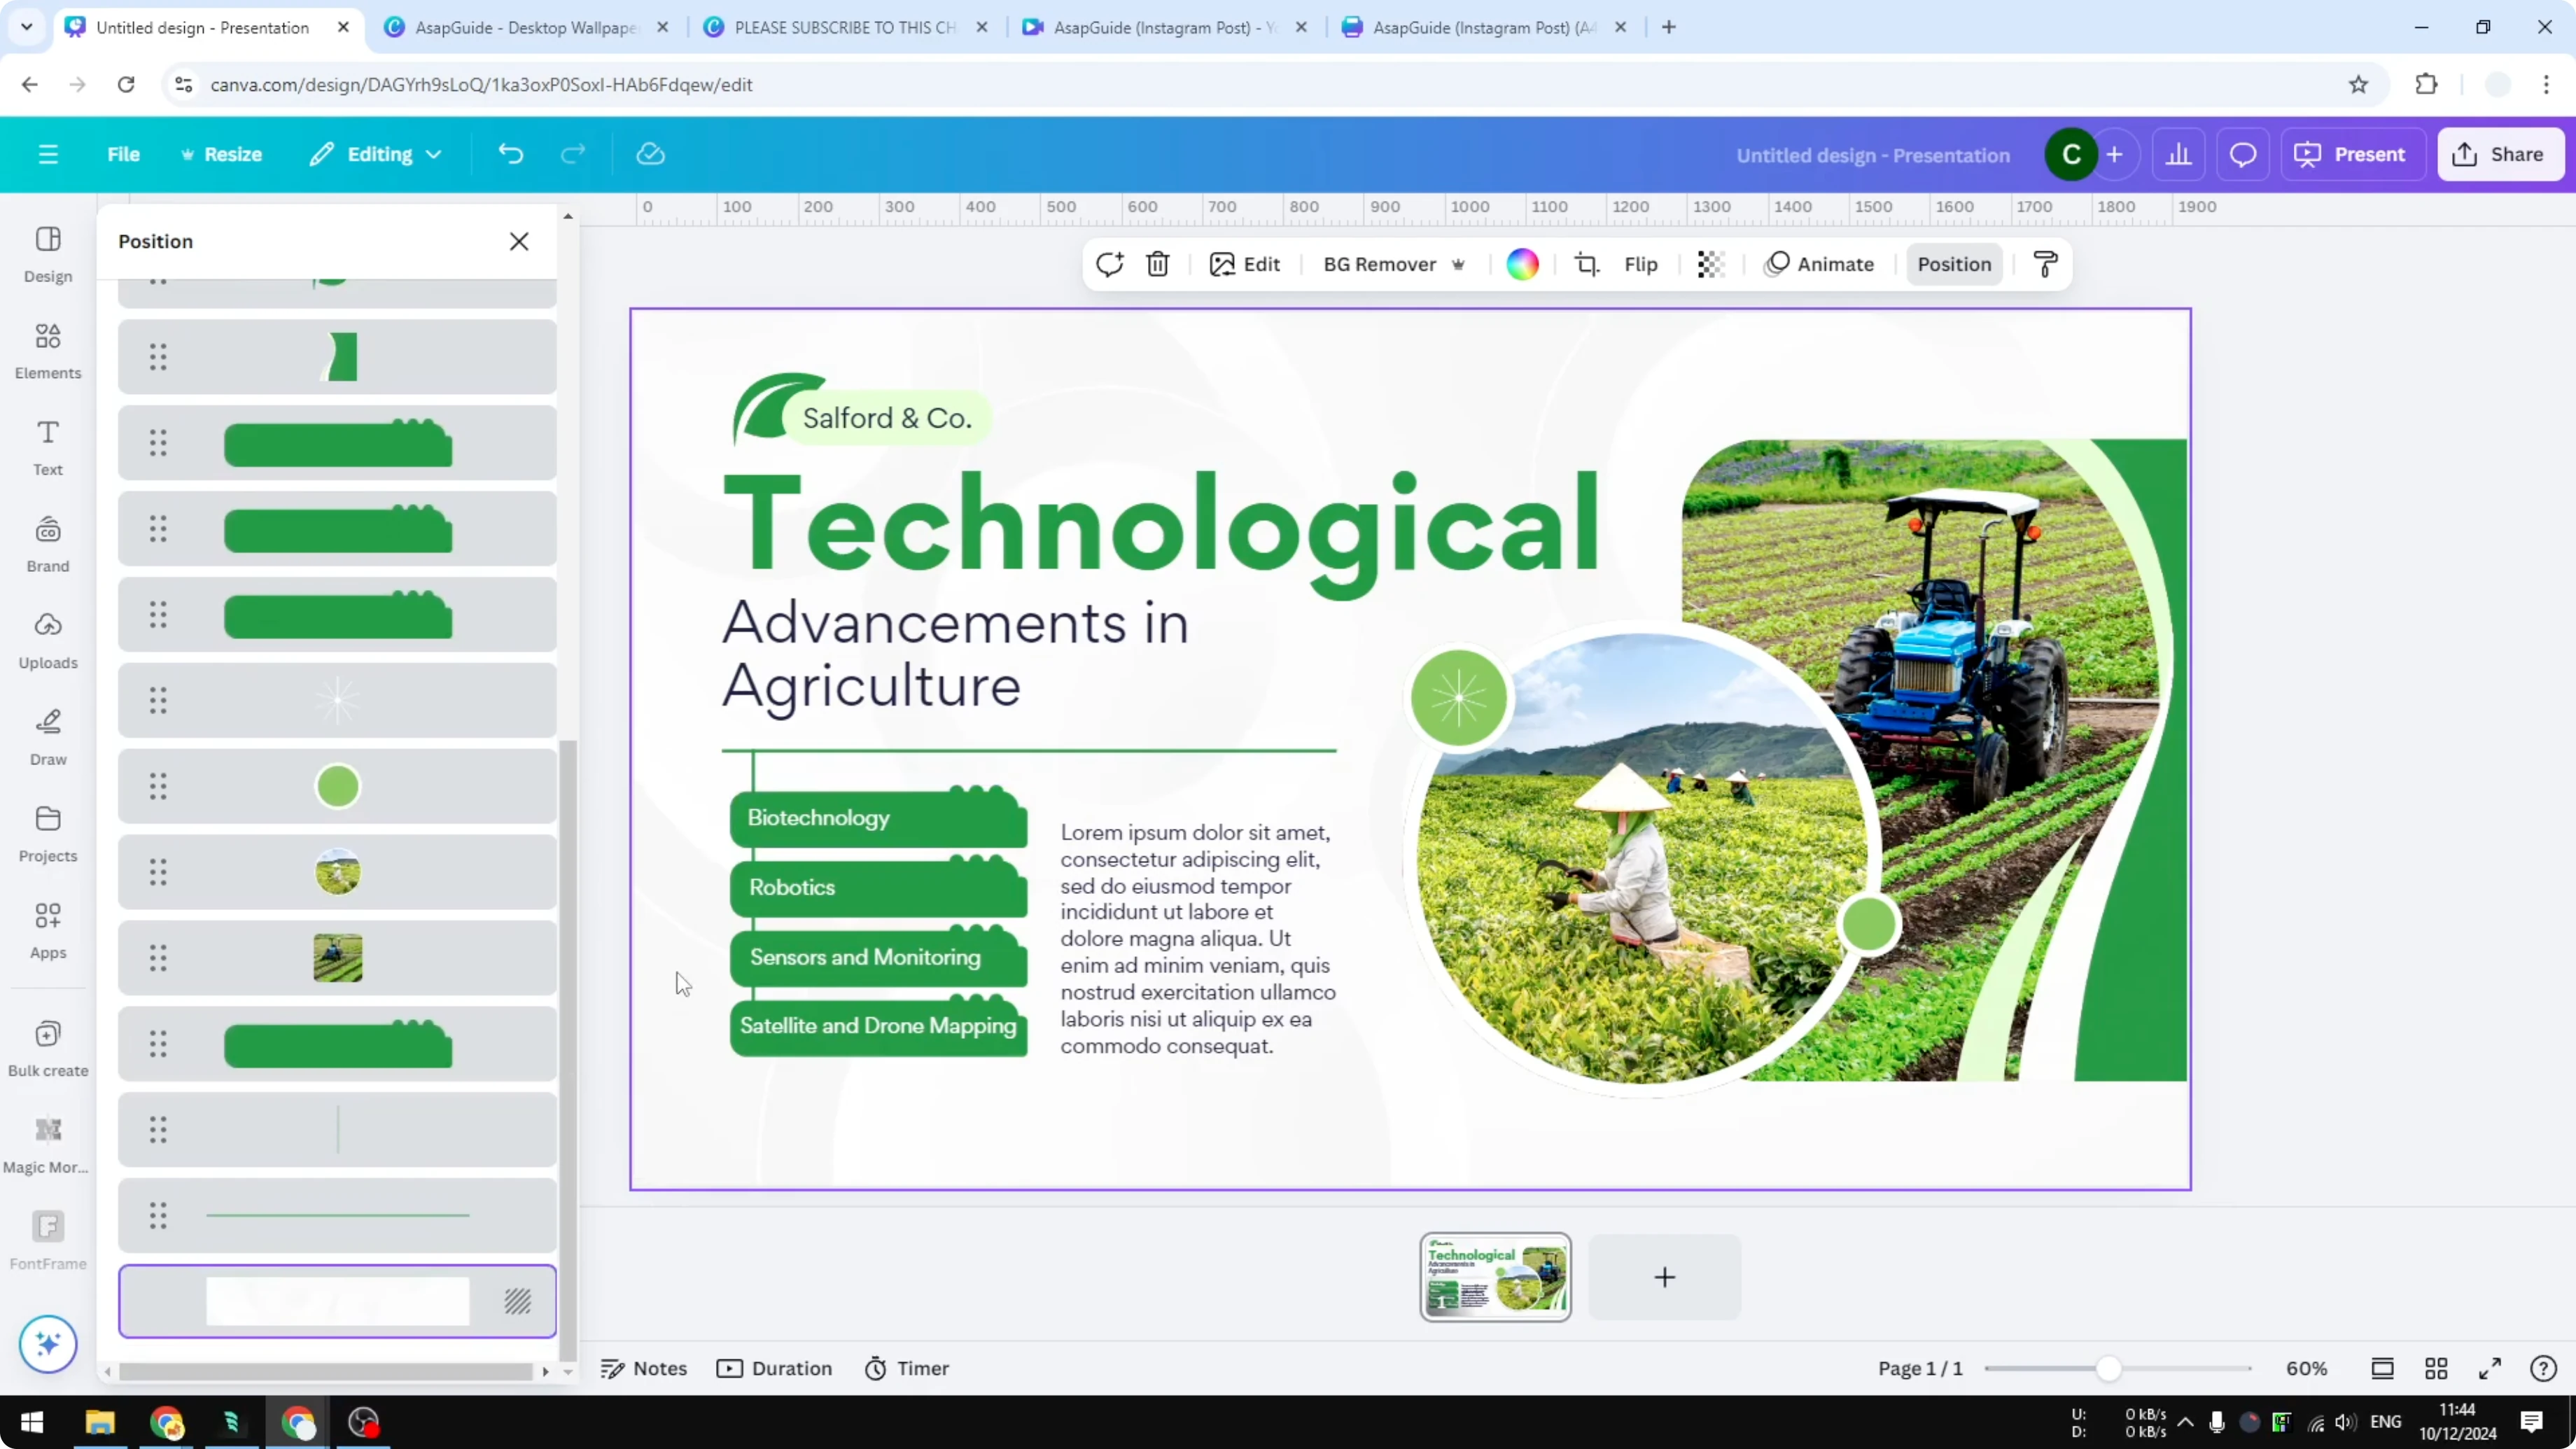
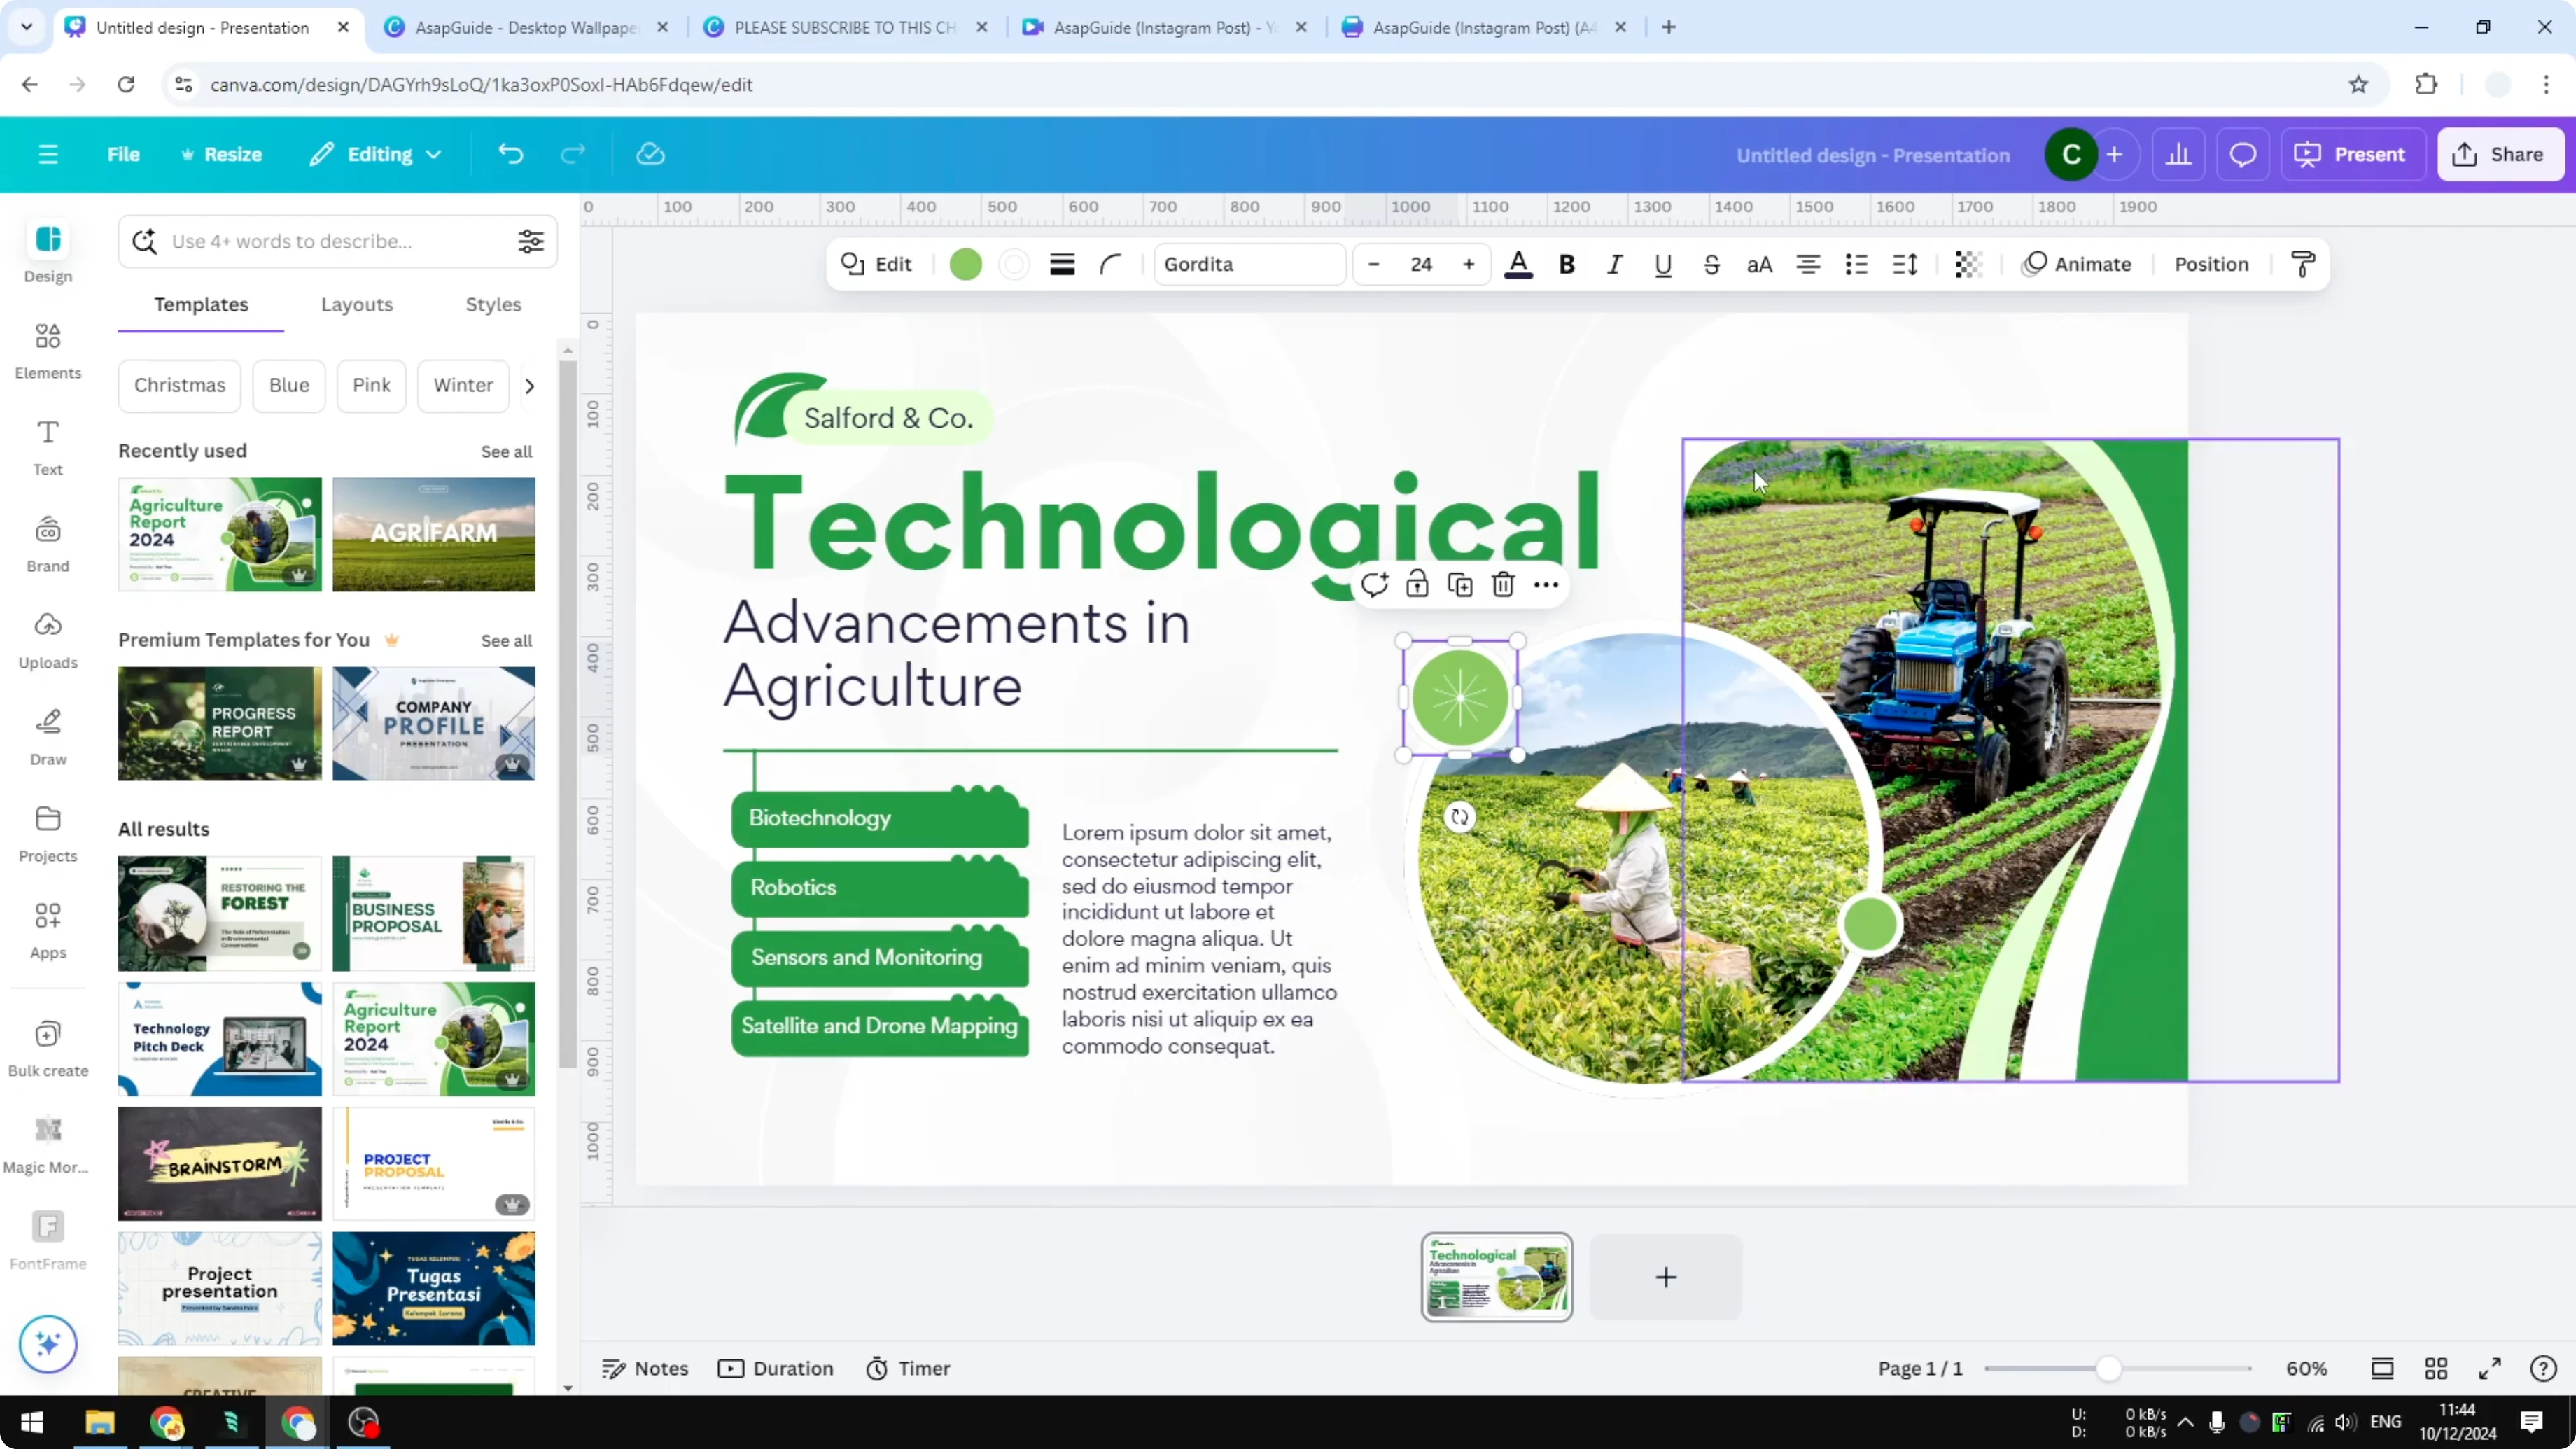
You can select the circle decoration and move it to the top of the picture. If you drag it below the picture in the Layers list, it goes behind the image. Drag it back above the picture to bring it to the front again.
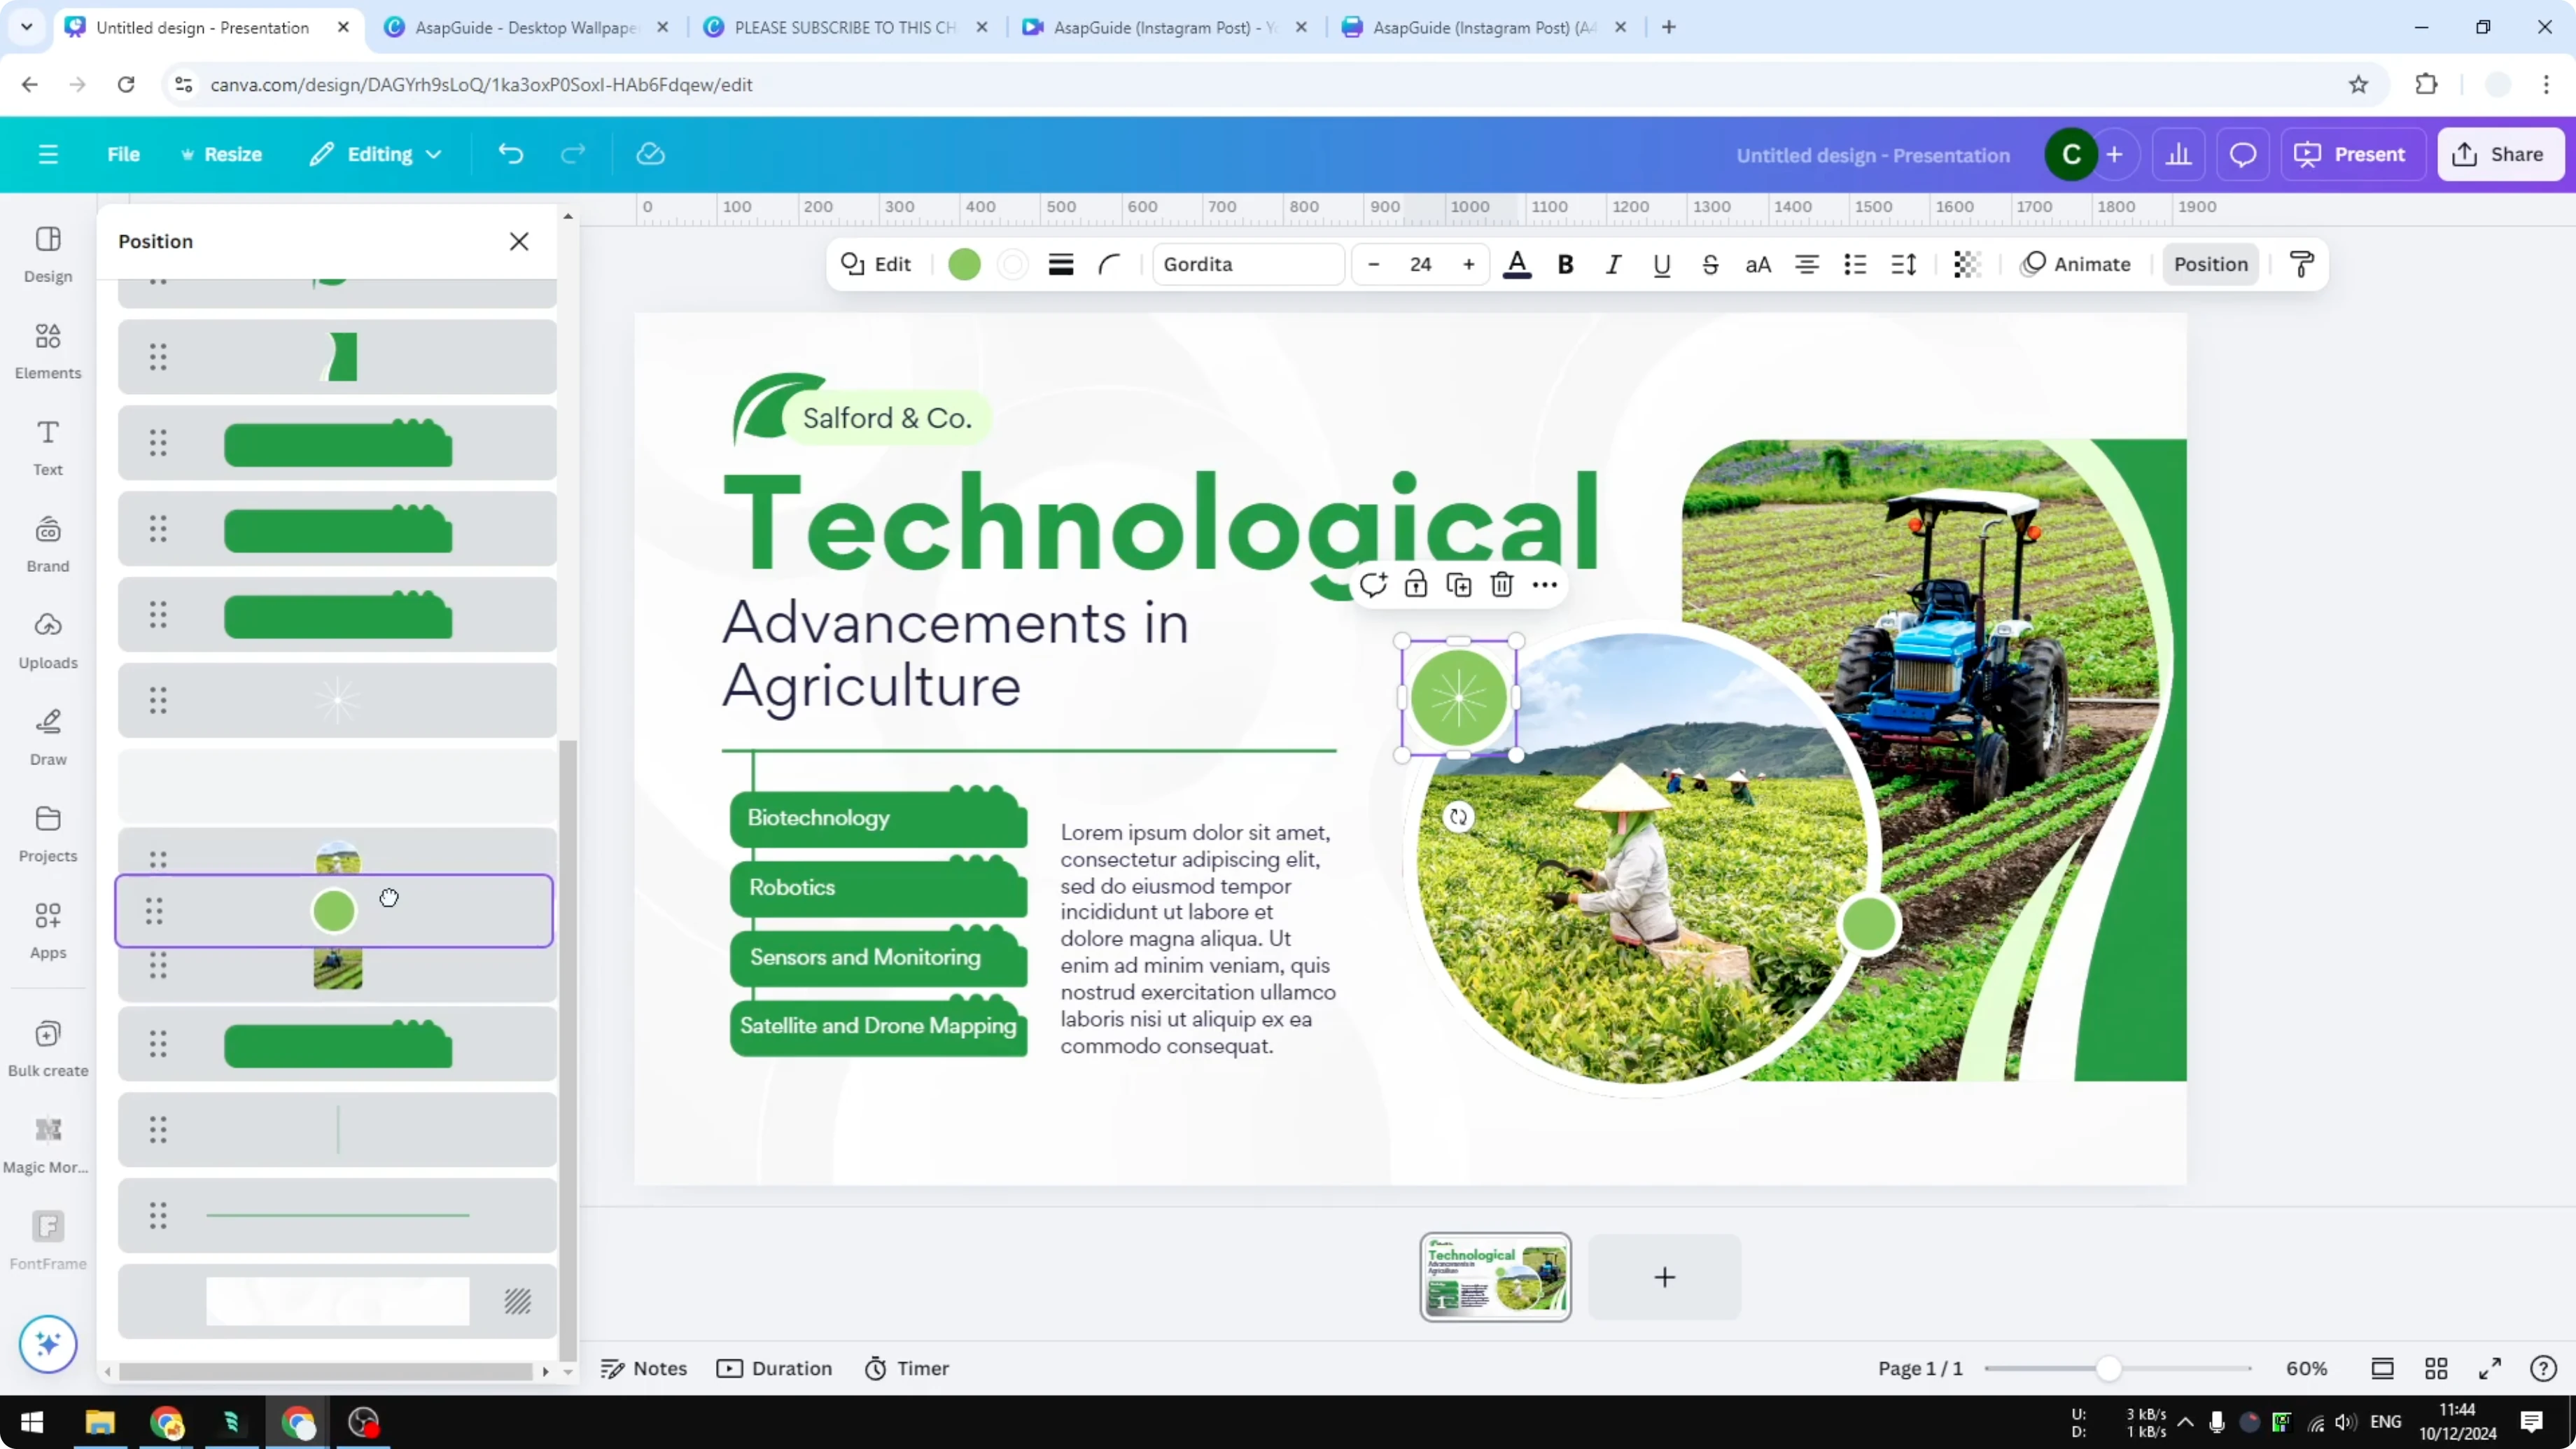
This is true for every element and every group in your document. If you put an element behind a picture, it can become invisible because it is being blocked. That is why you need to play around with this menu to make sure everything is visible and not blocking other elements.
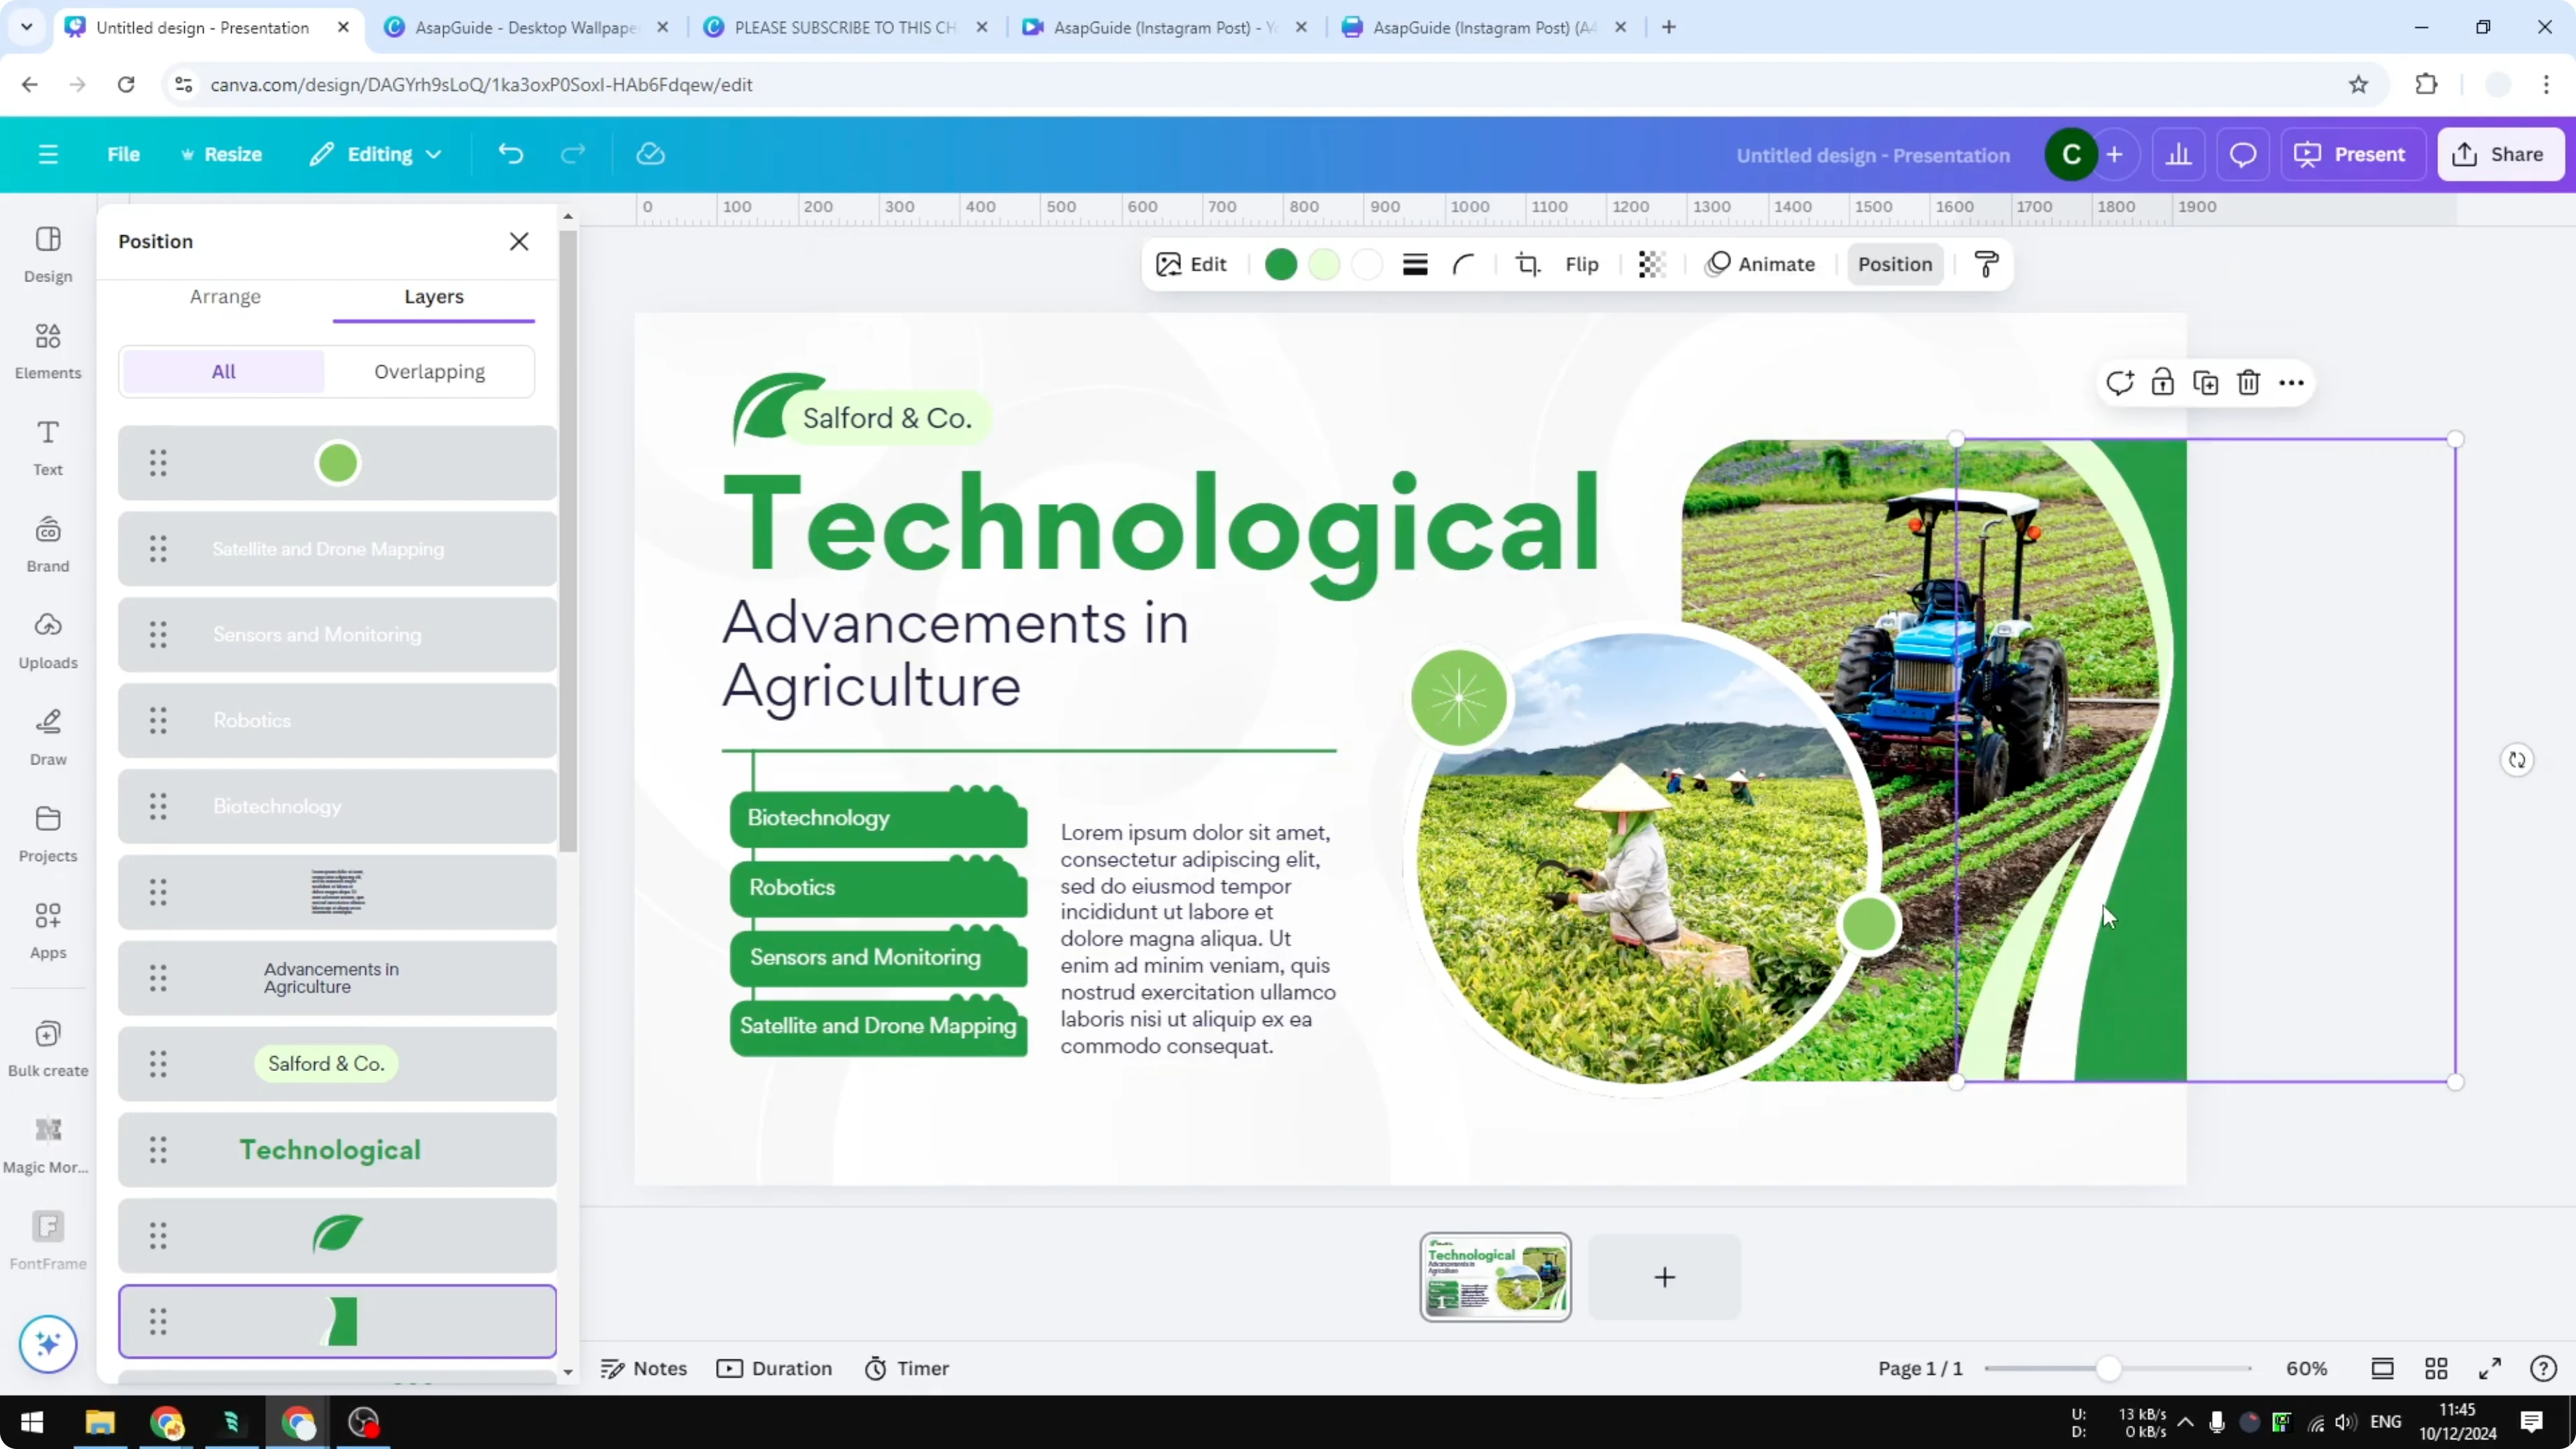
Arrange Layers in Canva with Drag and Drop steps
Open your design in Canva.
Open the Position menu.
Go to Layers to see all elements.
Click and hold the element you want to move.
Drag the element up to bring it forward, or drag it down to send it backward.
Release to drop it in the new layer position.
Check the canvas to confirm the element is visible and not blocked.
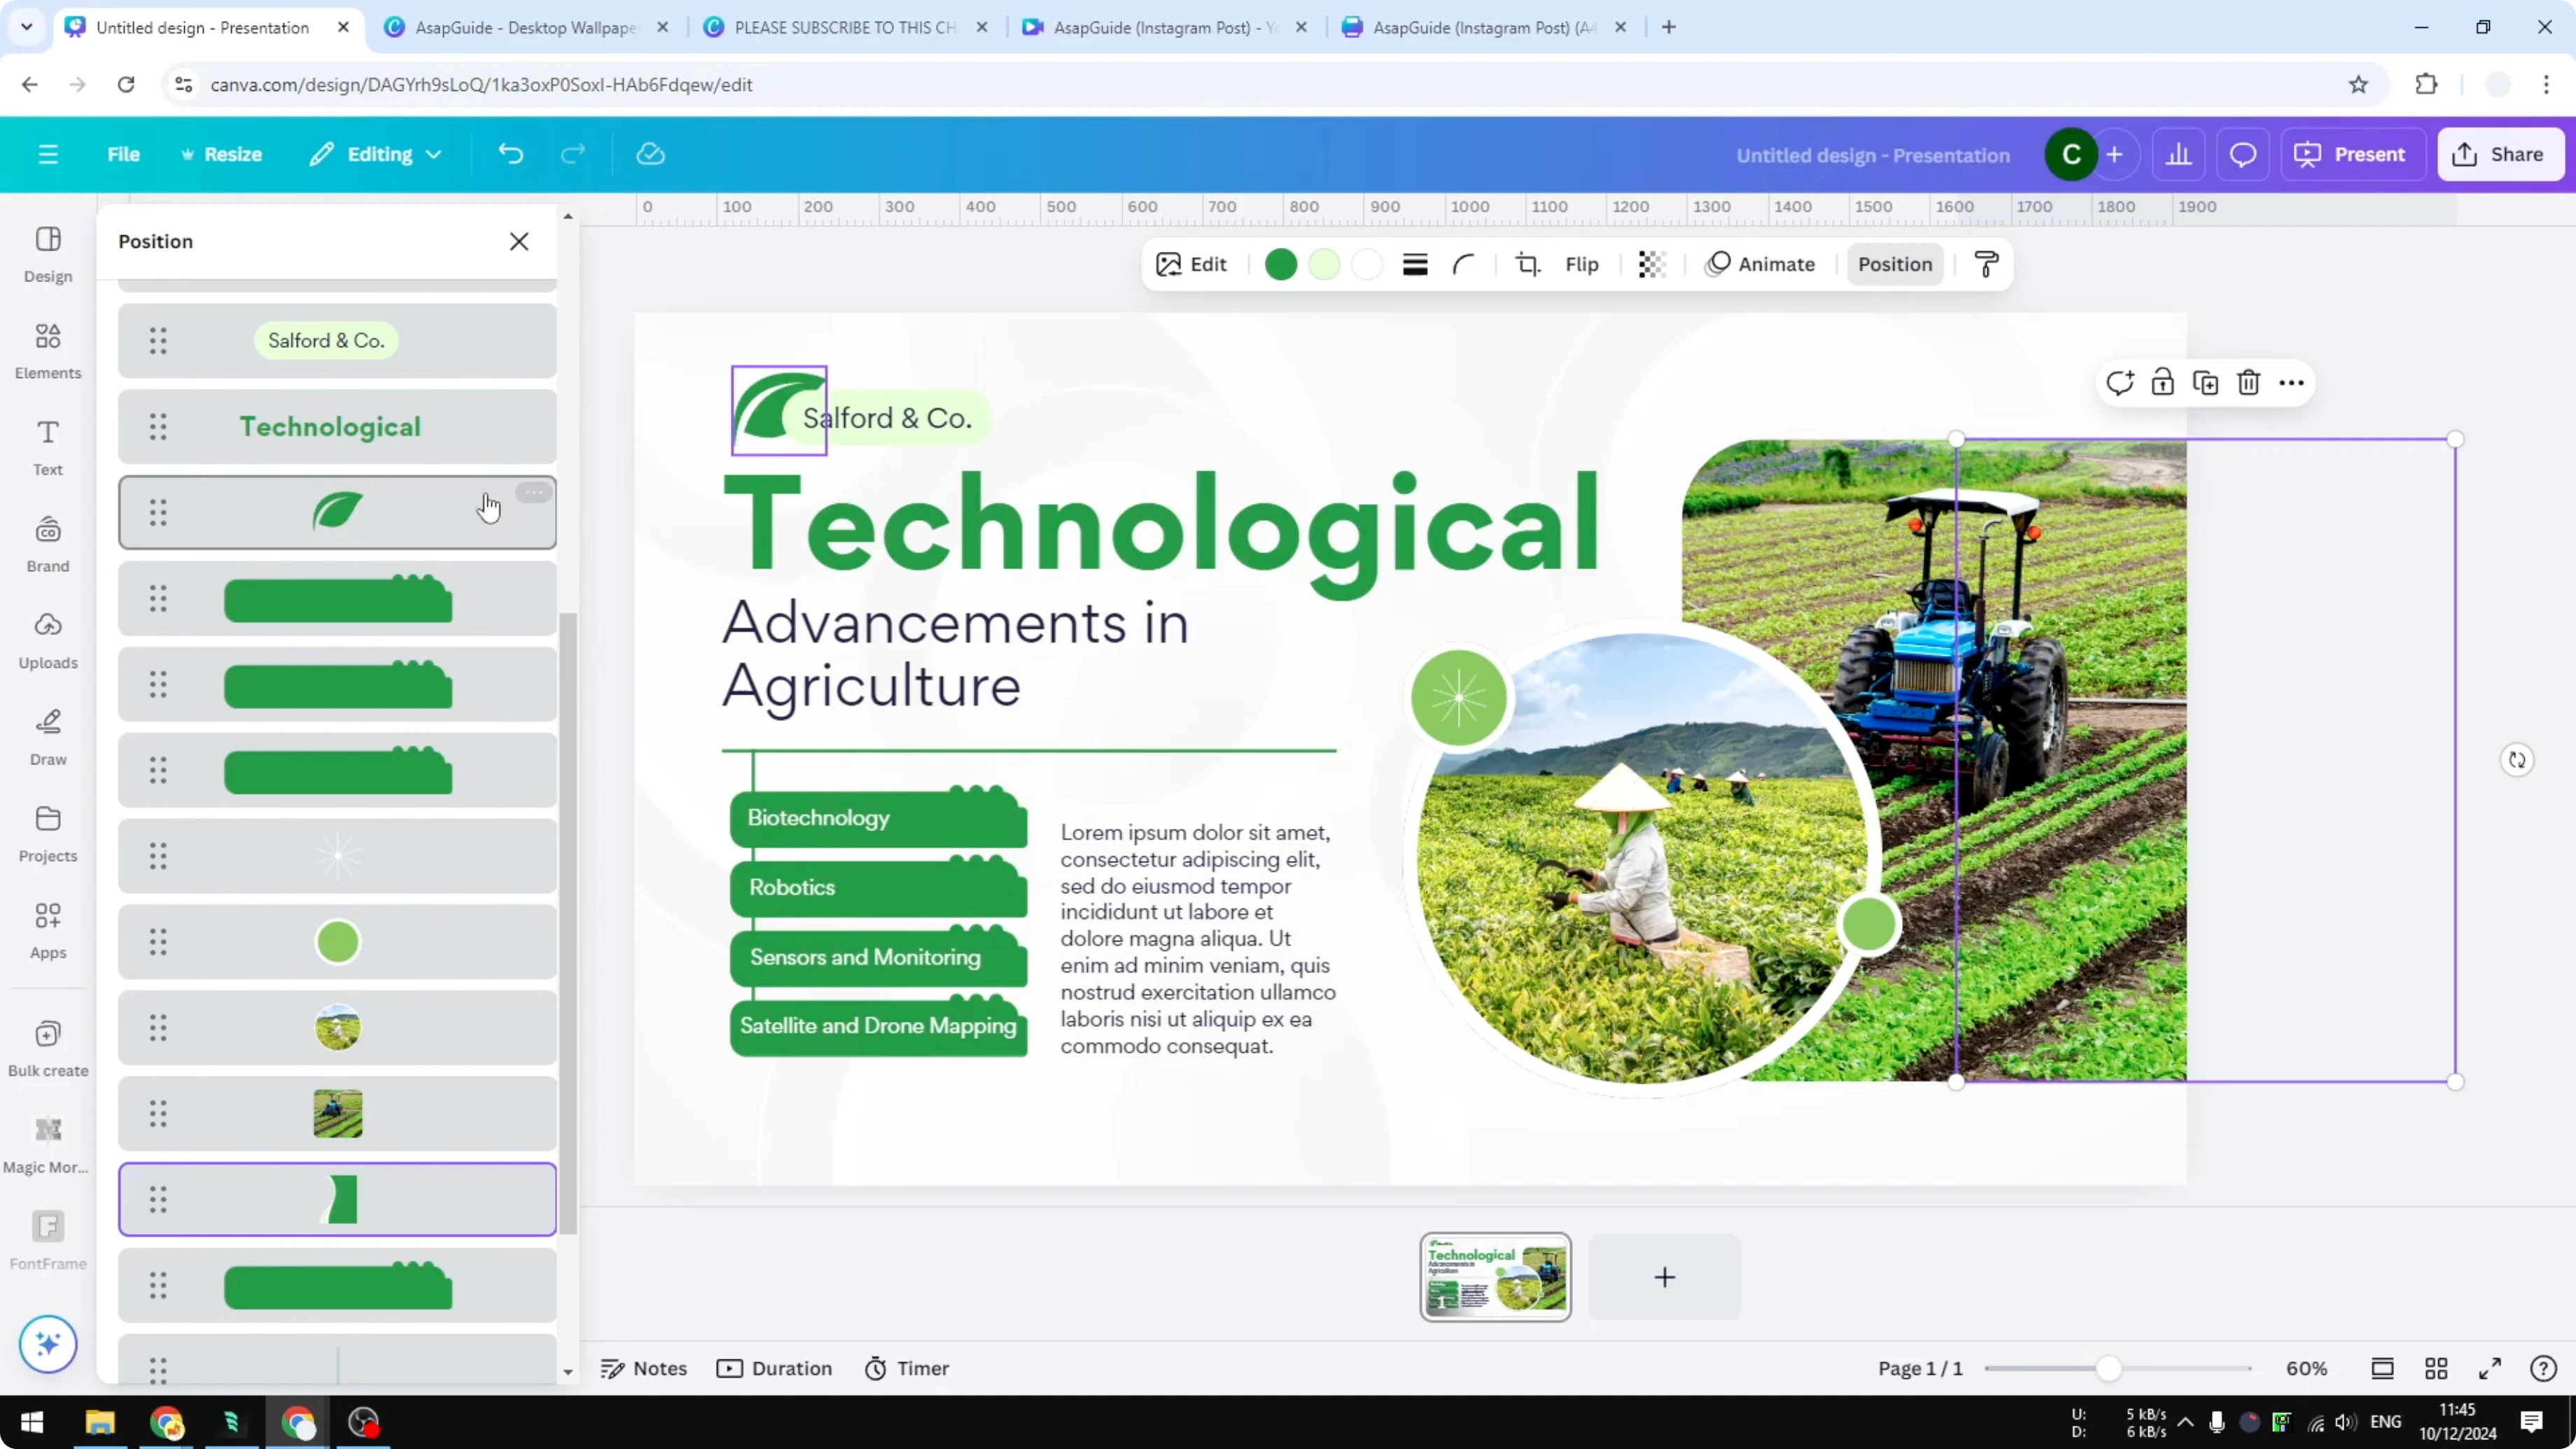
If you want a full walkthrough focused on dragging items through the stack, check arrange layers with drag and drop.
Arrange Layers in Canva with Drag and Drop tips
Move one element at a time and check the result on the canvas. If something disappears, bring it forward in the Layers list. Keep decorative items behind photos if they are meant to frame, and keep key subjects on top so they stay visible.
If you also need to reorder entire pages, see how to rearrange pages with drag and drop.
Final Thoughts
Layers control what you see first and what stays in the back. With drag and drop in the Layers menu, you can quickly fix overlaps and keep important parts of your design visible. Keep adjusting the order until nothing important is being blocked.
Recent Posts
How to Visualize Yourself as a Pixelized Character with AI?
How to Visualize Yourself as a Pixelized Character with AI?
How to Revive Faded Memories and Enhance Image Clarity with AI?
How to Revive Faded Memories and Enhance Image Clarity with AI?

How to Visualize Yourself as an Animal Crossing Character with AI?
How to Visualize Yourself as an Animal Crossing Character with AI?