How To Apply Watermark In Canva

I will show you how you can add a watermark to your document or a design in Canva. There is no dedicated watermark feature in Canva like Google Docs or Microsoft Word that auto-applies a watermark to every page. That does not mean you cannot add a watermark to your document.
This method works across regular designs, documents, and multi-page projects. I am working with multiple slides, but you can follow the same process on any Canva design. It is simple and quick once you set it up.
Apply Watermark In Canva
No built-in feature
Canva does not offer a one-click watermark that sticks to all pages. You will create the watermark as an element and then place it on each page. This keeps the result consistent across different background colors.
If you are watermarking a video, see this guide for a dedicated approach: watermark a video in Canva.
Create the watermark
Create a new page in your document so you can design the watermark once. Go to the Text menu and insert a text box. I prefer a simple text watermark, but you can add a logo if you want.

Increase the text size to around 56 so it is visible. Make the text bold if needed to improve legibility. Keep the wording short and clear.

Style and transparency
Use a gray color for the watermark text because gray works on both black and white backgrounds. Choose light gray or dark gray based on your design. Add transparency around 20 percent, and even 10 percent can still be visible.
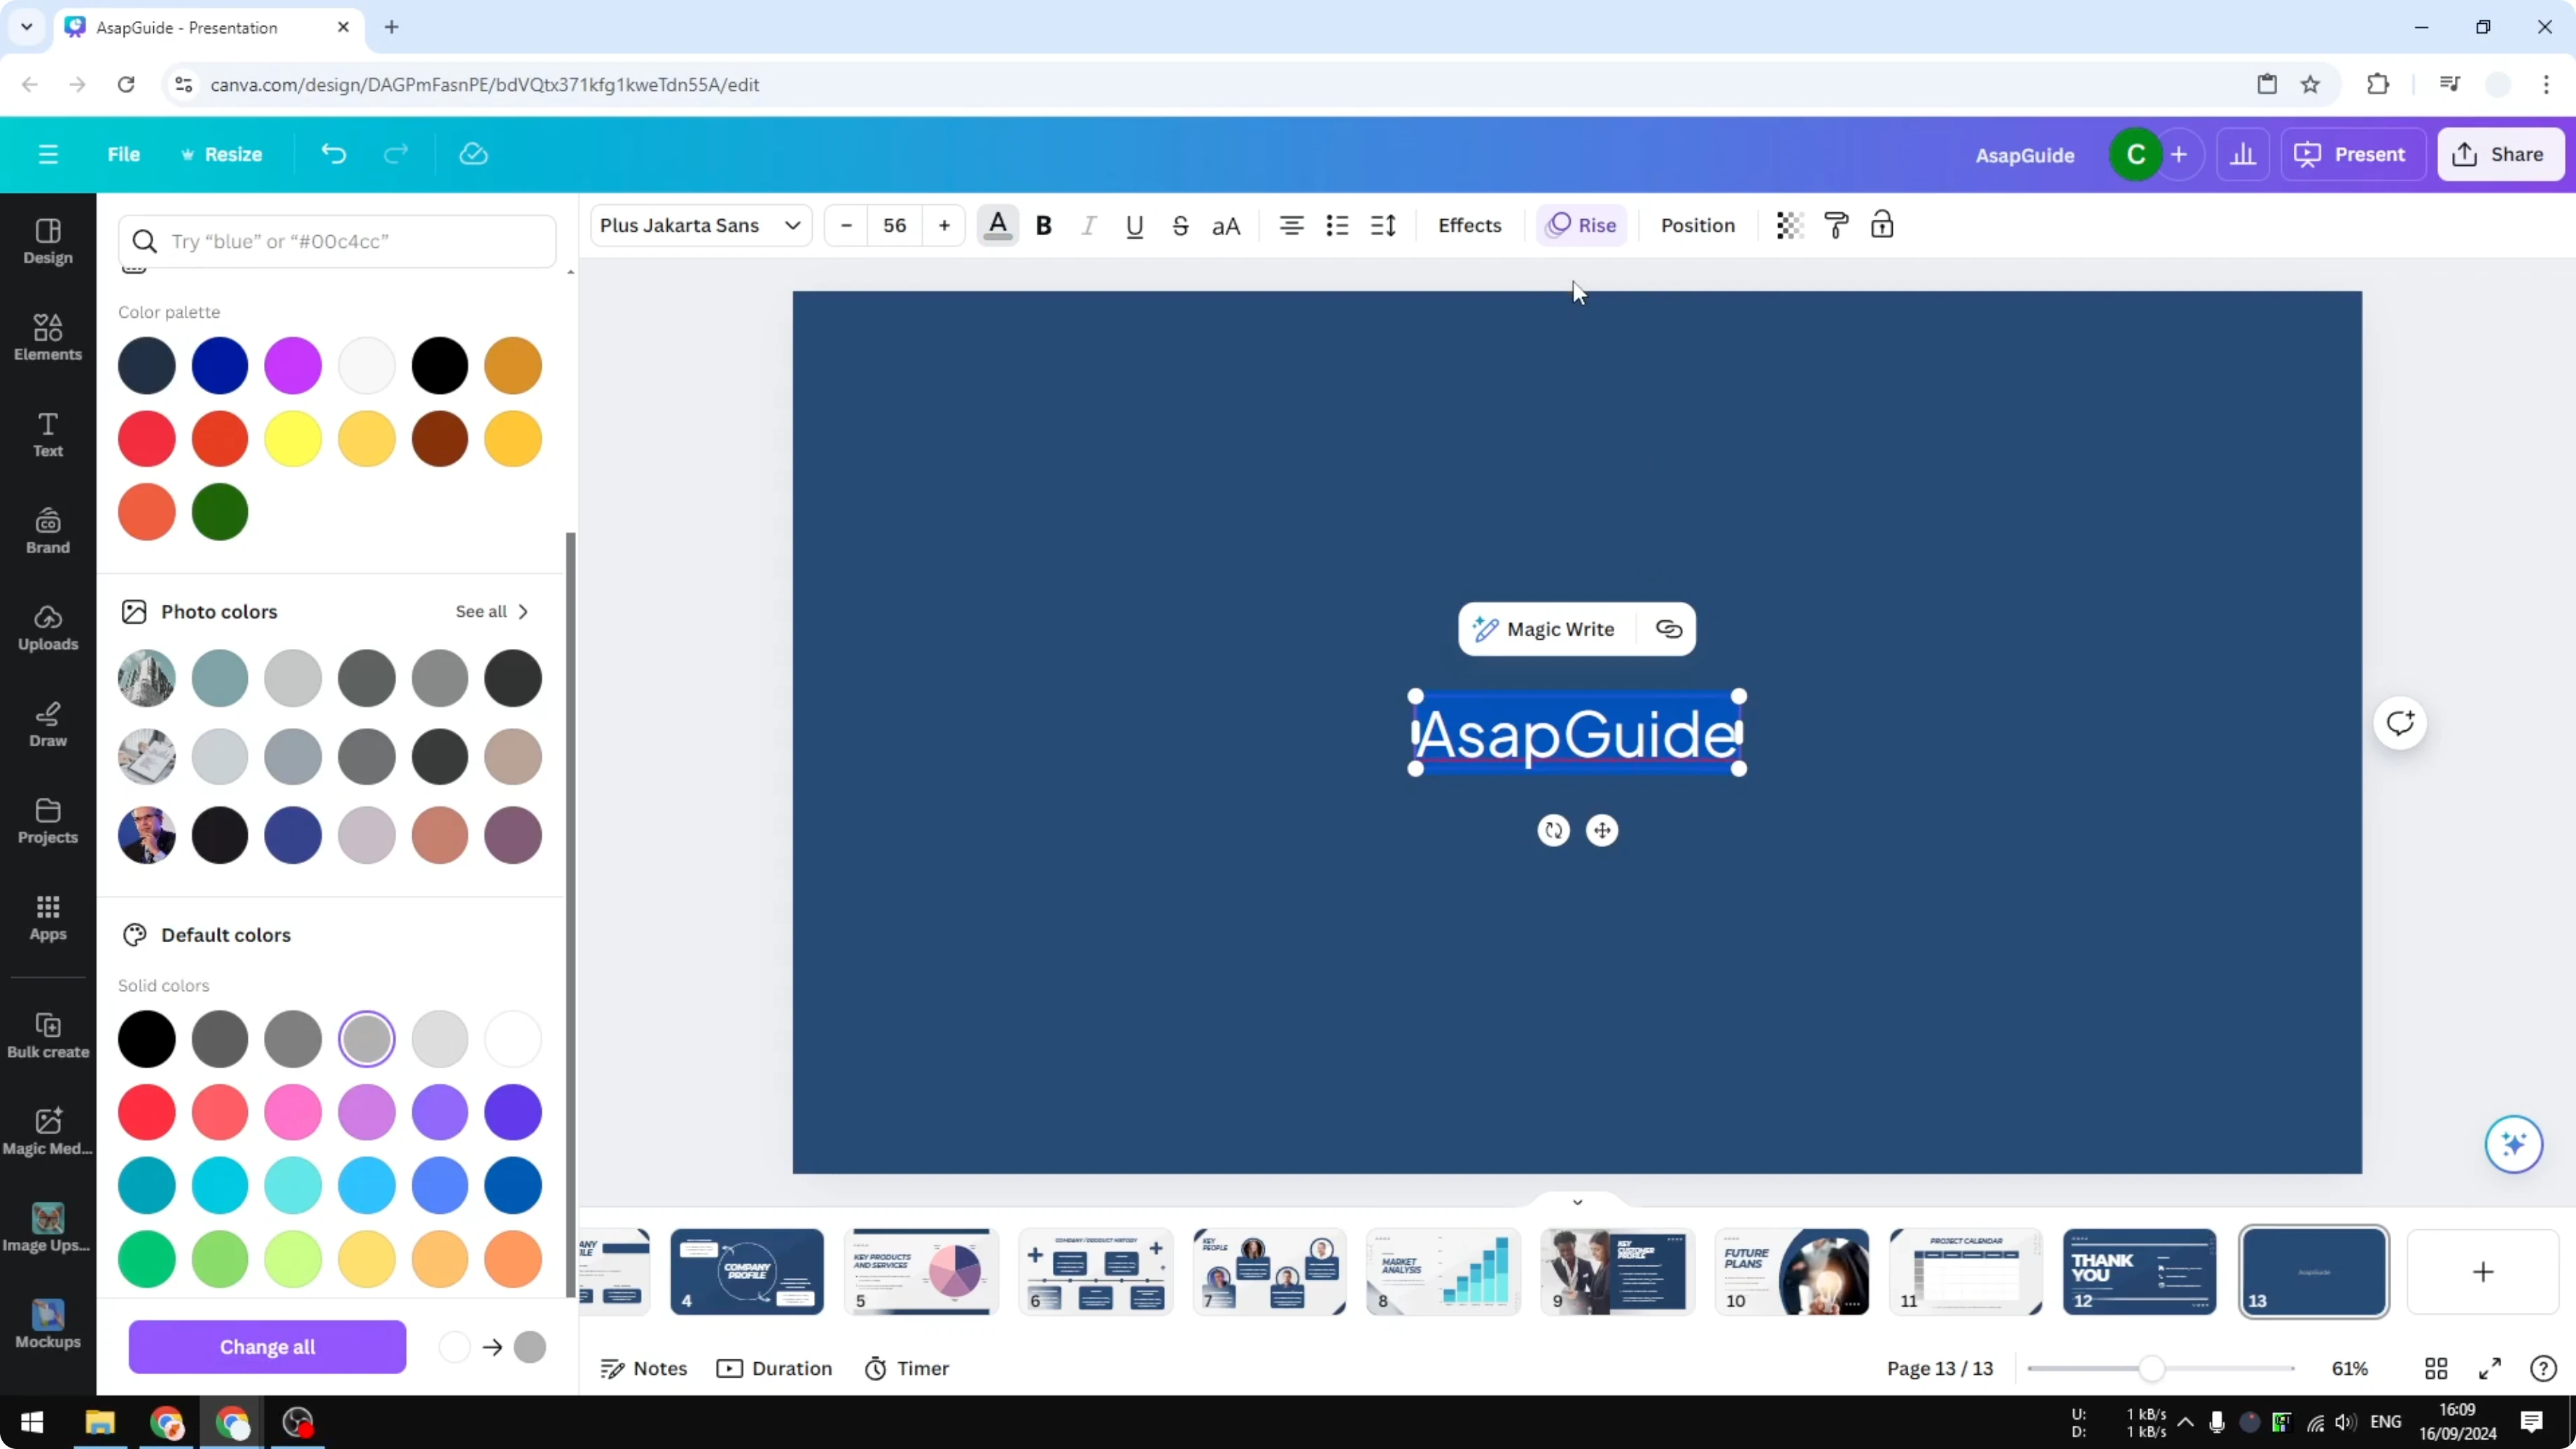
If you are working with brand palettes and want consistency, you can also apply your brand colors to templates before styling the watermark.
Duplicate across the page
Place the text in the middle, then duplicate it and place another on the right side. Copy and paste more text boxes to populate the page as a grid or pattern. You can add just one watermark or several repeated ones to make sure it stays visible.
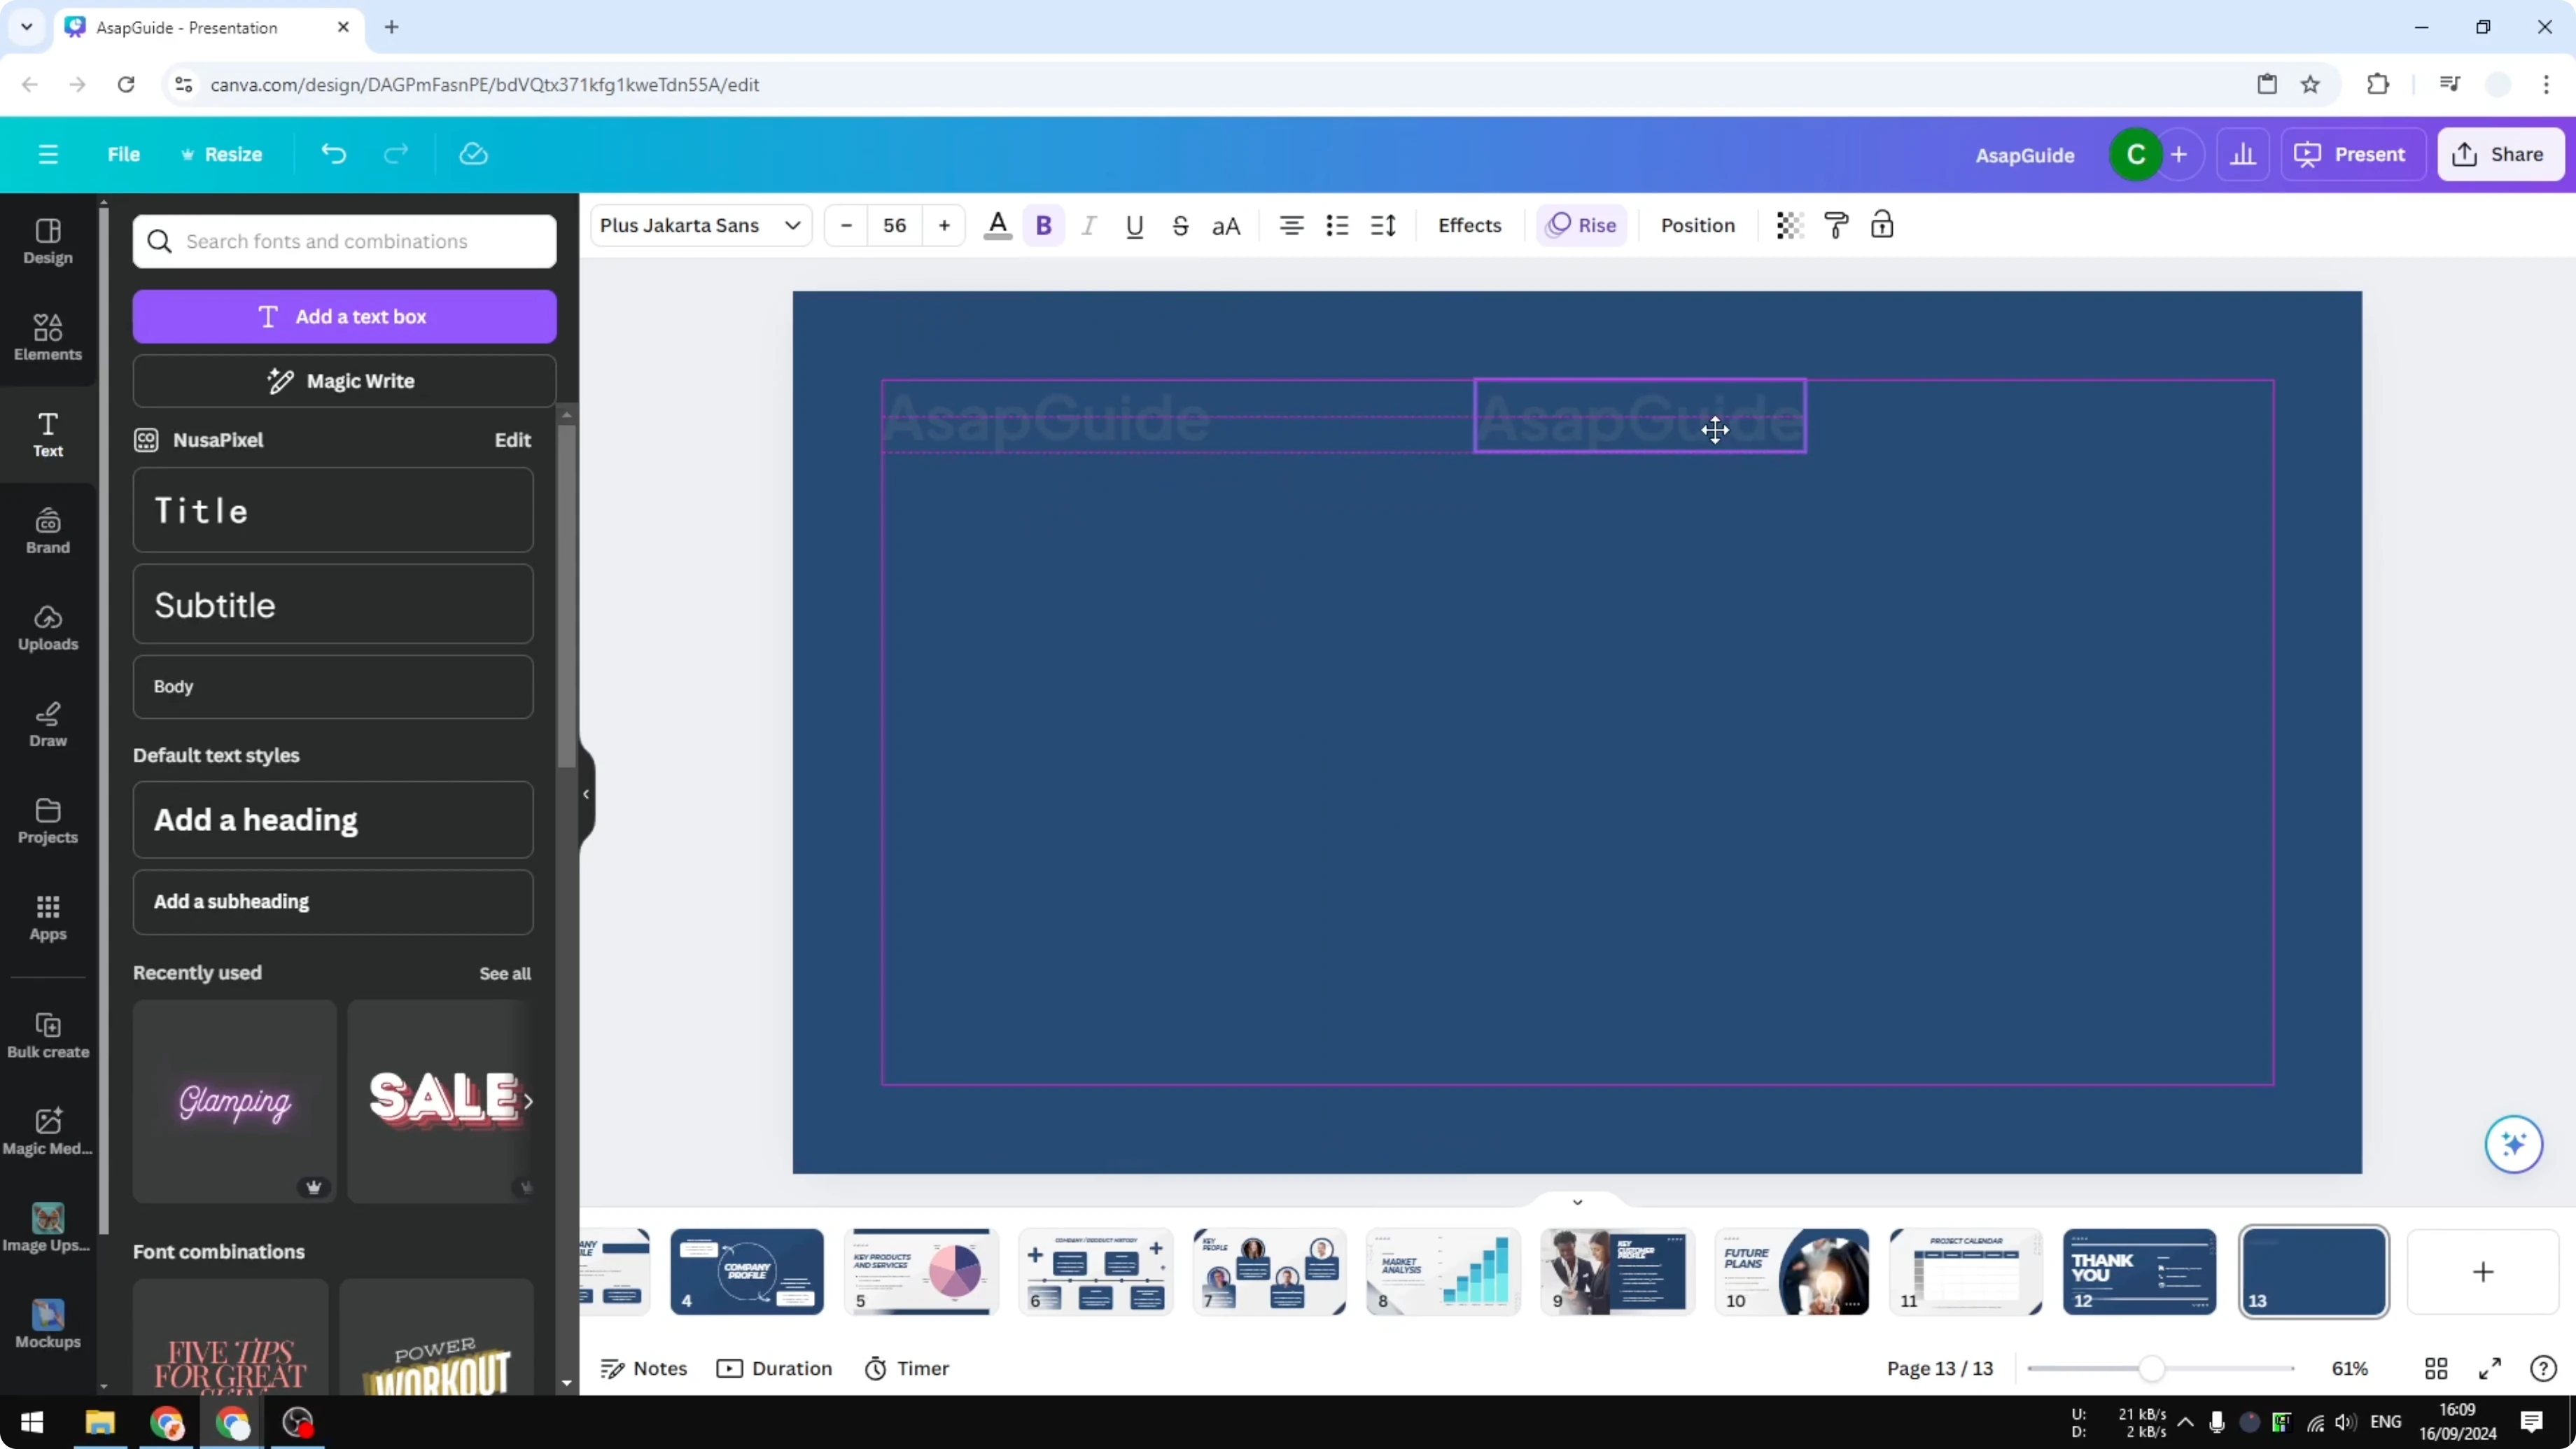
It can take a little time depending on how many marks you add. Multiple instances improve visibility across different layouts. Keep spacing even for a clean look.
If you want to tint images or elements for a branded look instead of repeated text, you can also use a duotone effect in Canva.
Group and apply to all pages
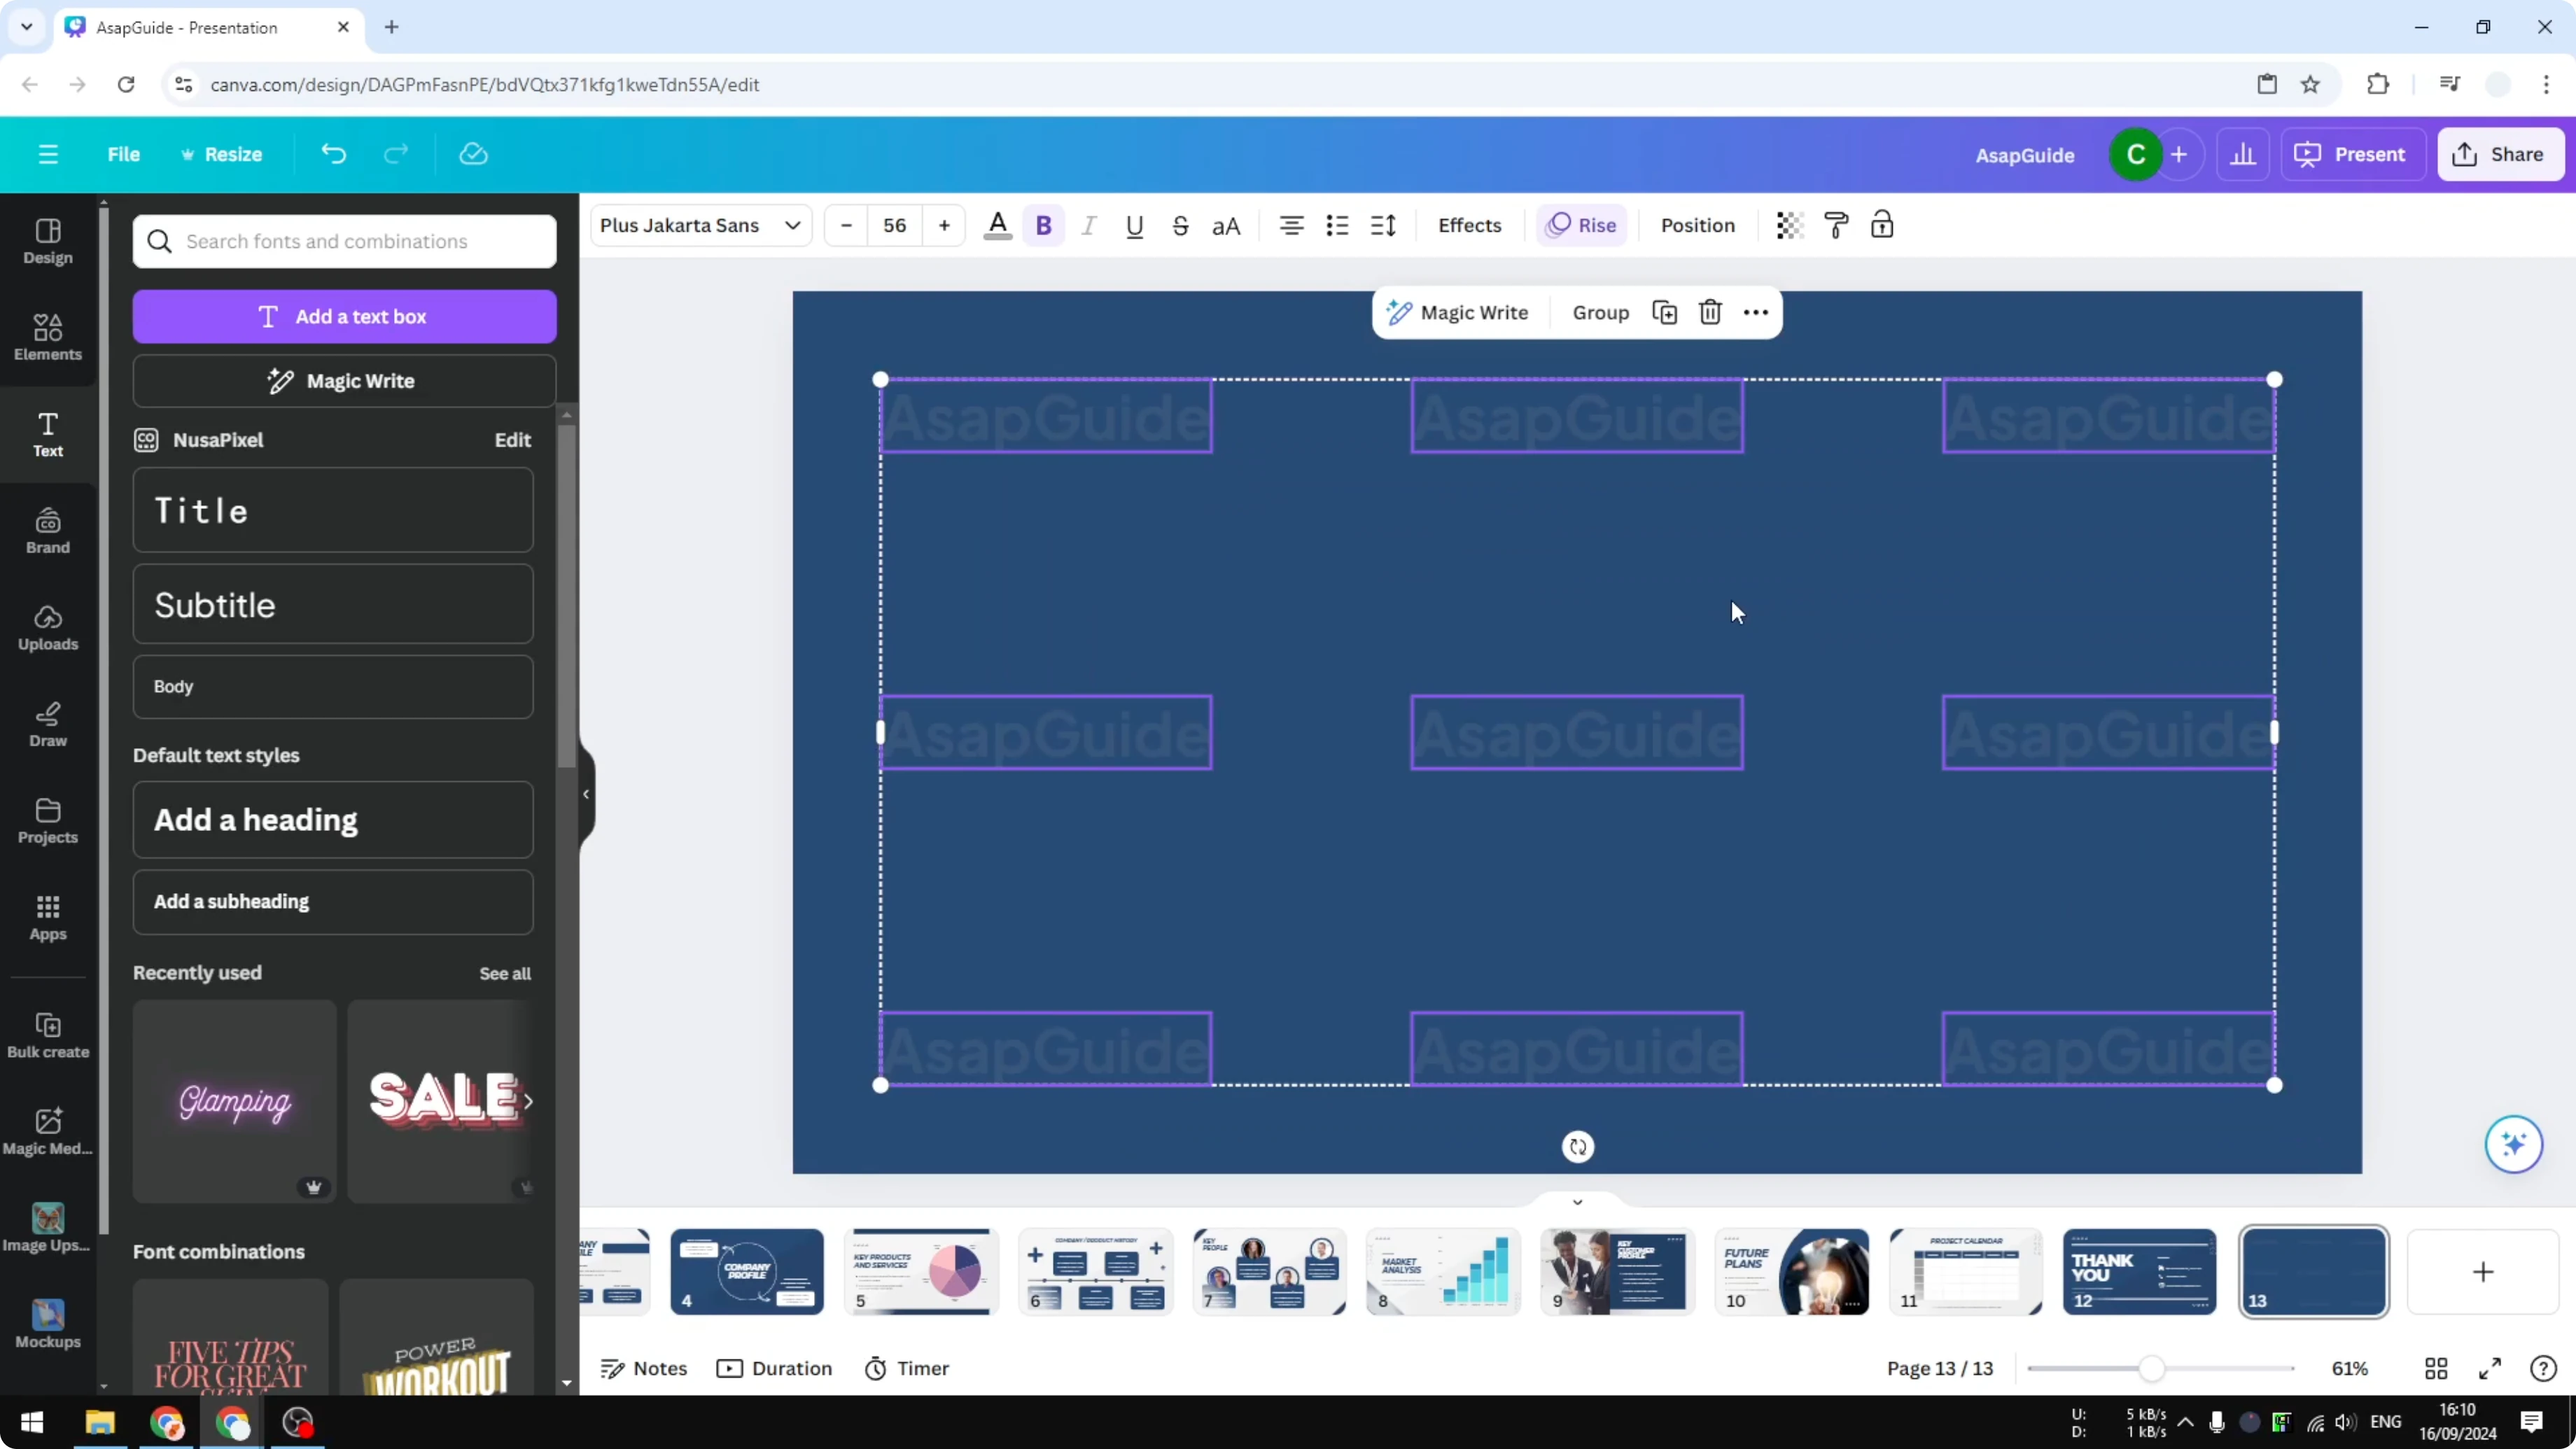
Select all the watermark text boxes. Group them so they act as one element.
Copy the grouped watermark. Paste it onto each page of your document.

This part can feel tedious if you have many pages. If your document has fewer than 30 pages, it is quick and can take less than a minute. I populated 12 slides in a few seconds, and all of them had a visible watermark regardless of the background color.

Useful shortcuts
Use these shortcuts to speed up selection, grouping, copying, and pasting.
Select all watermark text: Ctrl + A (Windows) or Command + A (Mac)
Group selection: Ctrl + G (Windows) or Command + G (Mac)
Copy: Ctrl + C (Windows) or Command + C (Mac)
Paste: Ctrl + V (Windows) or Command + V (Mac)
Duplicate element: Ctrl + D (Windows) or Command + D (Mac)
Final thoughts
This approach creates a consistent watermark using text or a logo, styled in gray with low transparency. Group your watermark, then copy and paste it across pages for fast coverage. It is a practical workaround that works on documents, slide decks, and other Canva designs.
Recent Posts

How to Visualize Yourself as a Pixelized Character with AI?
How to Visualize Yourself as a Pixelized Character with AI?

How to Revive Faded Memories and Enhance Image Clarity with AI?
How to Revive Faded Memories and Enhance Image Clarity with AI?

How to Visualize Yourself as an Animal Crossing Character with AI?
How to Visualize Yourself as an Animal Crossing Character with AI?