How to Blur Part of a Photo in Canva
I’m going to show you how to blur part of a photo in Canva. My goal is to focus the viewer’s attention on one of two photographs someone is holding. I want one photo in focus and the rest blurred. There are a few methods to get that effect.
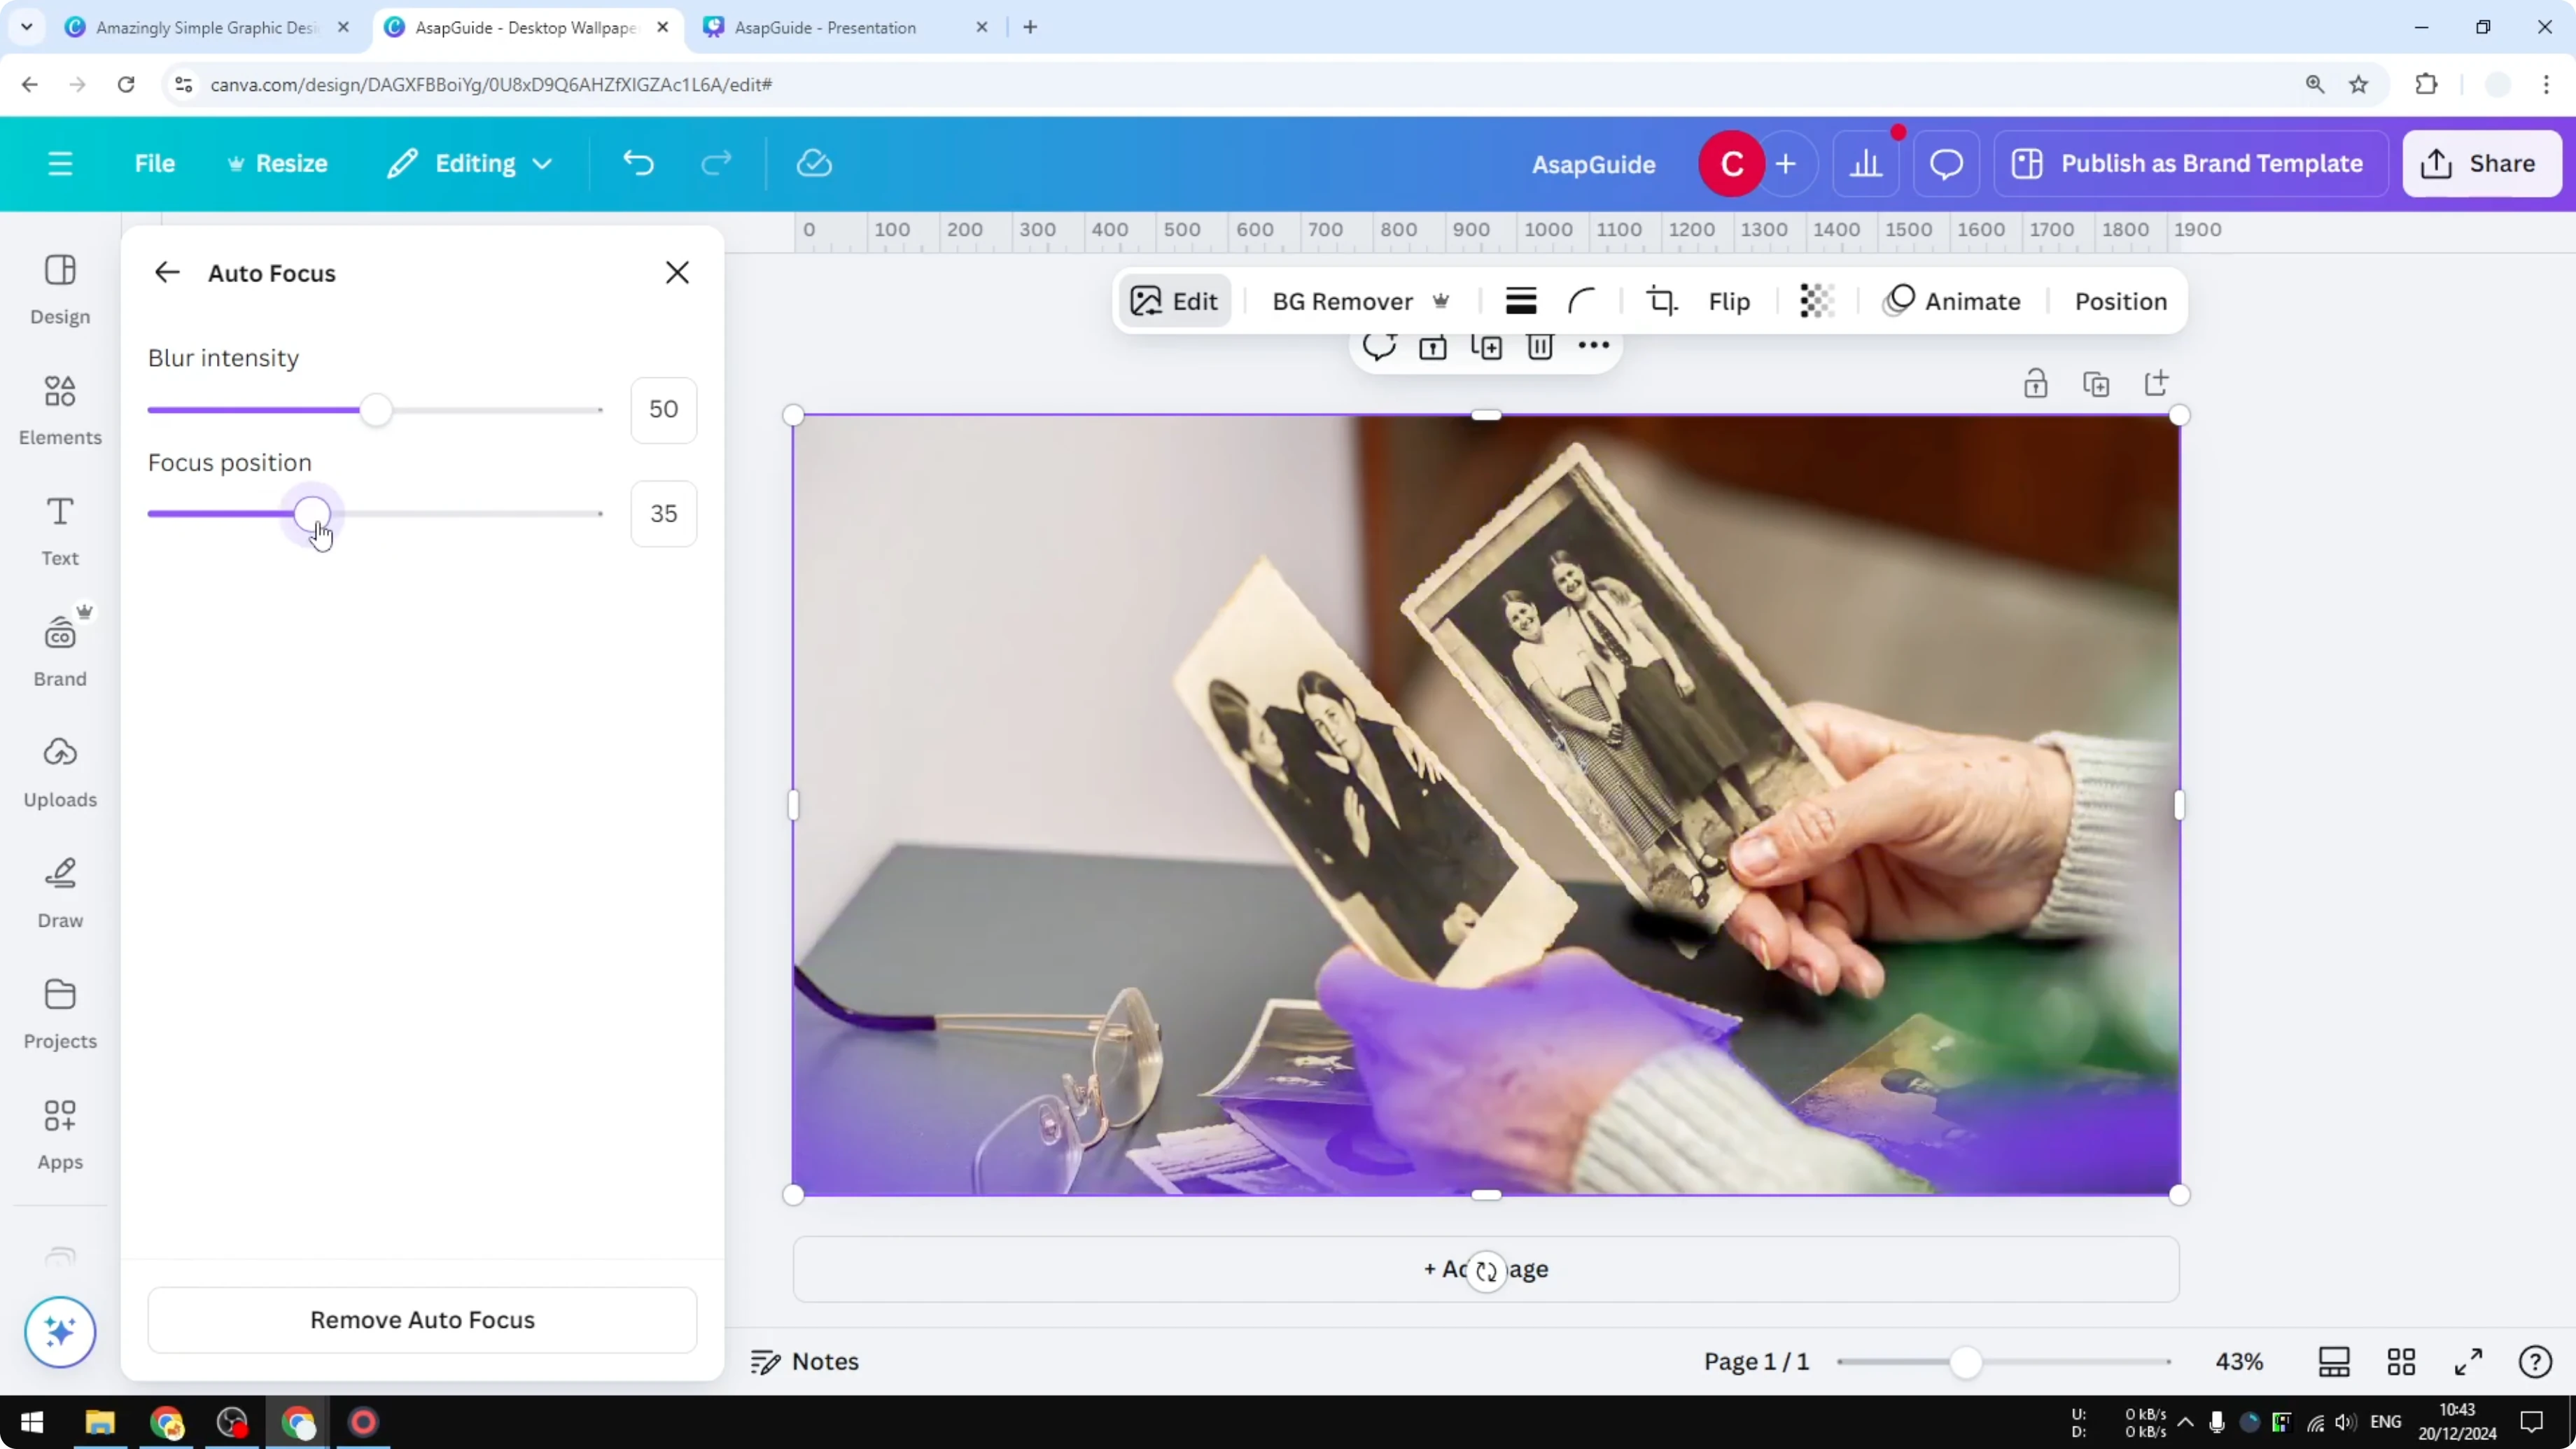
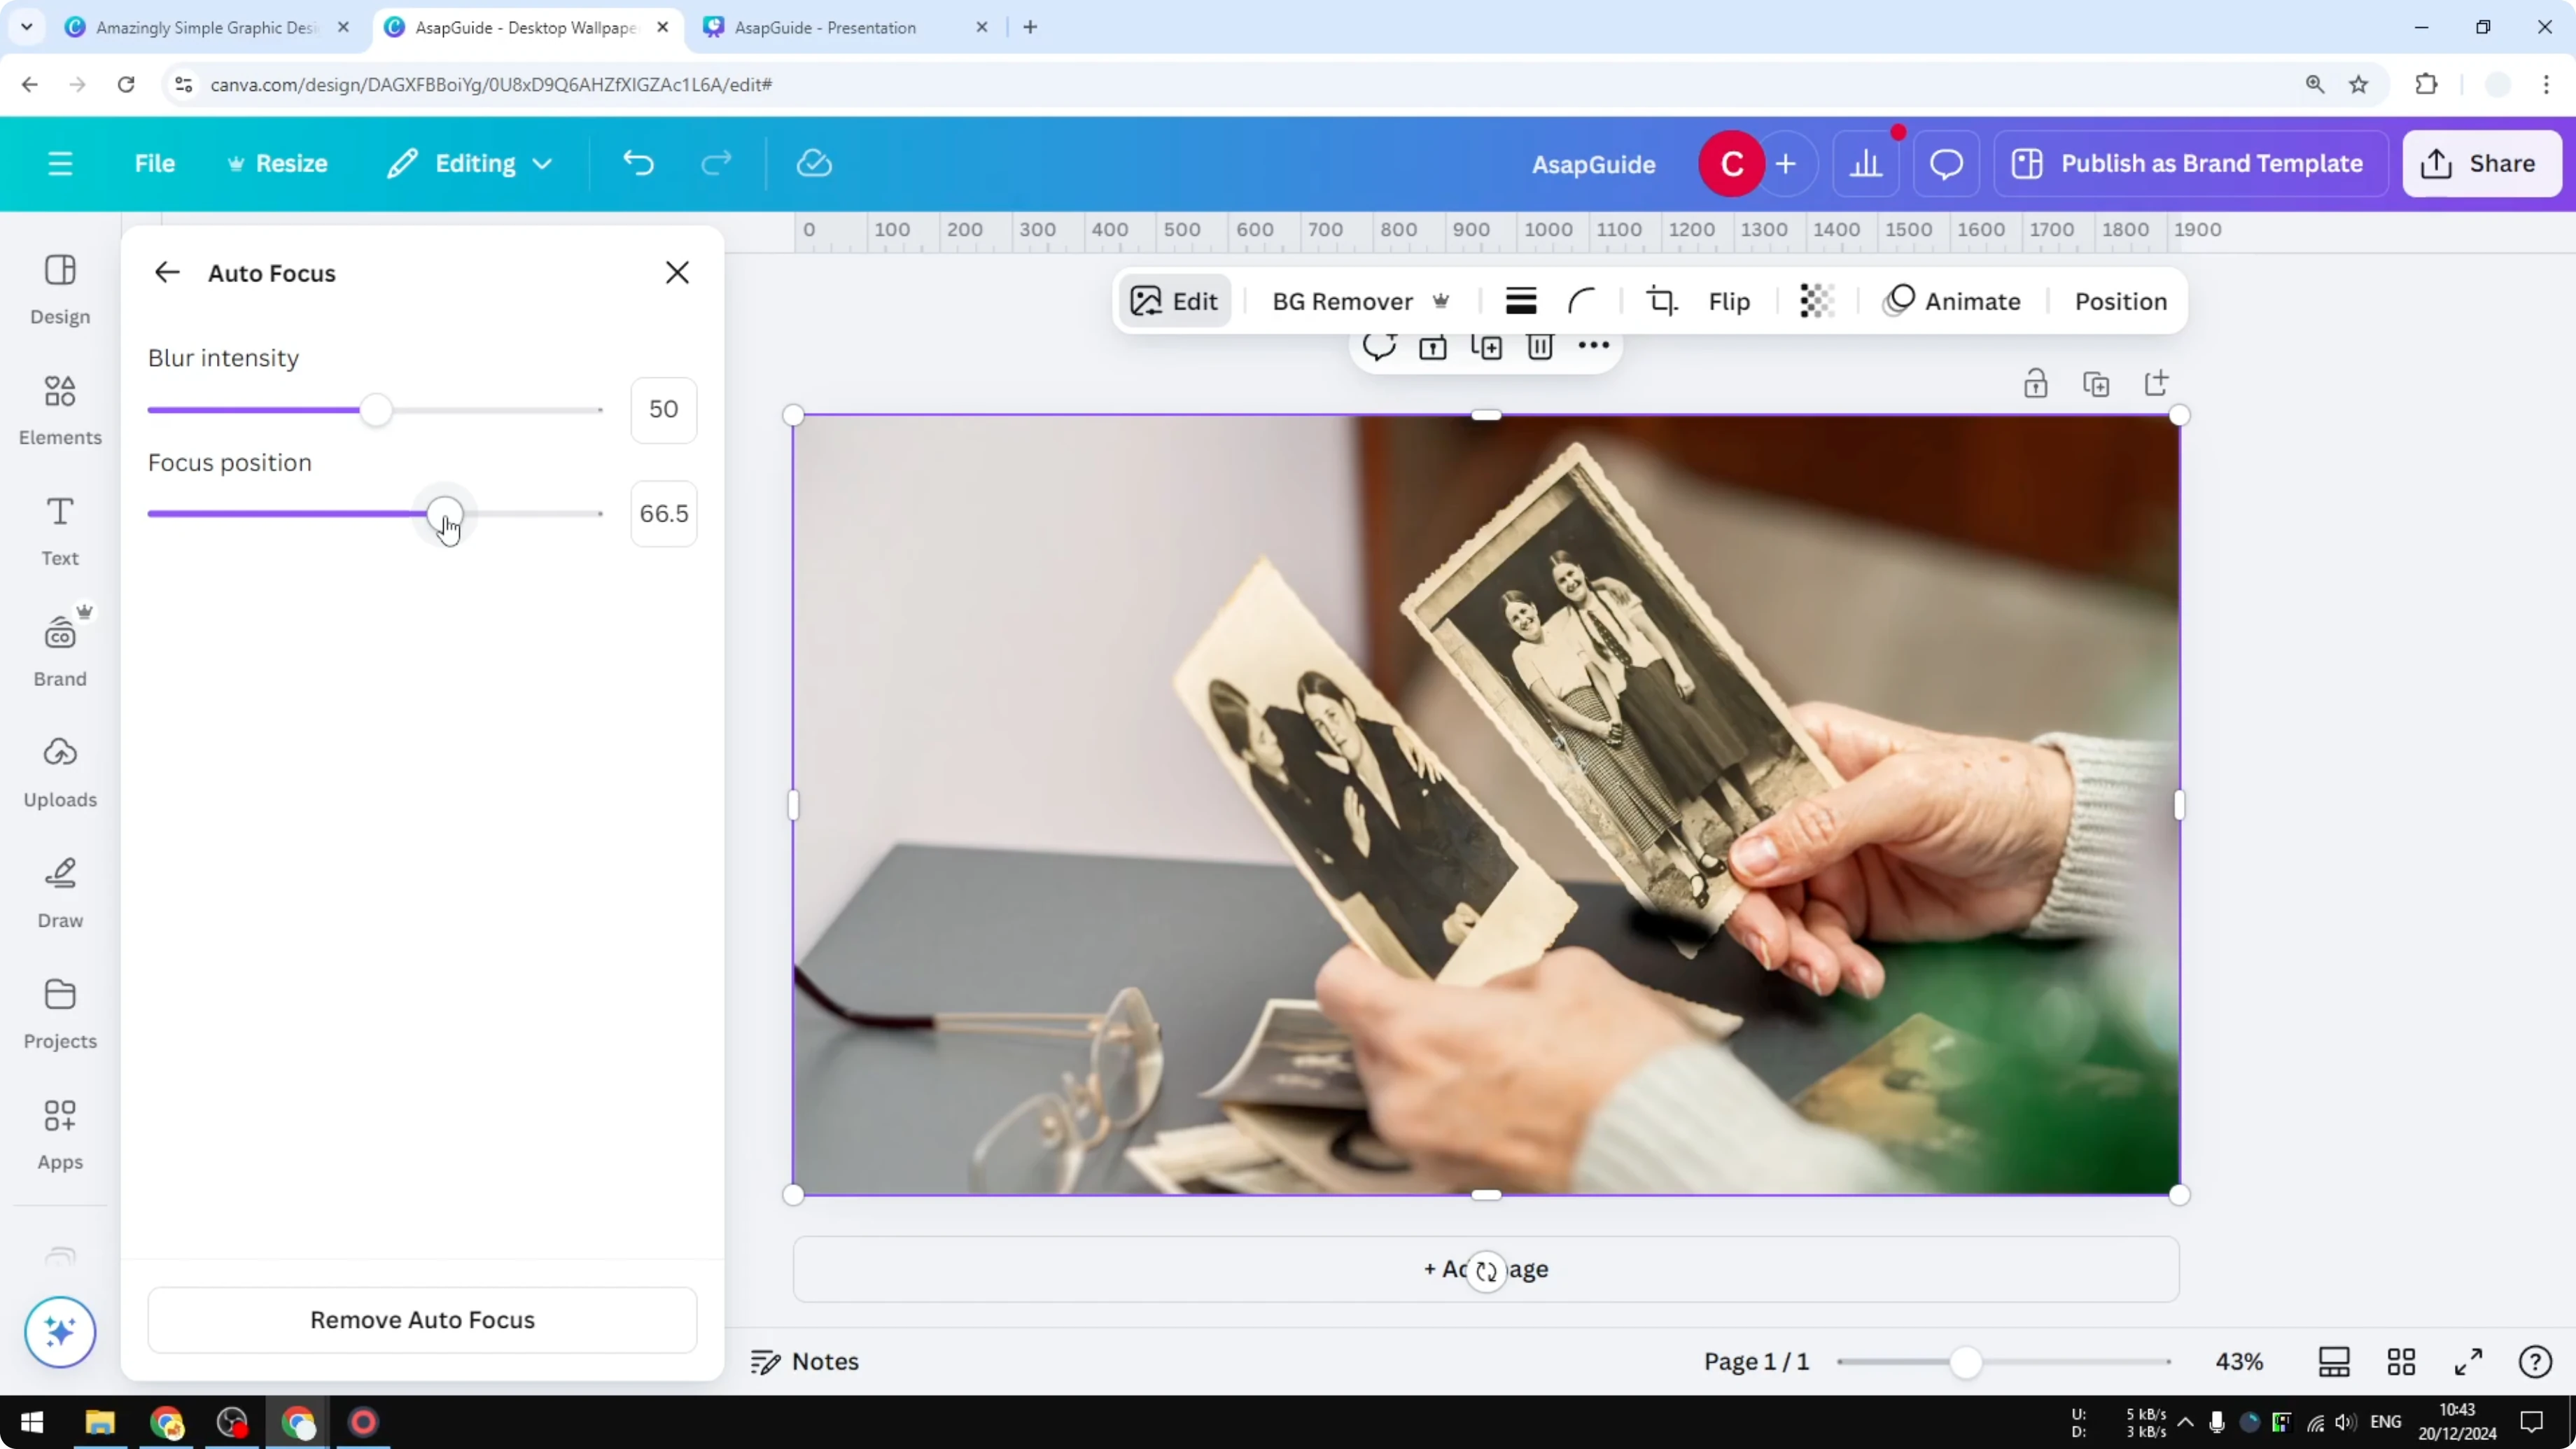
Blur Part of a Photo in Canva with Auto Focus
This is where the magic lies if your photo has a clear subject and background.
Step-by-step:
- Insert the photo into your canvas.
- Click the photo, click Edit.
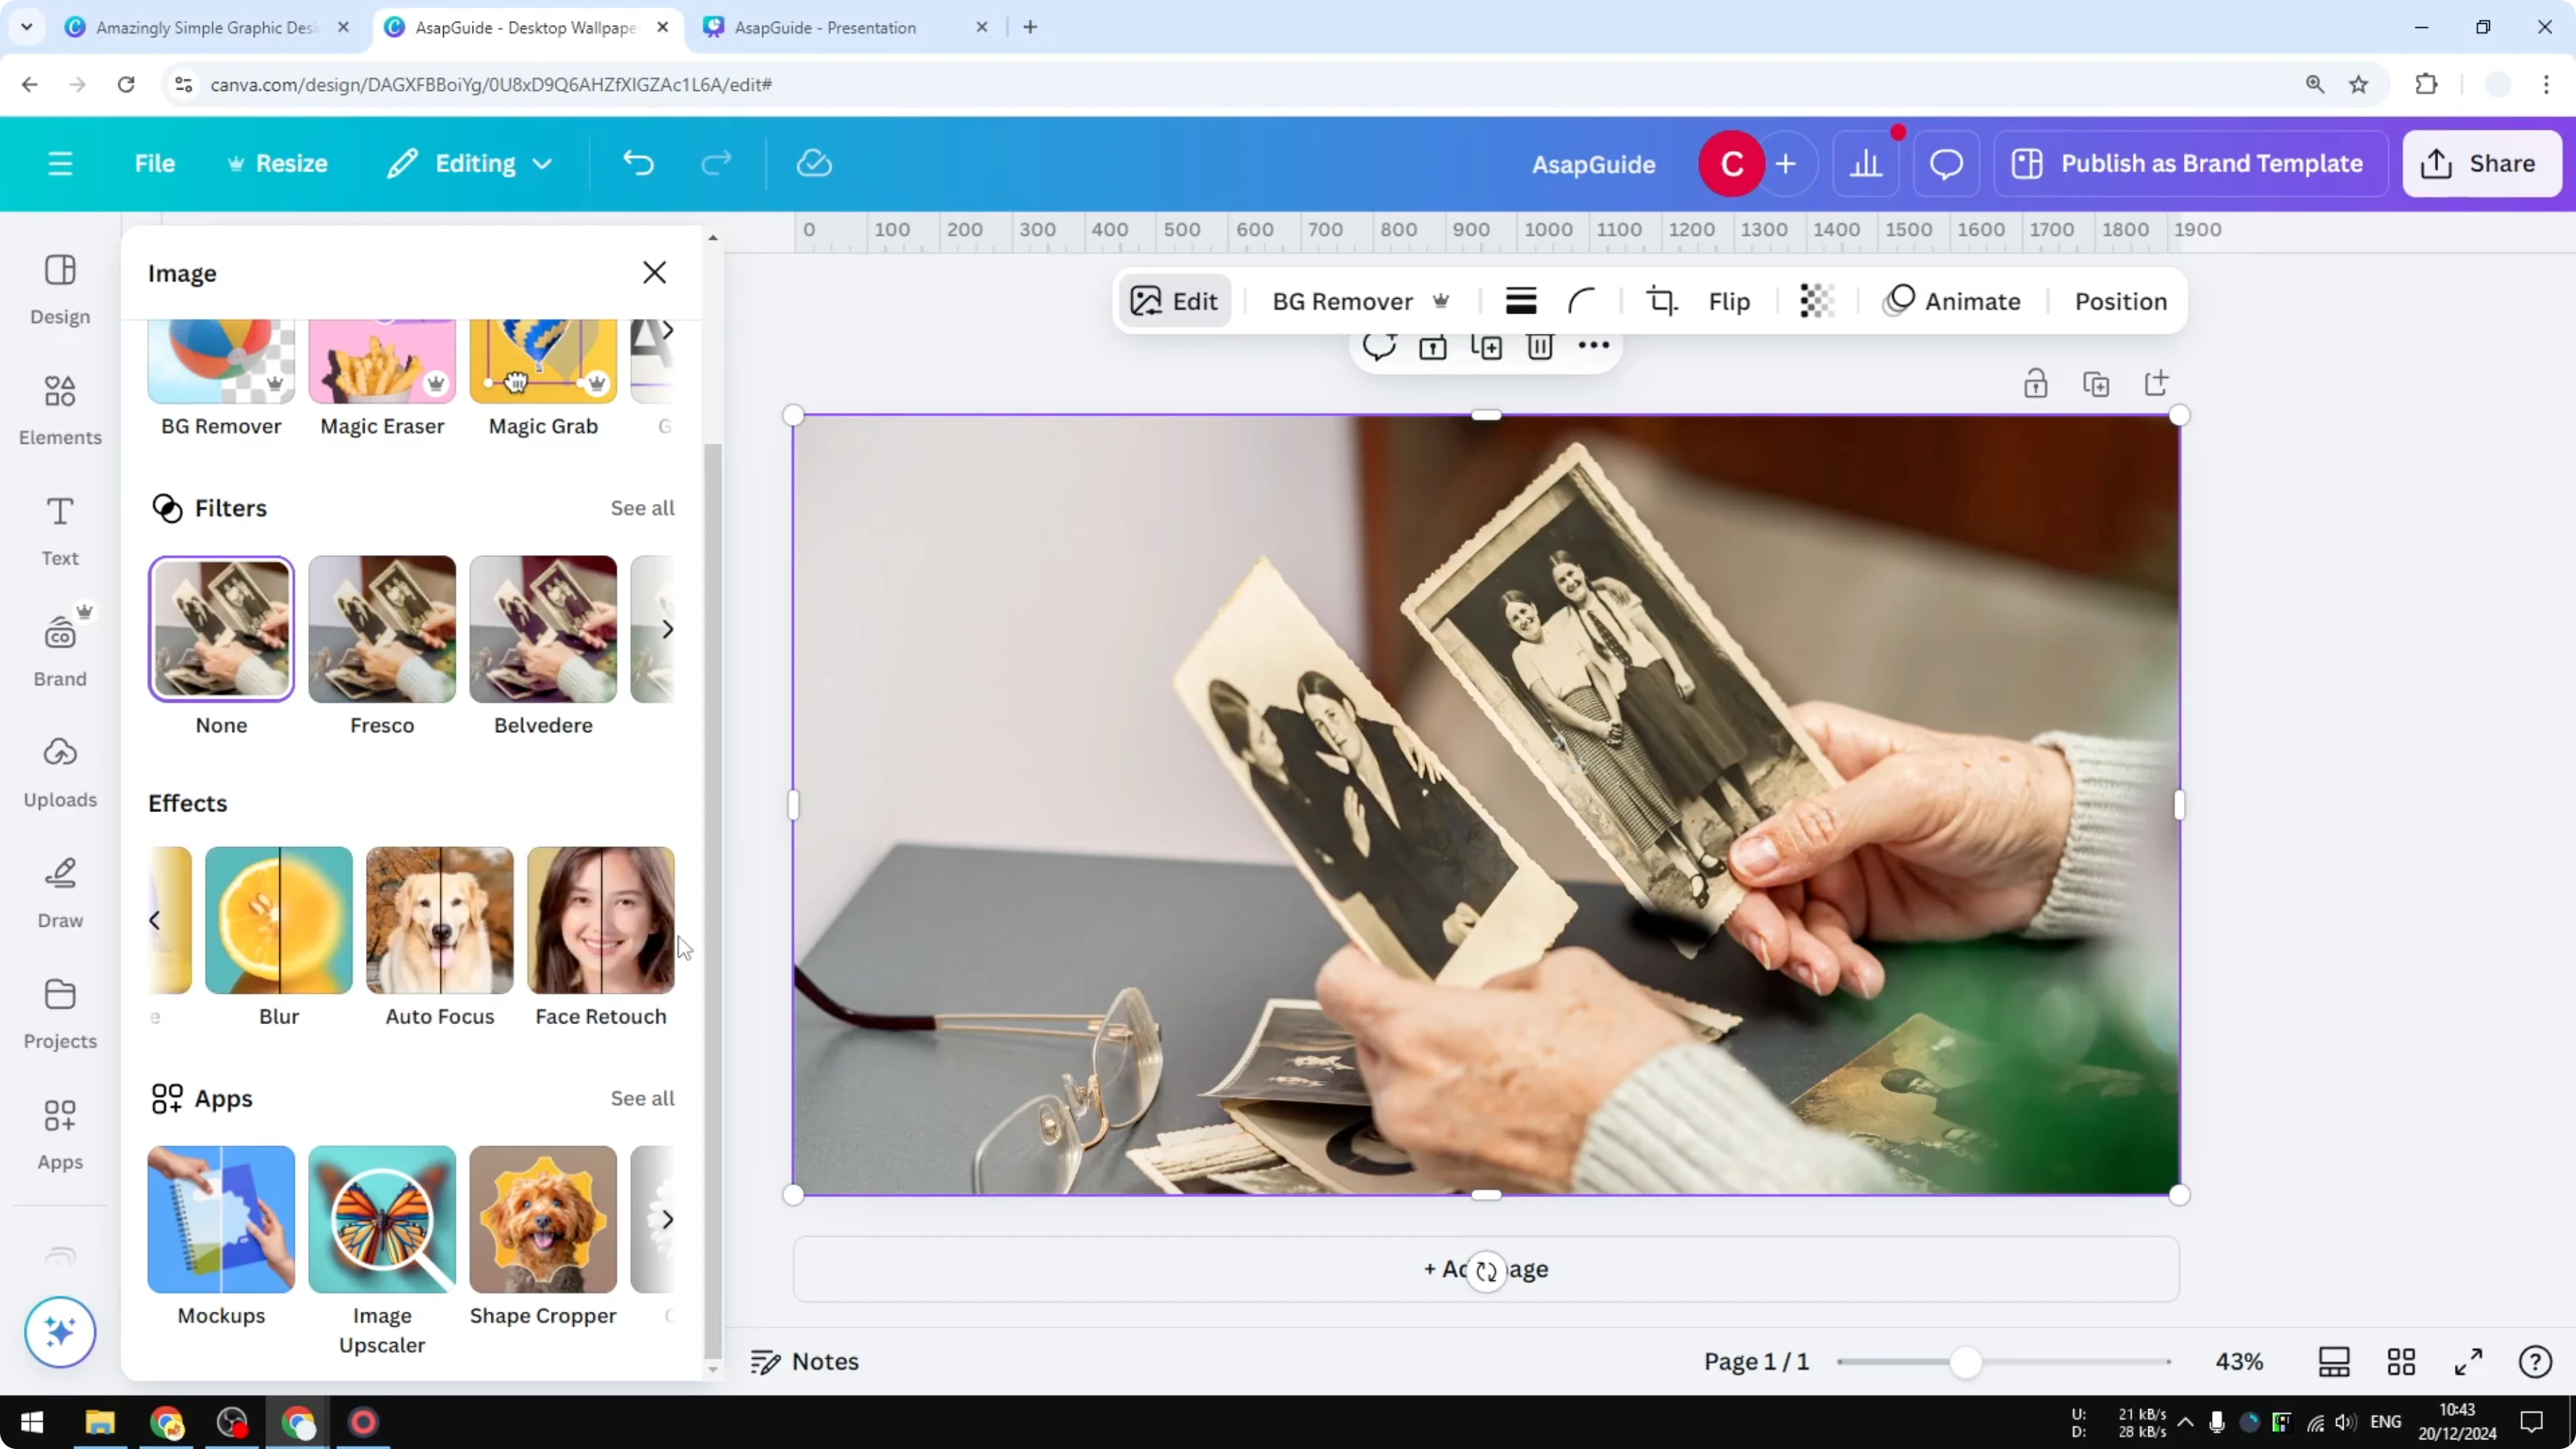
- Scroll to Effects and open Auto Focus.
- Set the focus position to define the area that will stay sharp. The rest will be blurred.
- Move the slider. You’ll see an orange overlay that shows the focus area. The stronger the purple color, the more focused that area will be.
- Adjust the blur intensity to control how much the rest of the photo is blurred.
I think this method is very simple if you have a simple photo with a subject and a clear background.
Blur Part of a Photo in Canva by Duplicating and Isolating (Magic Grab)
I’m going to isolate one photo and blur the rest.
Why duplicate first:
- I highly recommend duplicating the photo before applying this second technique. It gives a better result and avoids weird artifacts because we’re using AI, and sometimes it can accidentally edit the original photo.
Step-by-step:
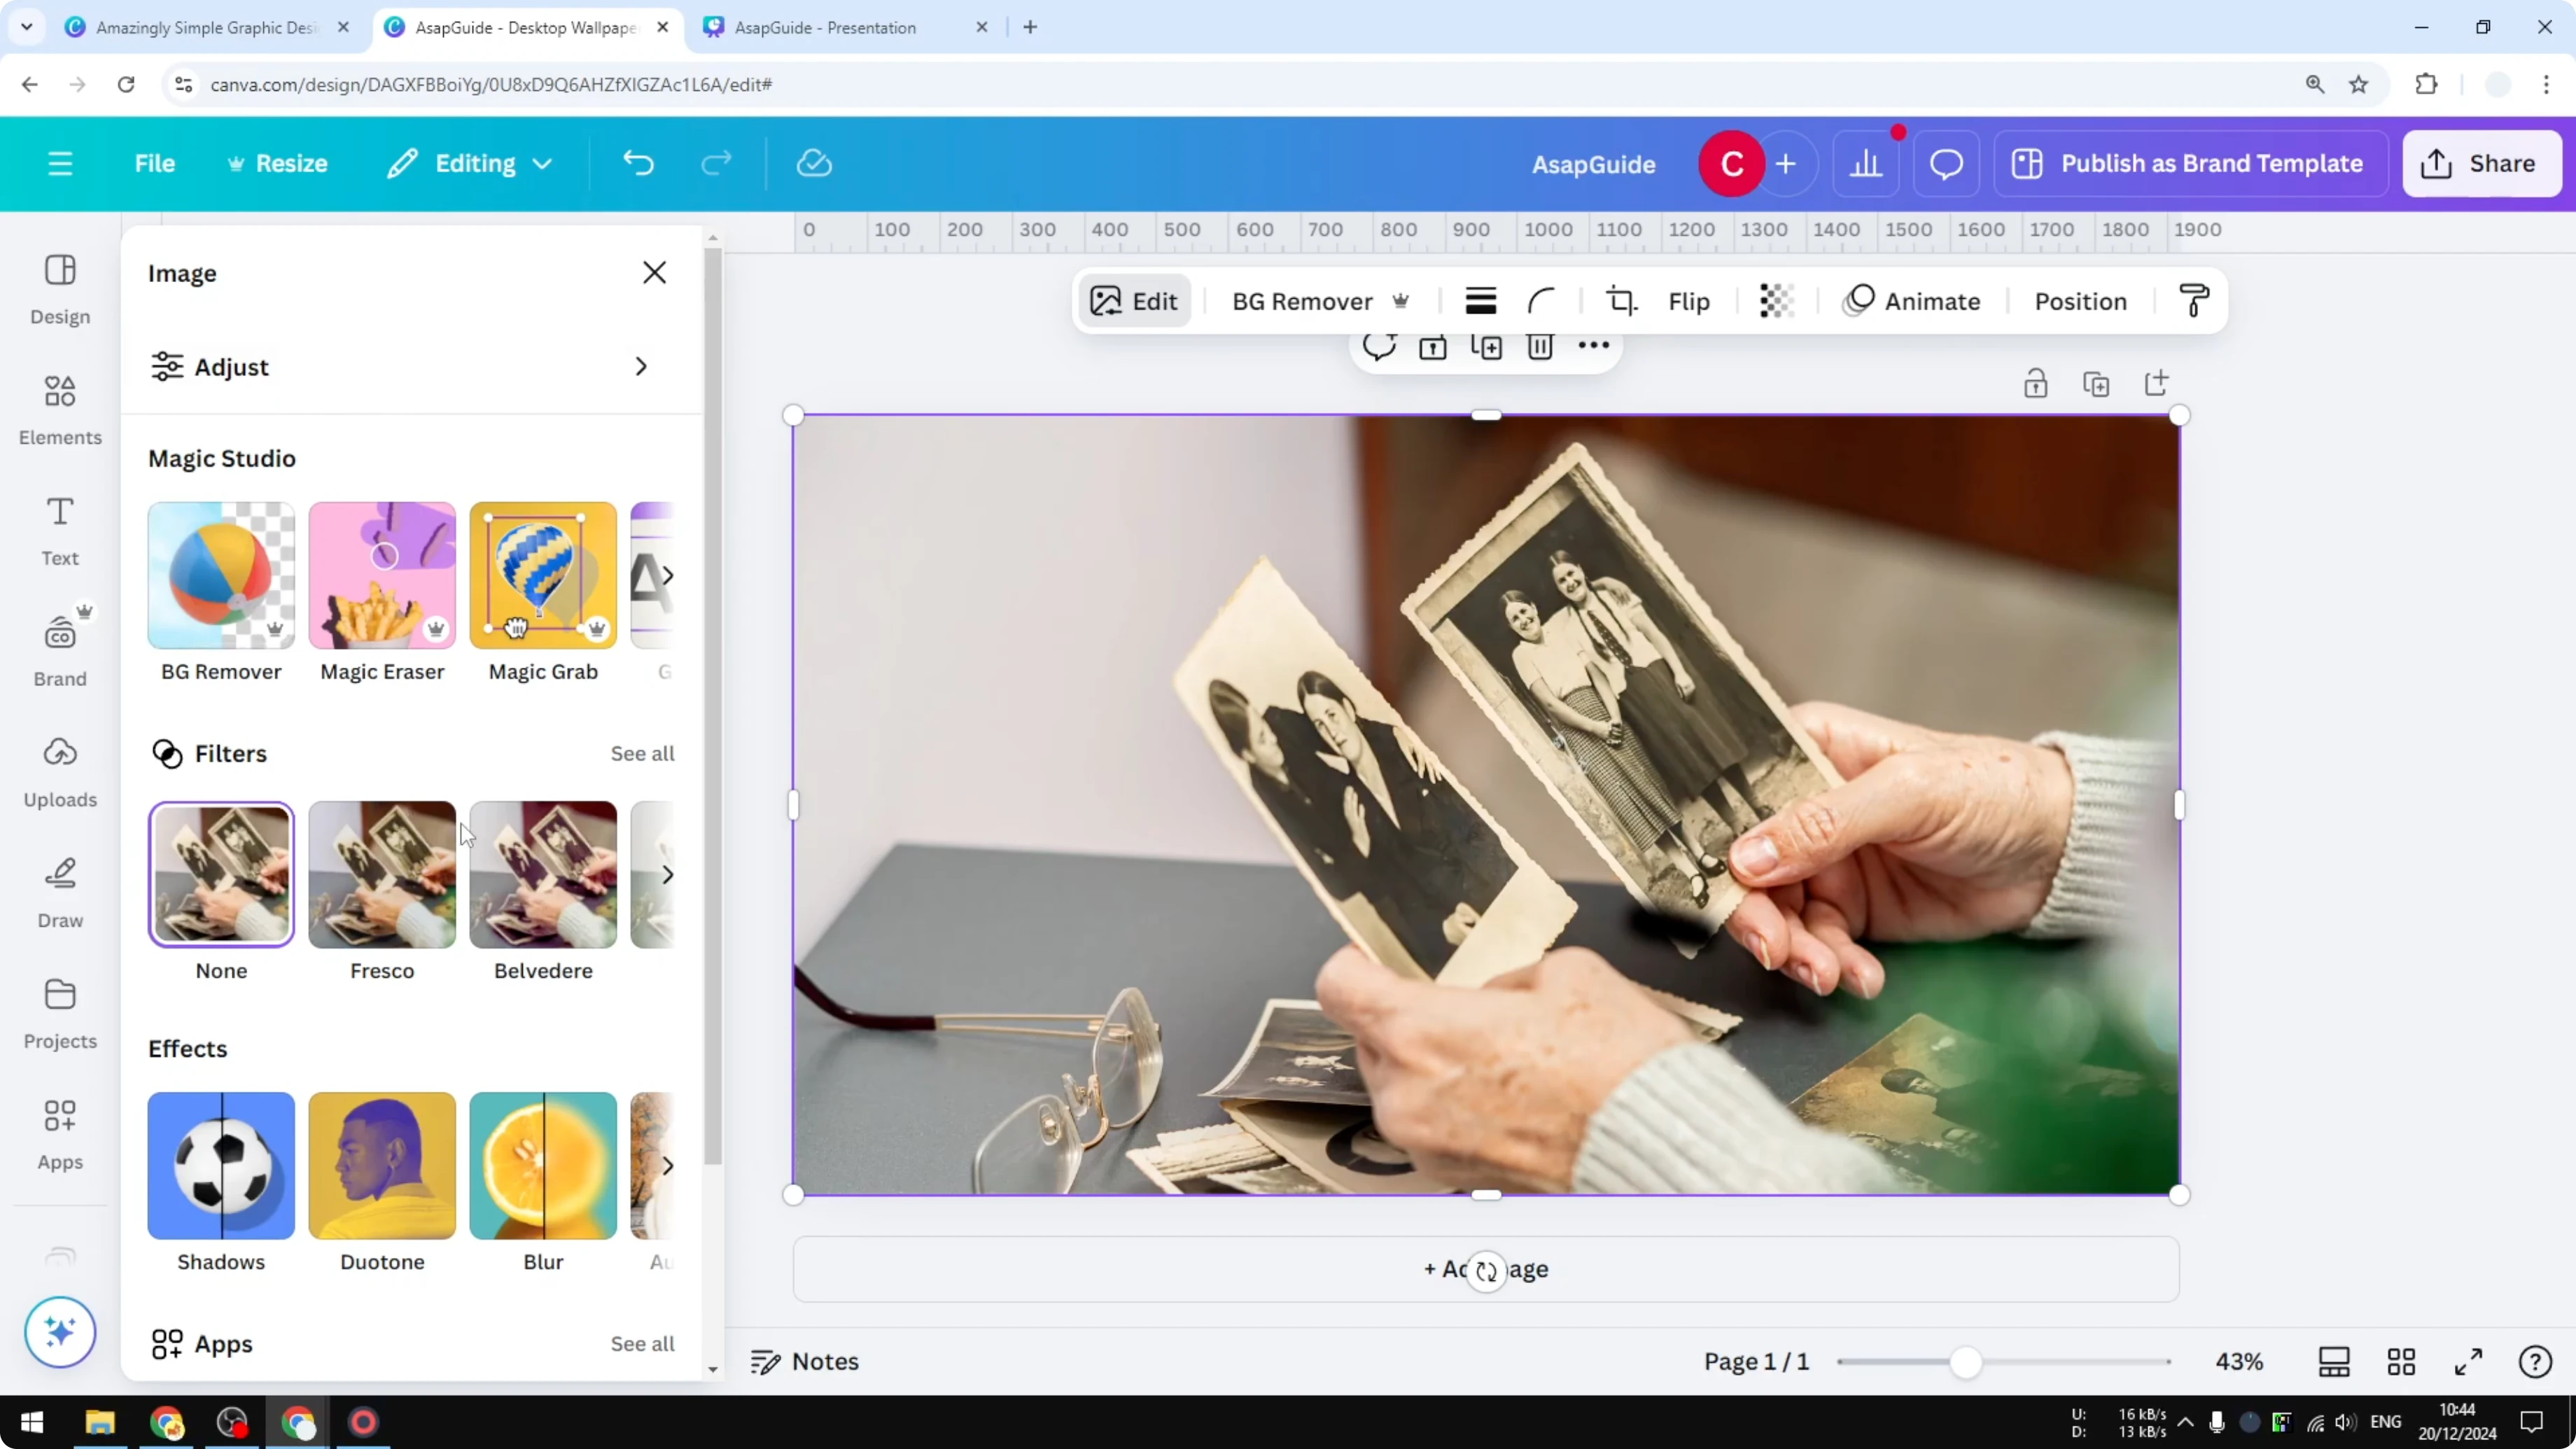
- Duplicate the photo.
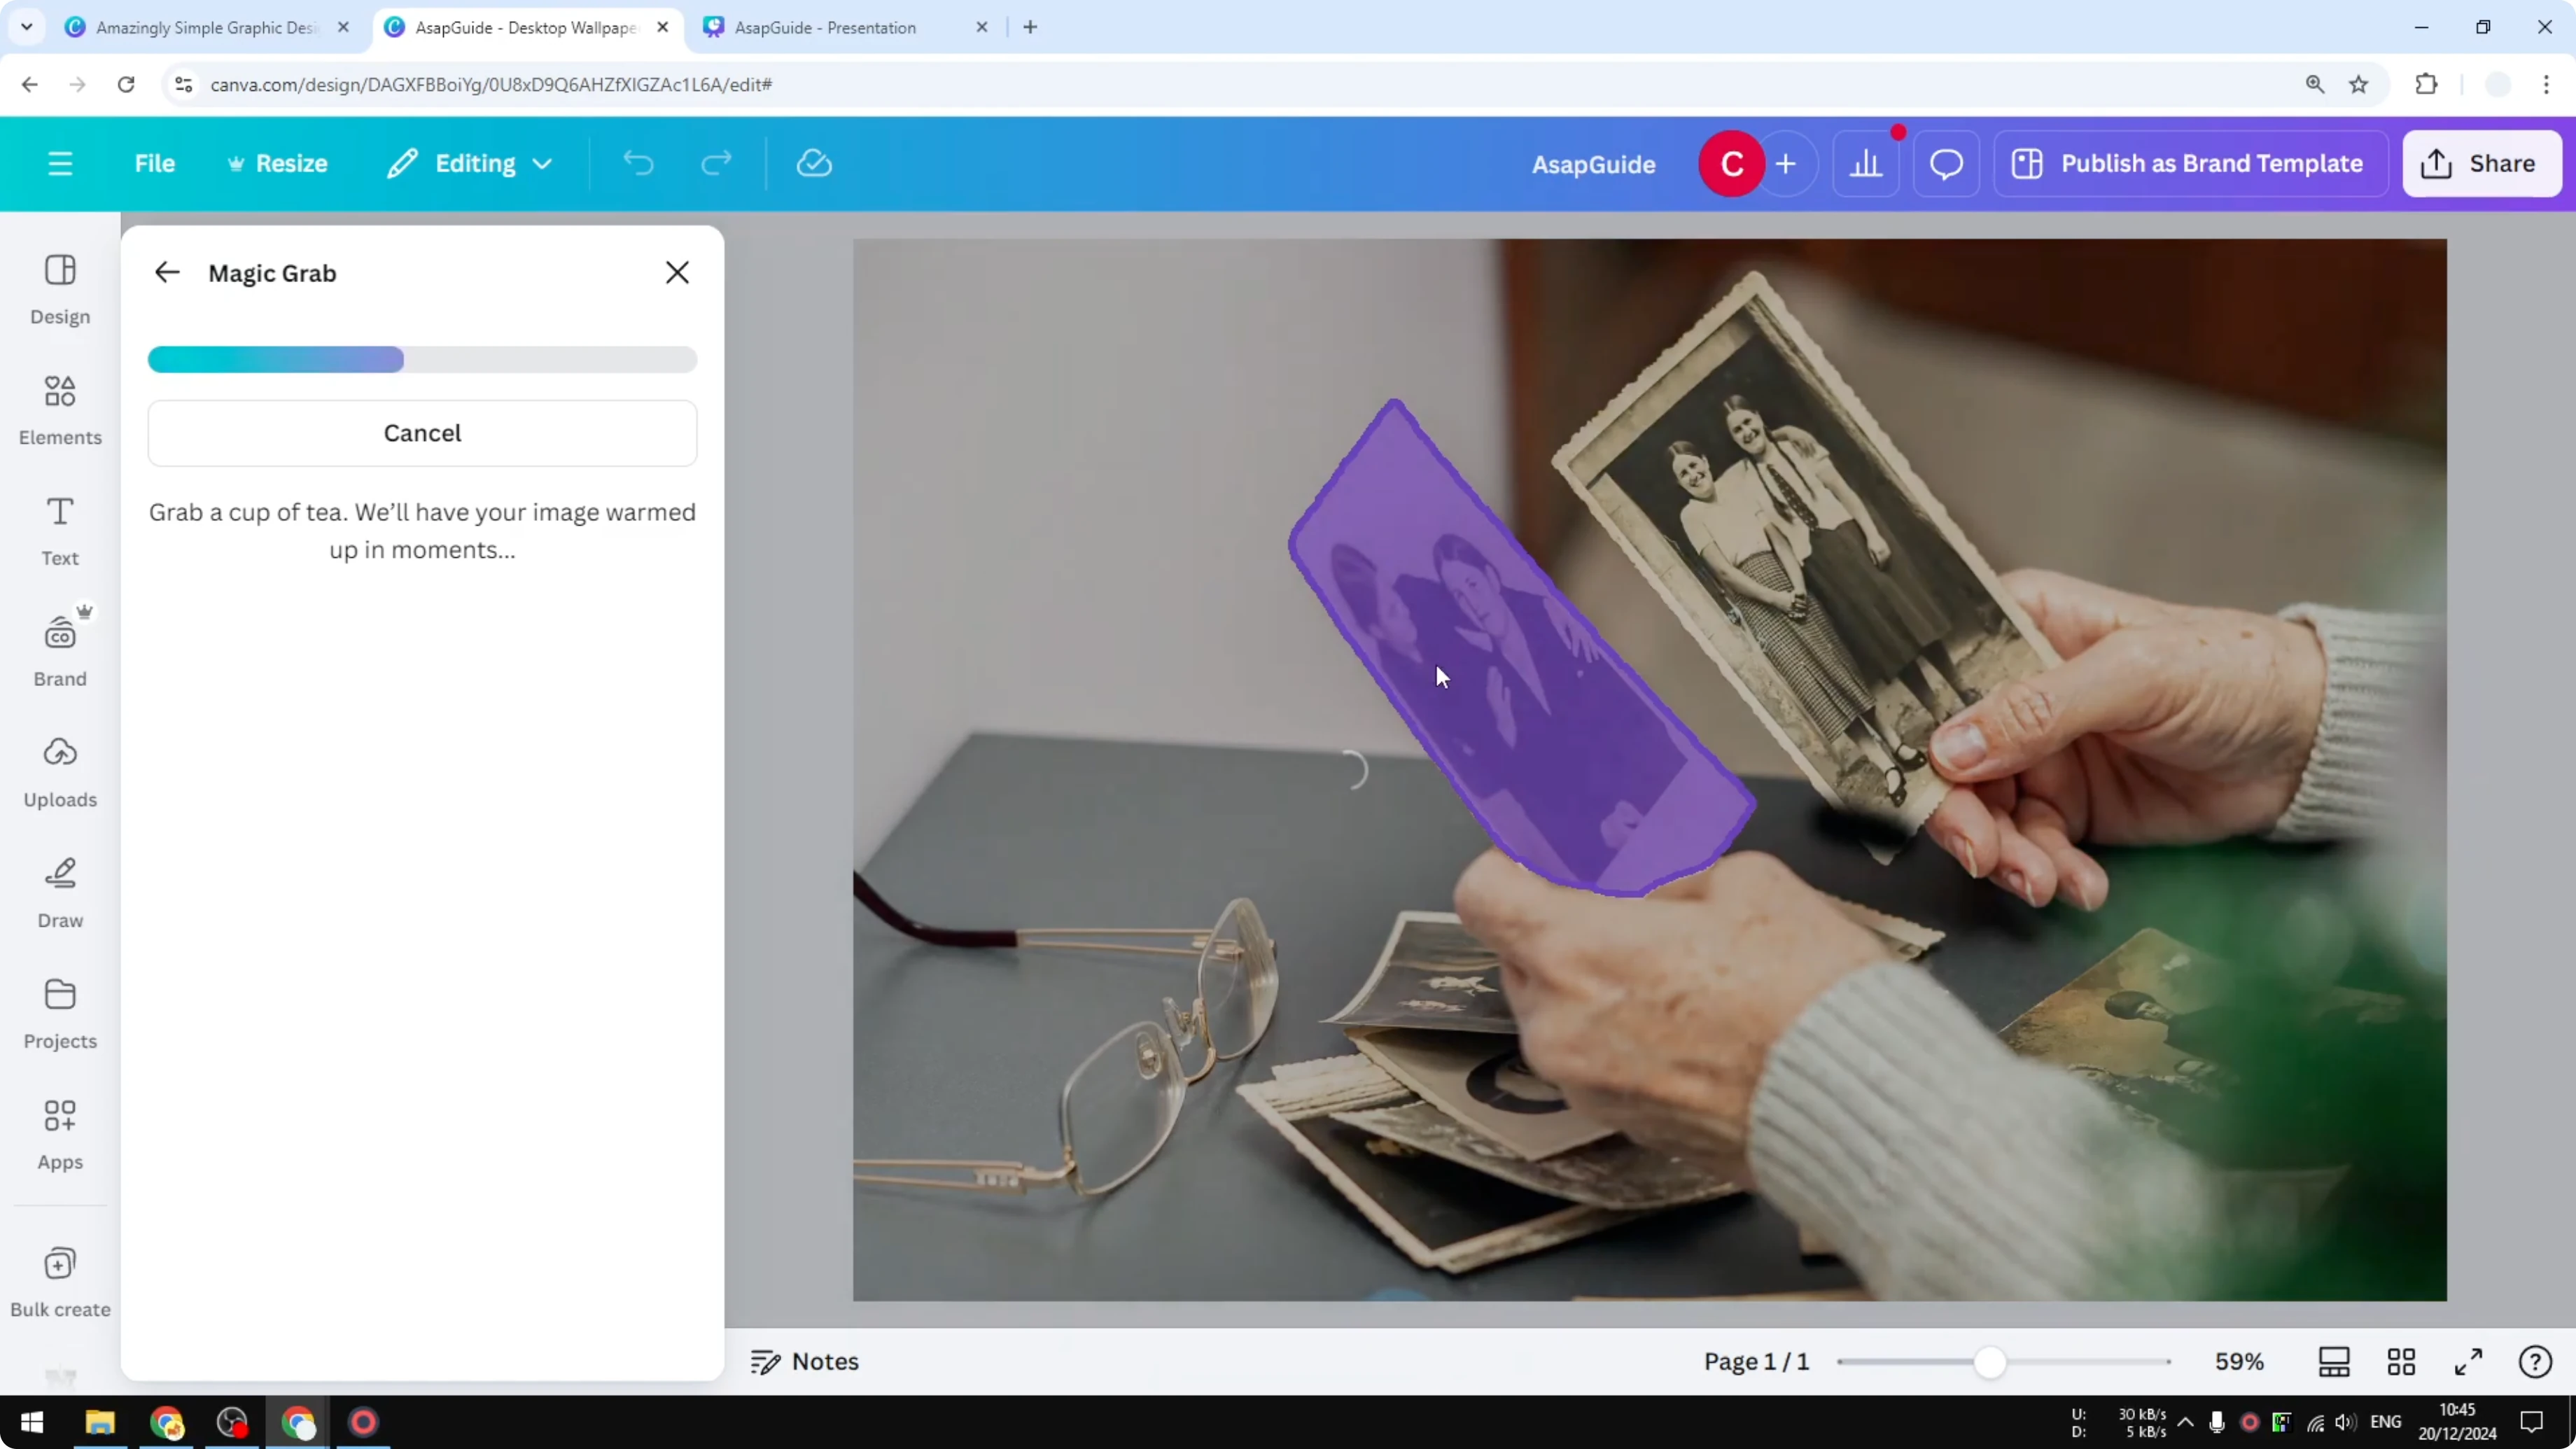
- On the duplicated photo, click Edit and choose Magic Grab.
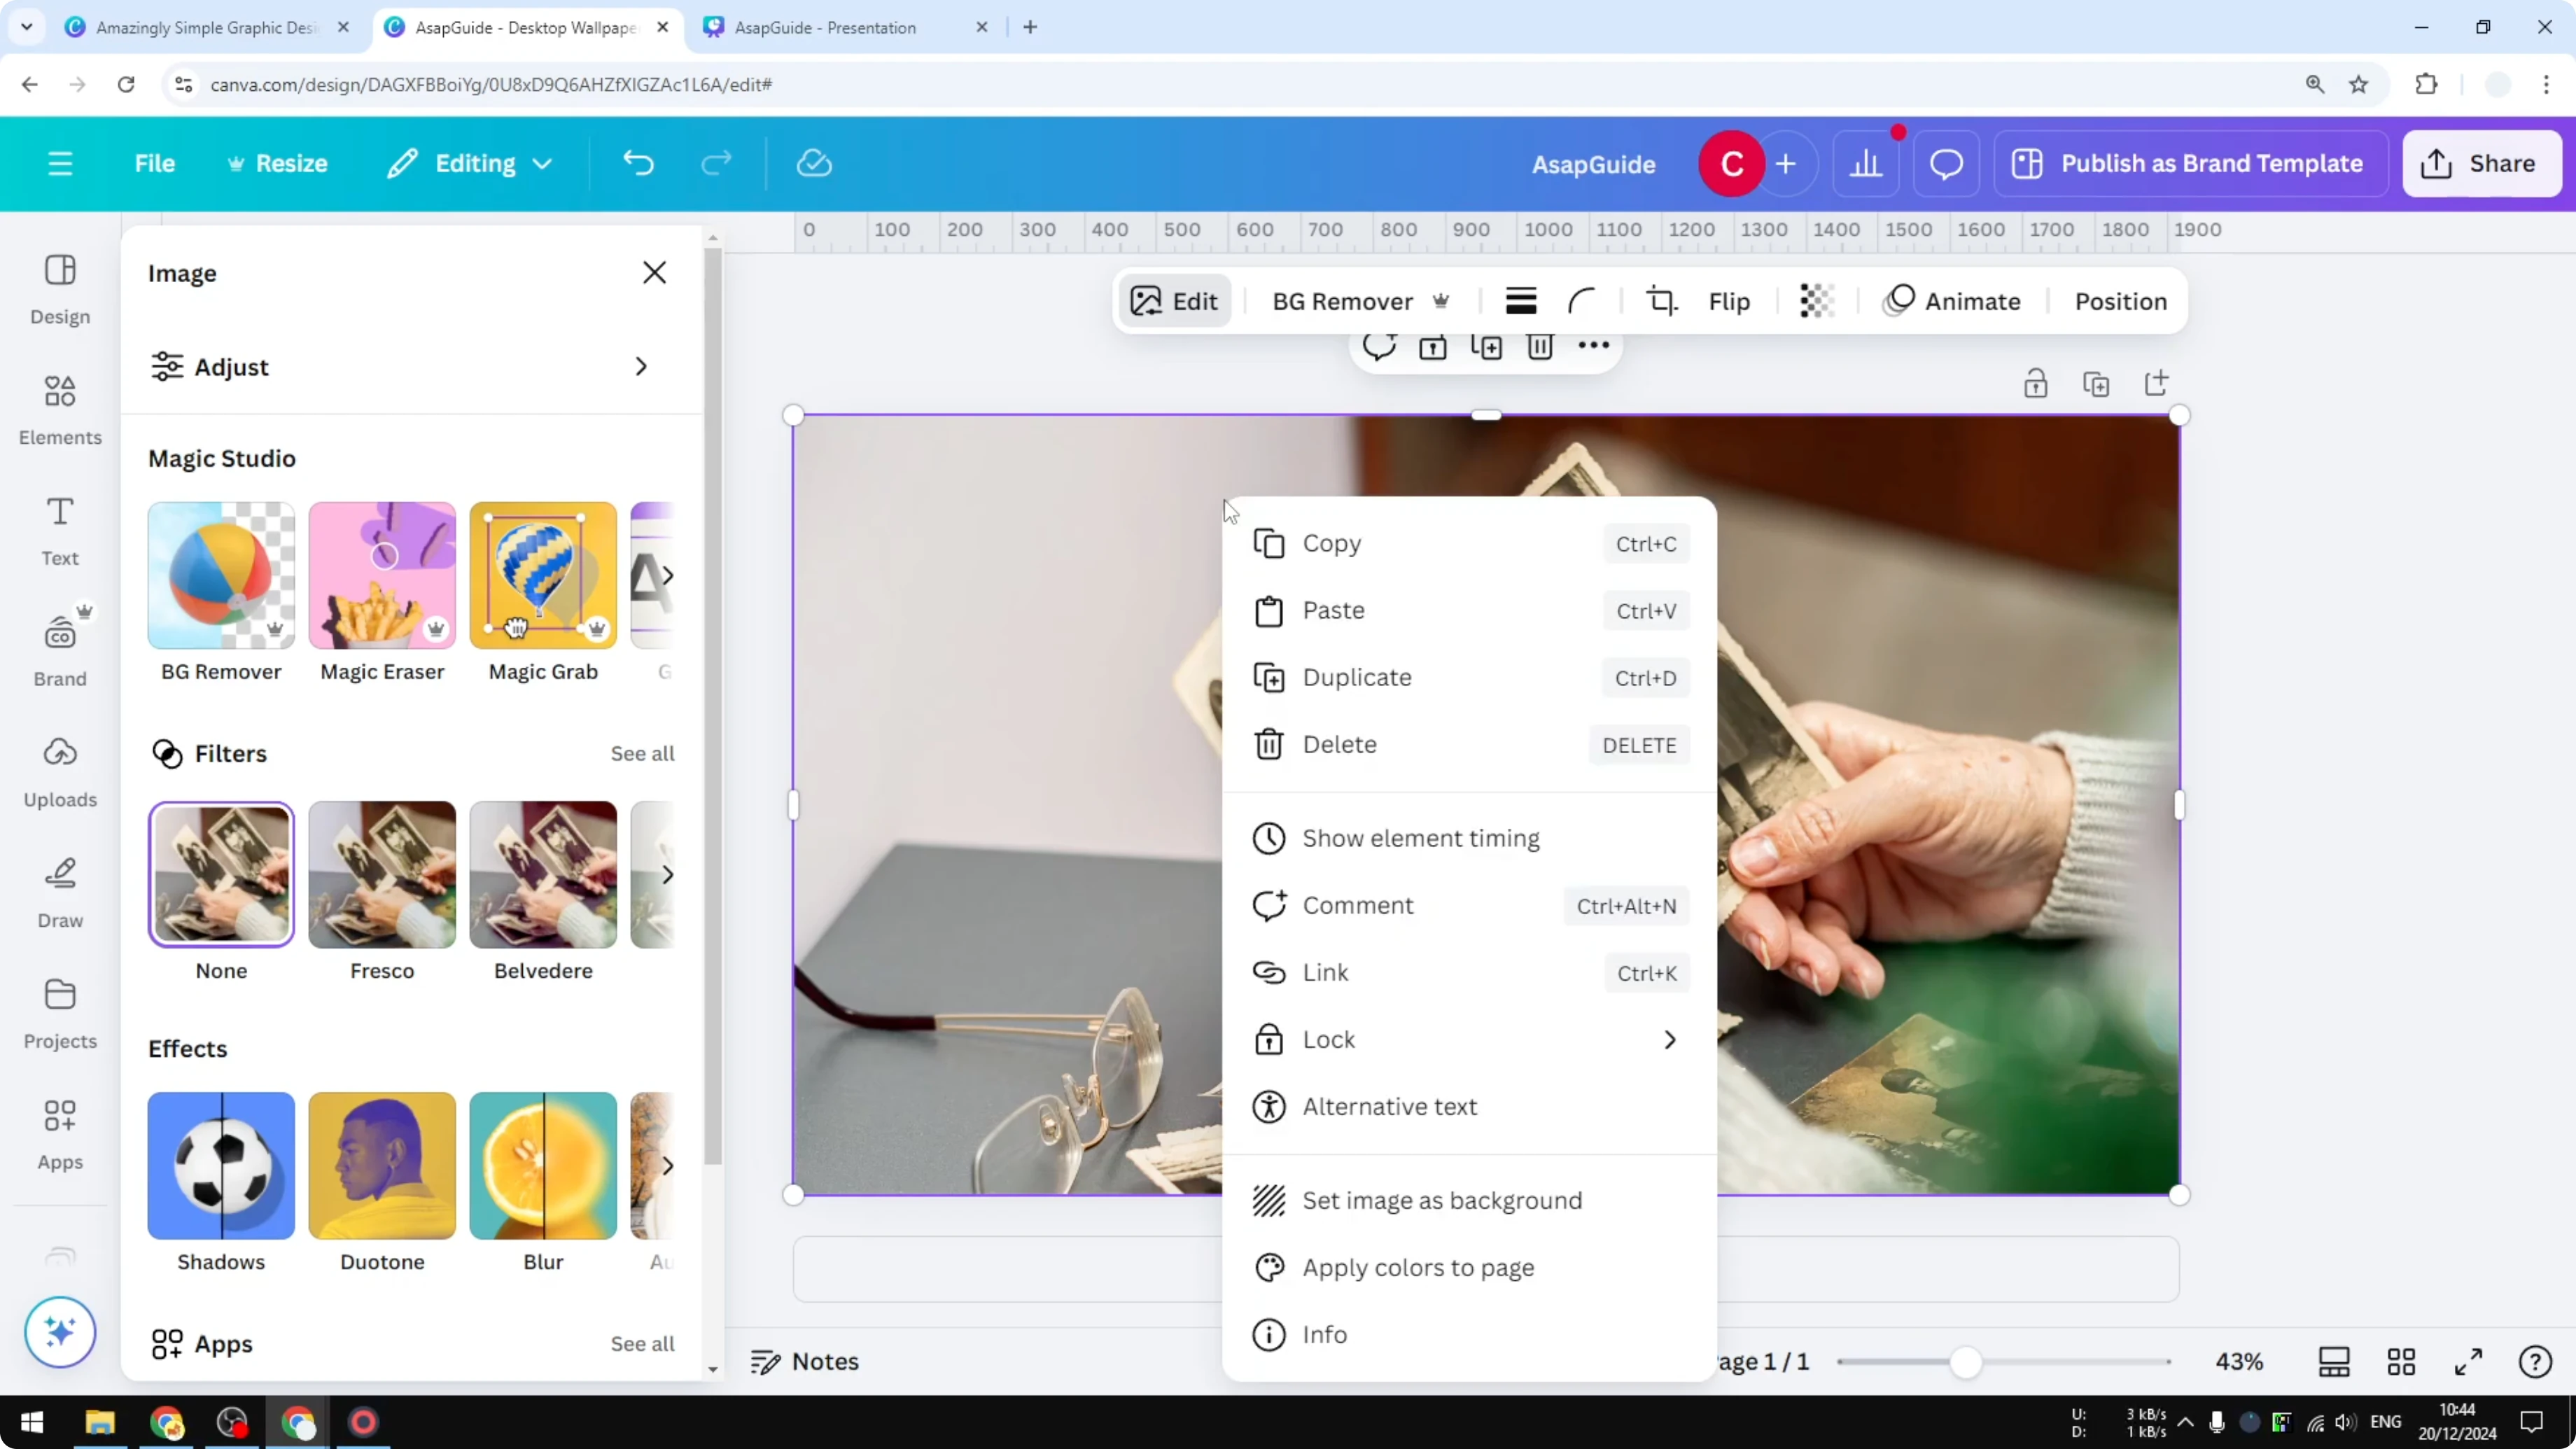
- Use the brush to manually isolate the object you want, or use the click feature if it’s available. I can click on the photograph and then click Grab. Canva will isolate that section so we can edit it as a separate object.
- Remove the clone if needed.
- Blur the background: select the background layer, open the Blur effect, select the whole image, and increase the intensity.
- I set it around 50 at first, but 50 is a bit too high. Adjust to something more moderate like 20.
- Now only this photo is the main focus. The result looks pretty good.
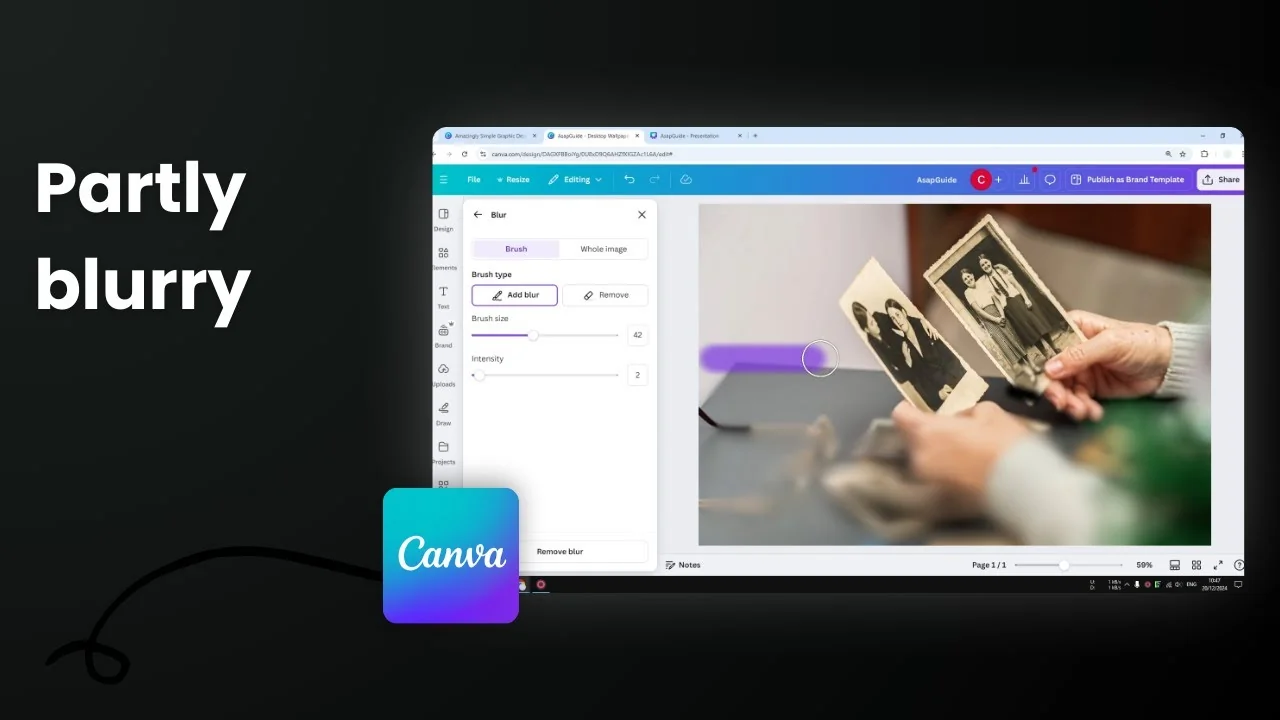
Blur Part of a Photo in Canva with the Manual Blur Brush
This method requires more manual work but can produce a desirable result.
Step-by-step:
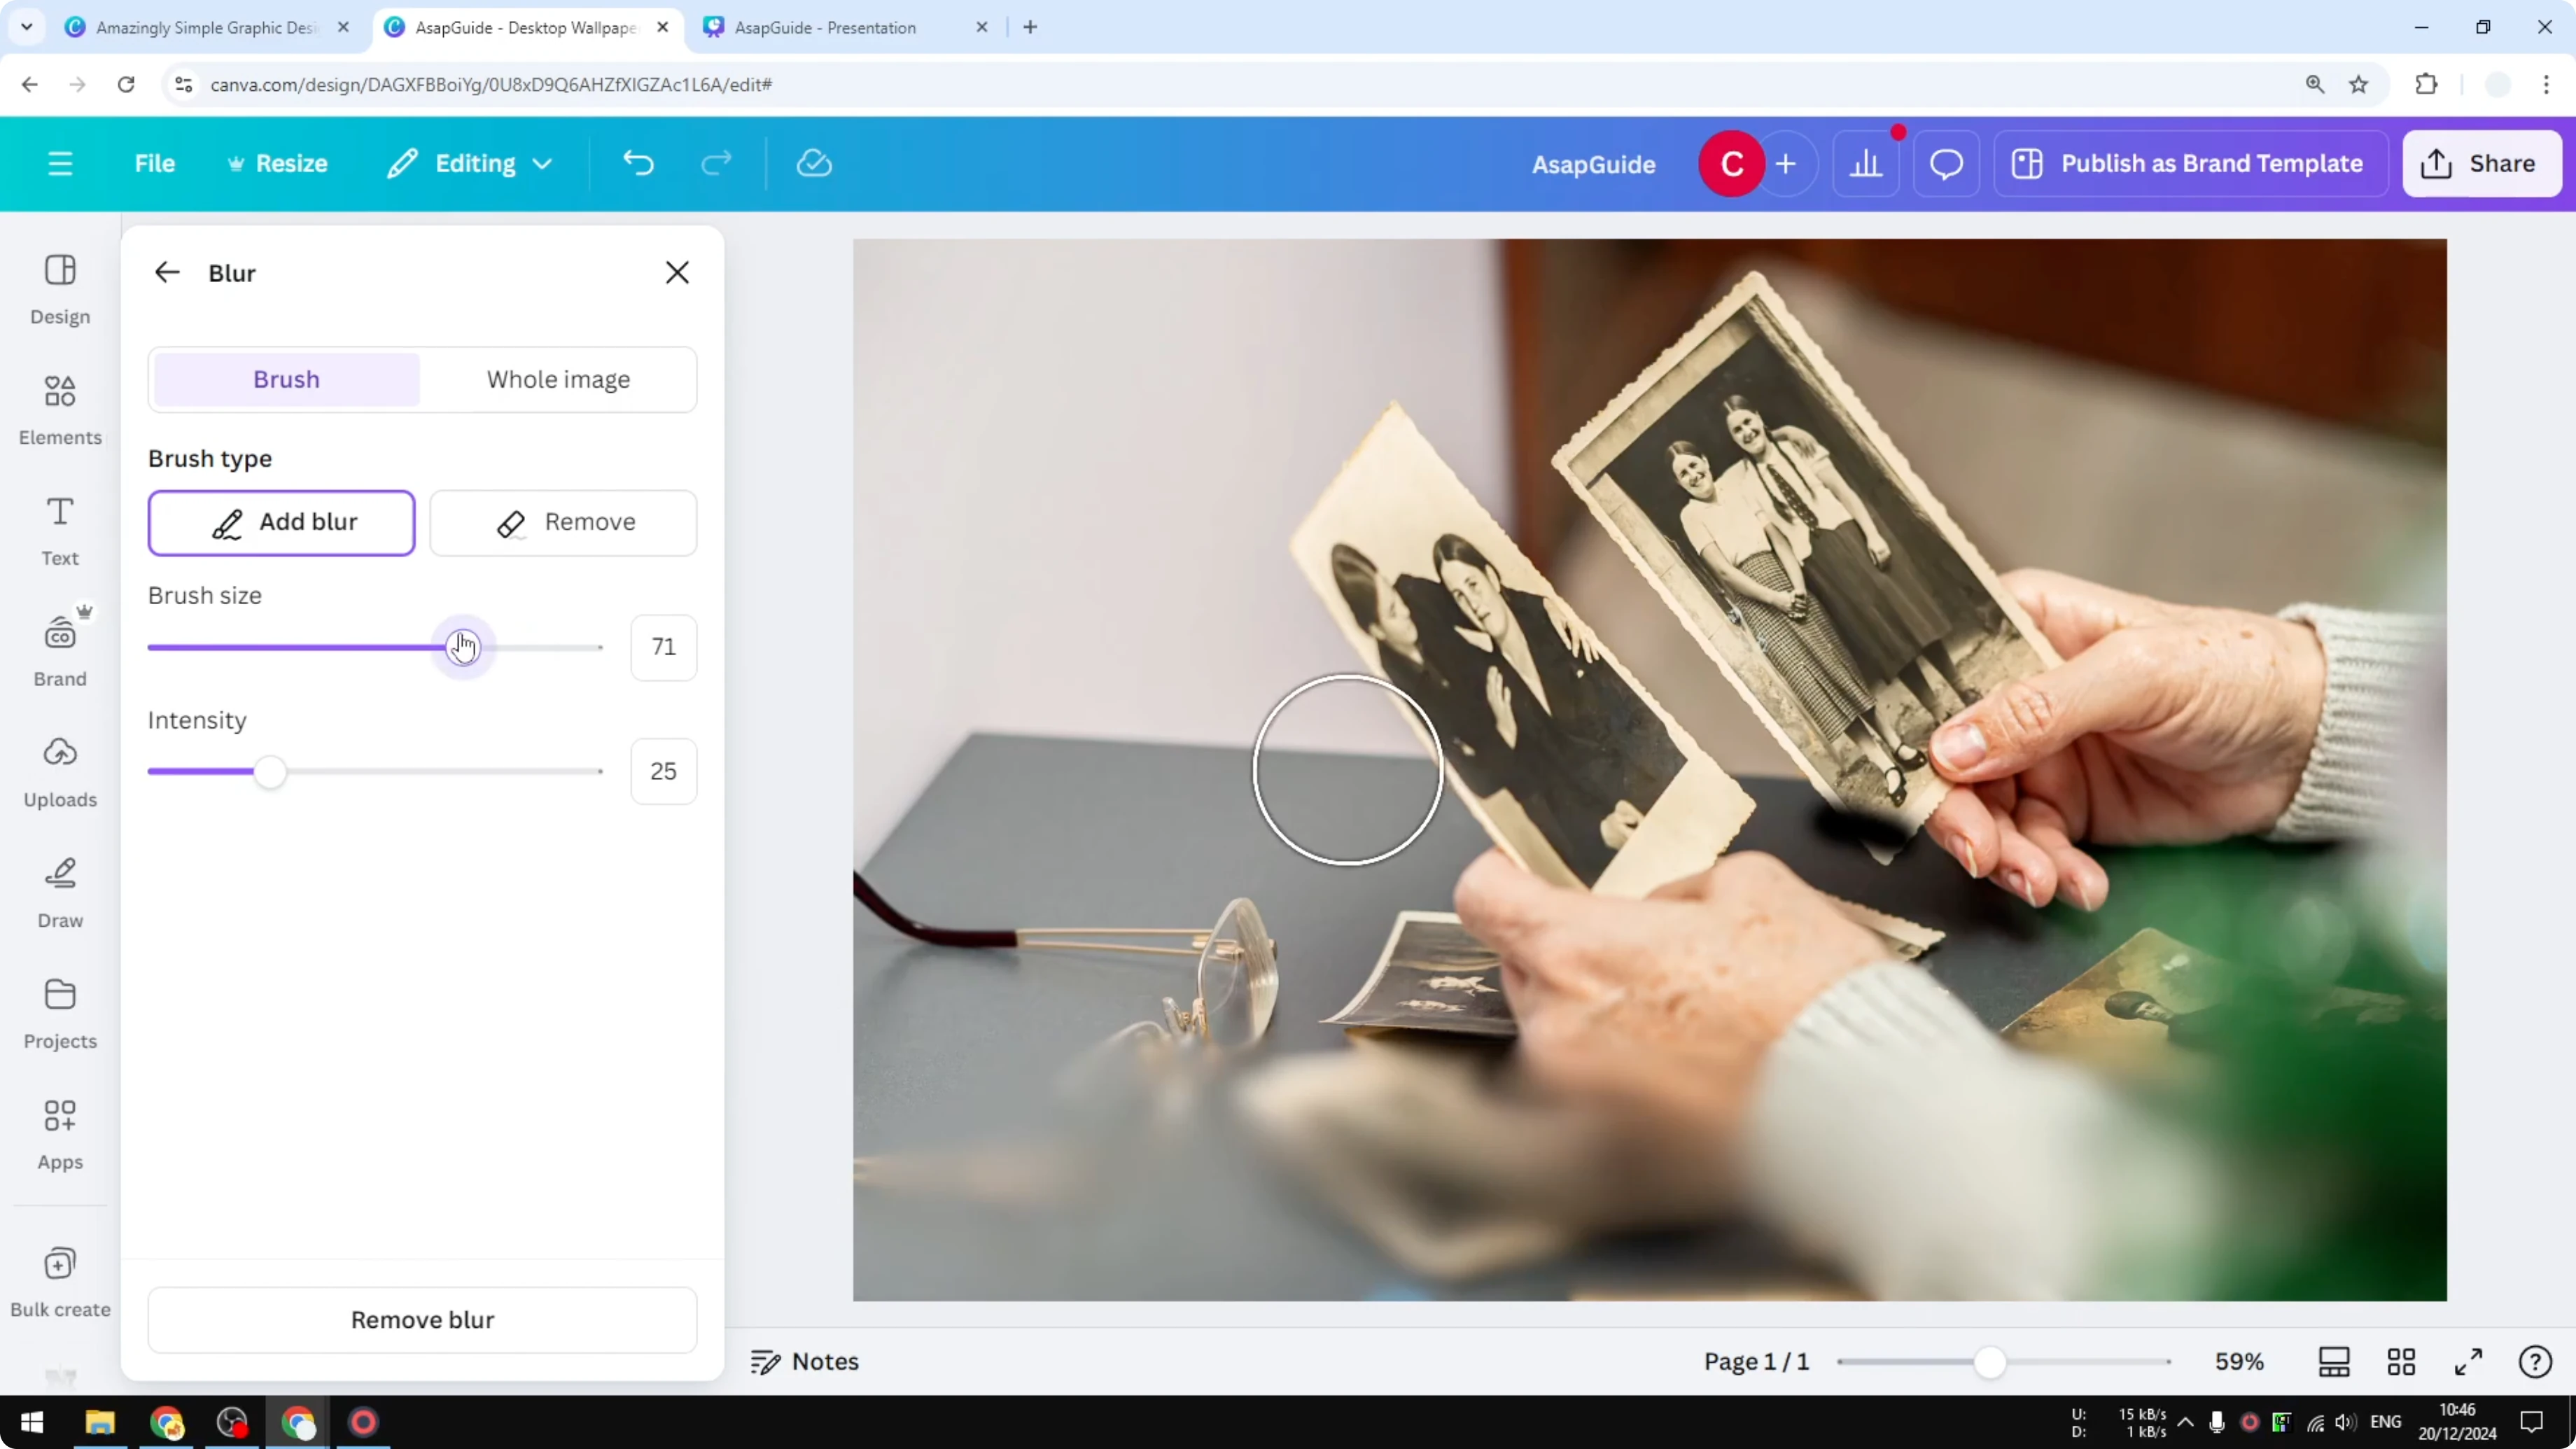
- Click Edit, open the Blur menu, and choose Brush.
- Adjust the brush size and manually paint over the areas you want to blur.
- I reduce the amount of blur every time I make the brush smaller because that’s how the blur effect works.
- If you spend enough time, you’ll get something that looks pretty good.


This is definitely not my first option. Only use this method if you feel it will deliver the best result for your photo. Once everything is set, close the Blur effect to finalize.
Final Thoughts
You have three ways to blur part of a photo in Canva:
- Auto Focus for the quickest, cleanest result with a clear subject.
- Duplicate + Magic Grab to isolate the subject and blur the background with more control.
- Manual Blur Brush for detailed, hands-on editing when needed.
Recent Posts
How to Visualize Yourself as a Pixelized Character with AI?
How to Visualize Yourself as a Pixelized Character with AI?

How to Revive Faded Memories and Enhance Image Clarity with AI?
How to Revive Faded Memories and Enhance Image Clarity with AI?

How to Visualize Yourself as an Animal Crossing Character with AI?
How to Visualize Yourself as an Animal Crossing Character with AI?